It’s Been A Long Time

The last time I posted was December last year and so much has happened. So much. This is more of a life update than a sewing related post, but I’ll make sure to include a bit of sewing content too. I think most people who follow me on social media will know that we had a house fire on the 2nd of February this year. It wasn’t particularly bad, it was contained to the garage and the angel firies kept it that way – by some miracle it never spread into the house, although it was very close. Our house is split level, with the garage and my sewing room next to each other on that ground level, downstairs has the kitchen and lounge which were basically untouched and upstairs is bedrooms and bathrooms which needs to be gutted down to frame (including taking off the roof). Why? Smoke. I never realised the sheer amount of damage smoke can do, it’s heartbreaking. Especially smoke that comes from a garage fire. Everything that burnt was plastic or rubber or something else toxic, so the smoke is also toxic – it’s oily and sticky and corrosive, meaning that it starts to eat away at things the second it hits. Some things were gone instantly, some things we’re still losing almost five months down the track – my big 27″ iMac just died because the smoke corroded it slowly over that time.

Yes, we’re insured. Everything will be covered and I can’t even imagine going through this without that. The process is still incredibly slow. No work has started on the house yet beyond the first little flurry of cleaning within the first two weeks. All our clothes and textiles were sent away for dry cleaning. Our house sits charred and sad on our street, while we rent a cute little place about 10 minutes away.

Of course, having the sewing room next to the garage means it was hit pretty hard. It will be demolished along with the garage. We’re incredibly lucky to have amazing neighbours who acted so fast. They saved our house. I left for work at about 8am with the kids, shut the garage and that’s when hell broke loose. The fire investigators best guess is that a small metal object (likely a wiper blade) fell from a shelf in the garage and onto an old, dead car battery that was bound for the tip later in the week. It hit both terminals perfectly and caused a spark. That’s all it took. At 8:15am one neighbour saw the smoke rolling down the street and jumped into action, bashing on all our doors and yelling – which in turn alerted our other neighbours. Triple 0 had so many calls that they sent all available units from the Sunshine Coast, we had trucks come up from an hour away. Both sets of neighbours called my husband and I, it’s a call that I will never forget. My husband told them that our dog Sid was in the house, probably asleep in my sewing room. And he was. Fast asleep in the blistering, smoke filled room. Our wonderful neighbour risked his life to break in and carried him out to safety. Typing that still makes me cry. The firies arrived just after 8:20am and the fire was out by 8:30am, just before I made it home.

I’d never seen anything like that in our quiet suburban street before, there were multiple fire trucks, police cars and ambulances. People everywhere. A very kind work mate didn’t want me to drive, so had driven me home. I bolted from the car and buckled over in the street. I was shocked. Even the whole drive home, I was telling myself that it was impossible, there is nothing that could have caught fire in our house, the neighbours must have been mistaken. I talked to the police, I talked to the firies, a very kind paramedic got me out of the sun and gave me tissues and water. Everyone was talking to me but I couldn’t really absorb what they were saying. My husband arrived after what felt like forever, but in reality was only about ten minutes. There’s that gross old cliche about other halves, but god I needed him there and felt it down to my core. We were better together. We talked to the police and firies together, the media arrived and we hid behind the fire truck from them together. Slowly but surely people disappeared until it was just us, in the rain together, looking at our burnt house. We weren’t sure if we were allowed to go in, but there was no one there to stop us so we did it anyway.

It was a strange time. Almost like we’d been abandoned. The firies had told us there was ‘a bit of smoke damage’ in the house, but we were certainly not prepared for what we saw. We both ended up buckled over, sobbing in the hallway. How does that much damage happen in 15 minutes? The rooms furtherest back from the fire showed signs of heat damage, bolts in the walls and the ceilings had burned black marks into the plaster. The shadows of roof beams were printed onto the ceiling in black. The fire hadn’t even come close to these rooms but the smoke and heat had left their permanent marks.

We let ourselves mourn for a little while but then it was calls from the insurance company and people started arriving again. Builders came to board up the windows and garage and secure the house. It felt so much better when people were around, when work was getting done. Action is good, work is progress. I think that’s why I’ve felt so lost for the past couple of months. The waiting is killing us. I’ll feel so much better when actual work can start. But for now, there’s a lot of paperwork and scopes of work and approvals and back and forth about everything.

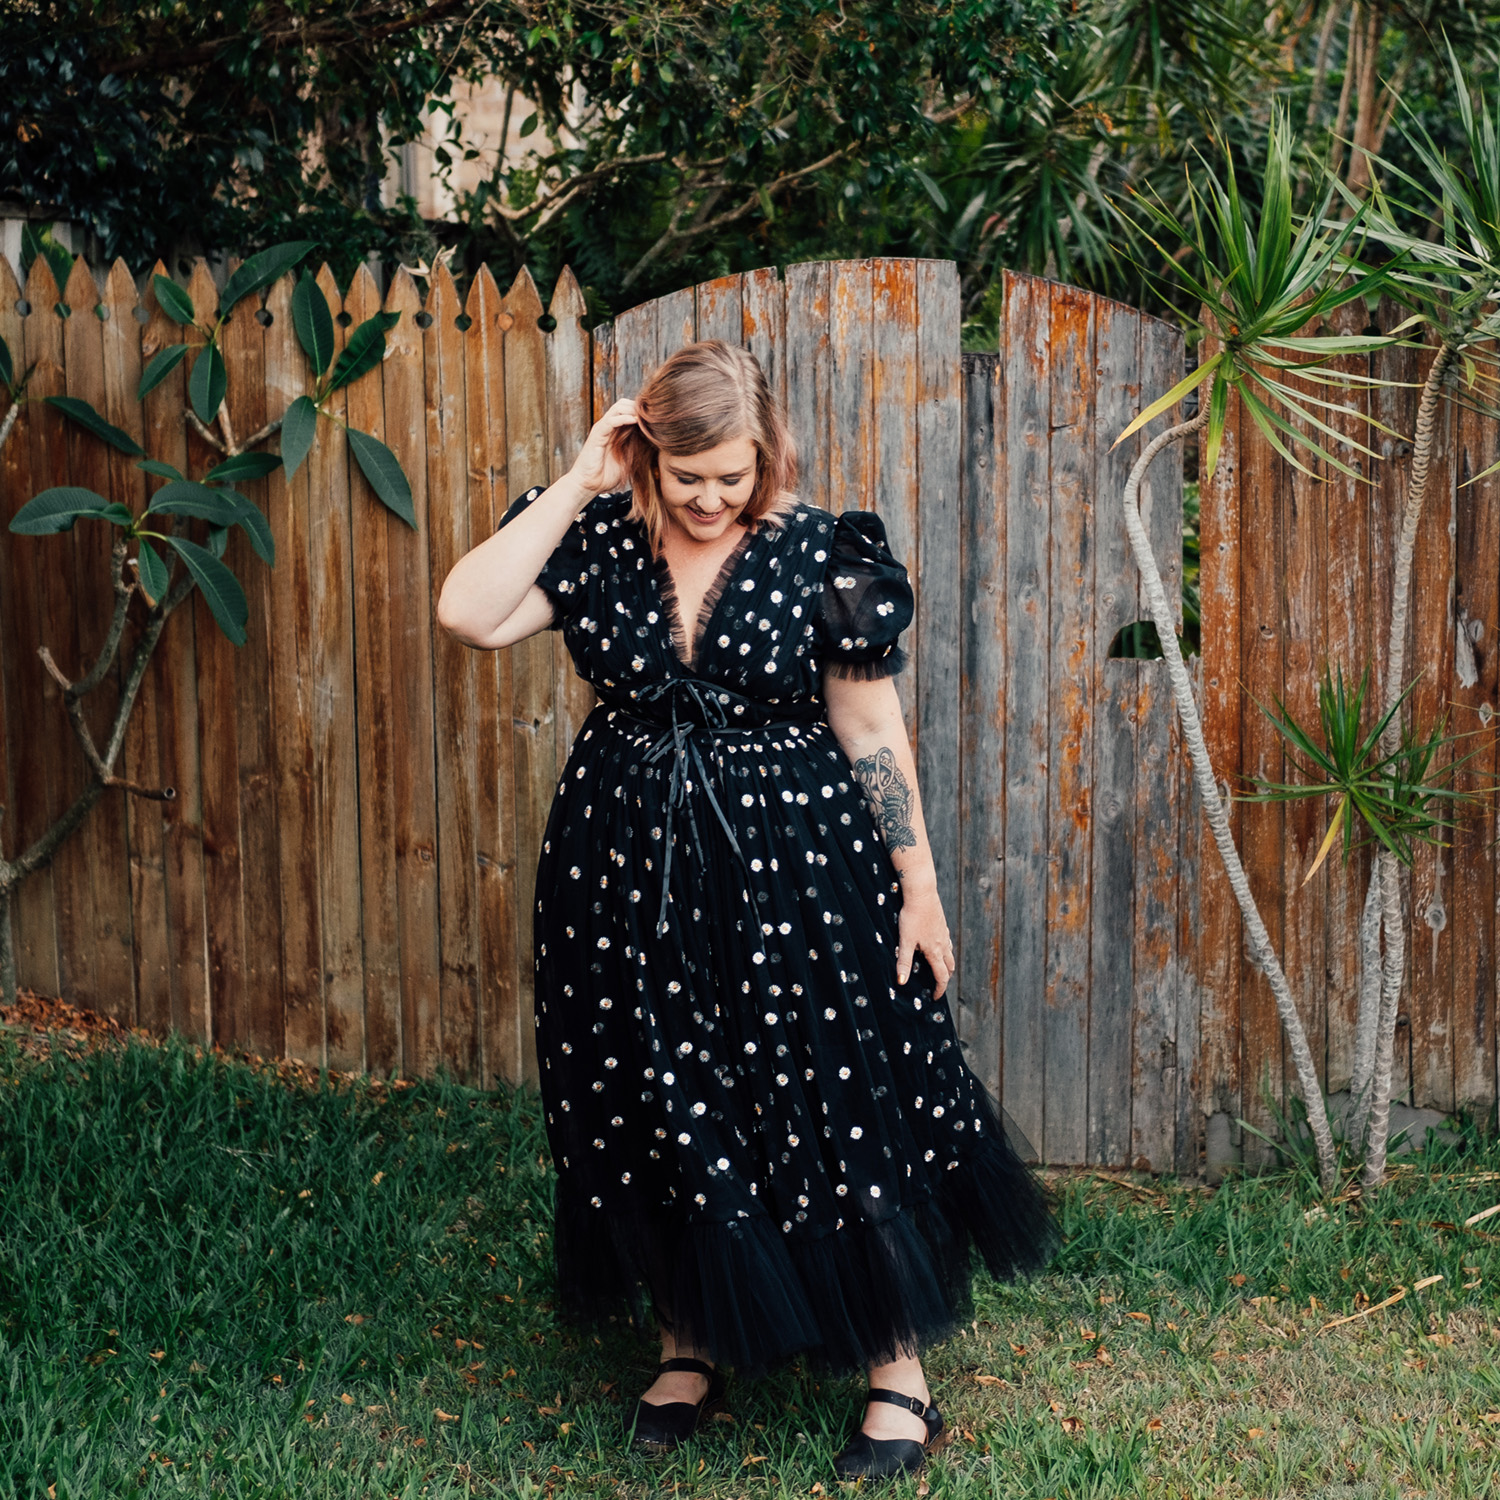
I have a little shed at our rental that is a perfect sewing room really, but I haven’t used it. It feels too far from the heart of the house and a bit lonely, so I lug my machines to the dinner table and make a mess in the centre of our space. I have no where to cut anymore, so the floor it is – so I haven’t been able to sew for the shop at all. I recently picked up some work sewing for Nerida Hansen, which has been really nice. It allows me to have that creative outlet and get paid at the same time, which is wonderful. I work at school three days a week and couldn’t have got through this without that gang of amazing people (same can be said for Brian’s workmates). We have leaned on our friends and family a lot and they have been there for us. We are lucky. It doesn’t look like it, but we are – we weren’t home when it happened, we have a roof over our heads and food in our bellies, we are insured and things will be replaced. Lucky.

webNH_Isaform-3
A Friday Pattern Company Adrienne Blouse made in Isaform cotton lycra for Nerida Hansen.
webNH_HS_PJs-13
PJs made in Holly Sanders french terry for Nerida Hansen.
A Mood Heather dress in Lisa Congdon and Nerida Hansen fabric.

Party Time! Excellent! {Sewing the Lirika Matoshi Strawberry Dress}

webDSCF7947

Look at this, a blog post! It’s a Christmas miracle! I thought I should document this one though, because it’s a big one. You know the dress, right? Have a squiz here. Like the rest of the world, I was pretty enamored when I first spotted it about 6 months or so ago. So dreamy, so twirly, so much of a distraction in a pandemic. A pandemic that barely affected my life personally, by the way. I’m aware of what an extreme privilege that is and that’s why I was able to dream about a frivolous dress. Of course I was going to make my own version but in fabric a bit more me. A bit darker but still with something happy to brighten it up. I searched for embroidered tulles on ebay and stumbled across this daisy one. Perfect. It came in a few pastel colours, which was tempting, but the black drew me in the most and I knew it would be so much easier to colour match with plain tulle. Sorted.

webDSCF7903

In total, I used 5m of daisy tulle and around 8m of plain black bridal tulle. Total cost of about $100, but I did grab the plain black tulle at 40% off when Spotlight had one of their sales. I also used about 2m of black cotton lawn for the lining. Of course, after that I became paralysed with fear over where to start, despite watching a couple of youtube videos where other sewists had made their own versions of the dress. Plus, you know – work and stuff. But last week, as my best friend’s 40th birthday party edged closer and the Christmas party invites started to roll in, I threw caution into the wind and started cutting.  Because there’s nothing like crushing yourself under a bit of time pressure, right? Right.

I started with the skirt. Half circle skirt out of lawn for the lining. Easy. Then came a bit of tulle maths. My black tulle was 300cm wide and my daisy tulle was 150cm wide. Was it better to just gather 300cm wide panels of plain tulle onto the lining or would I be better joining two panels so I get 600cm of width in total? Hm. Six metres of skirt seems excessive. Famous last words. I used 5 layers of 300cm wide black tulle and then two layers of 300cm (two panels joined with a french seam) wide daisy tulle on top, stitching each one separately to the skirt lining. I pinned it together, tried it on and was very disappointed. It didn’t feel anywhere near wide enough at the hem. No twirl factor. Waaaahhhhhhh. Should I unpick or forge ahead? I knew in my heart of hearts that I had to unpick all those hours of gathering and sewing. But I wanted to love it and I couldn’t love it if the skirt wasn’t right. It was also super puffy. And we all know I love puffy. But it was far bulkier than the original dress. And so I got to work in front of the tv later that night, unpicking black thread on black fabric. It only ended up taking just over an hour.

I then got started again, sewing panels together so the total width was 600cm. It was so much better. Heaps of twirl. I ended up with only two layers of black tulle and one of daisy tulle. I think it’s perfect, I definitely wouldn’t want any more layers. I measured and cut the skirt to even out all the layers and got to work on the ruffle. Ah, the ruffle. Two times the hem should be a good measurement for the ruffle, right? That’s 12m of ruffle. Uh, no. Not even close. I ended up with 3 x 12m sections before it looked ruffley enough. Yes, that’s right friends. Good maths-ing. That’s 36m of gathered tulle. It took a very long time but I was pretty happy with the end result. Phew. And the skirt was the easy part, how the hell will I tackle the bodice?

Ok. The original is very low. Gorgeous, but braless isn’t something that would really work for my bust without some kind of internal structure to hoist everything into place. So a not as plunging neckline for me, but still low enough to keep the vibe of the original. McCalls 6833 was the first that sprung to mind – it had the low neckline but with the underbust band in a good position to sew the ties on to. I adjusted it slightly, dropping the centre fronts of the ‘cup’ pieces by 3cm and taking the same off the underbust piece. That was simple and worked really well. It was at this point that I had also intended to do an FBA, as I’d made the pattern a couple of times and could do with the bit of extra space – but I kind of got carried away and forgot. It’s not the end of the world, but that underbust seam does sit a bit higher on me that I’d like.

Screen Shot 2020-12-07 at 10.05.55 am

After zooming in on every pixel of the original dress, it looked to have a few layers of tulle in it, with that beautiful gathered layer over the bust and centre front of the waist. So I cut: a bodice in cotton lawn, a bodice in black tulle and a bodice in daisy tulle. Easy right? Then I slashed and spread the bodice pieces only where I wanted the gathering to sit and cut those pieces out of daisy tulle. Unfortunately though, they were sitting king of puffy and pathetically, rather than those full pleats you see on the original. Ok. More fabric then. I literally cut two rectangles of fabric, gathered and pinned them onto the bodice using my mannequin (which I seriously never use, but was very necessary for this step). It was my first time doing anything so freehand like that but it worked really freaking well. I stitched it in place at the shoulders and waistline and then tacked it down in a few places by hand to make sure it didn’t move. Tulle doesn’t fray, so there was no need to worry about finishing raw edges on anything, I just turned it under. There’s a video in my instagram highlights if you’re keen to see the process.

It looked just how I wanted it to and I was thrilled! It was all downhill after that really – neckline ruffle, puffy sleeves (two layers of black tulle and four layers of daisy tulle, finished with more ruffles and elastic), ties made from satin, with the bust ones stitched down. Then a zipper and I finished off the lining by hand sewing it at the waist seam. I did have trouble with the waist tie once it was on – I’m very high waisted and the tie wanted to jump above the waist seam all the time. I have noticed this happens with the original dress too, so it’s not just me. Since the photos were taken, I’ve shortened the dress at the waist and added a waist stay from grosgrain ribbon. That has really helped because the skirt is very heavy.

All in all, it was a huge learning process and took more hours than I thought. Probably about 12 in total. I love it. I wore it to the party even though it was super excessive and now I just want to wear it everywhere all the time. I feel like a princess in it. I’ve gained a fair bit of weight over the last 12 months or so, but this dress makes me forget all of those insecurities. There’s something about tackling a big, scary project that makes you come out on the other side feeling 10 feet tall.

My thoughts on knock offs:

Making your own version of something for yourself, citing the original source – ok.

To then go on and sell it to other people, not ok.

Sewing With Gingham {Nerida Hansen Fabric}

I’m just starting off with the disclaimer that Nerida asked if she could send me some of her new gingham in exchange for an honest review of the fabric (you can see the range here). Of course I said yes, even though there’s eleven million other things I should be doing first. But I can’t resist me a bit of Nerida Hansen fabric, it always feels amazing. So here we go….

webDSCF4608

Gingham. It’s quite divisive, isn’t it? Love it or hate it? I quite like it, but I sewed with some in my very early dress making days and a pattern company shared my photo and there was a couple of comments roasting me for my lack of pattern matching. And because I was so new to it all, I was like ‘pattern what-ching?’. Of course, now I know better but those little burns have stuck with me. And I just want to say, you don’t have to pattern match if you don’t want to! I will absolutely not judge. It’s hard and one of those sewing things that has eluded me. Hence me being cautious to jump back into the gingham pool.

webDSCF4649

Plus there’s been other gingham negativity I’ve read lately like:

– Looks like a picnic blanket.

(DOES IT, CAROL? BECAUSE YOU KNOW WHO LIKES PICNICS? Everyone!)

– Makes plus sized people look bigger than they are.

(YES, BECAUSE MY MAIN GOAL IN LIFE IS TO LOOK SMALLER THAN I AM FOREVER AND ALWAYS FOR THE BURNING EYES OF THE POOR UNSUSPECTING PUBLIC WHO HAPPEN TO GLANCE MY WAY. No).

– You look like you’re getting ready to feed the chooks/milk the cows/collect eggs/run through fields

(IF THAT’S WRONG THEN I DON’T WANT TO BE RIGHT, STEVE. Besides, have you heard of cottagecore?).

(Thanks to my gingham loving mate for that one, yes she’s had that comment before).

webDSCF5003

It’s ok my lovely Ru, don’t let the weight of other people’s expectations get you down.

Moving on.

Let’s talk about the fabric itself. You can grab it in three bases: cotton sateen (lightweight, drapey, beautiful), mid weight cotton (um mid weight, more structure, also lovely) and cotton/linen (I didn’t get any of this one but I have used it in the past. Also a lovely mid weight, less drape, more loosely woven). Nerida mentioned that she wanted honest feedback because they’ve had issues in the past with the fabric being printed off grain. I’m not a particularly fussy person with grain lines etc, unless it’s super obvious or I’m cutting something on the bias. So I made sure I was taking note with this fabric and you know, once you fold it in half length ways, it is pretty obvious if it’s off grain because the checks are quite a decent size. So far, all the fabric I’ve used has been good, but I did notice some warping of the print towards the very edge, before they hit the selvedges. I just made sure I didn’t use those edges if I didn’t have to.

webDSCF4573

The first dress I made was this little red and pink number from mid weight cotton. It turned out very well and I’m super happy with it. The bodice and sleeves are self drafted, with the top part of the skirt from Simplicity 8248 and a ruffle added. Most pieces are cut pretty straight and that’s why it works. I used the smaller scale checks for the bodice, larger for the skirt and a bit of a mixture of what was left for the ruffle. I like how the red strips between the checks form a bit of a faux waistband on the dress. Pockets are slightly off, but close enough for me. Now because the sides of the skirt are cut at an angle, I didn’t bother trying to match them exactly, but did try and at least get the horizontal lines in line with each other. Does that make sense?

webDSCF4598

It didn’t match up super well, but I can live with it, you know? The ruffle pieces matched up well, but they’re very nice even rectangles, so it was easy.

And because it was easy and turned out so well, I got a bit cocky, didn’t I?

Yes I did.

I used the brand new Closet Core Patterns Elodie wrap and the sateen for this one. A match made in heaven, really. The Elodie is a beautiful pattern and the sateen has the loveliest drape for it. But I chose the wrong gingham, friends. I thought I was being edgy, I had a niggly voice in the back of my mind but as always, I ignored that sucker. Mostly ignoring him works, but this time it didn’t.

The Elodie pattern has a lot of curves and following the grain lines on the pattern pieces meant that the checks are cut off an angles instead of in straight lines. I did my best to match the horizontal lines again on the skirt pieces, but I completely forgot about the shoulders. I wanted to match the front and back in the same colour, but didn’t have enough fabric. Also, the waistband sits off the end of the bodice pieces, which I didn’t realise, so my careful matching was a fail there.

webDSCF4982

In hindsight, I wish I’d cut the skirt pieces in the opposite direction because I’m not a fan of the red around my hips. Someone mentioned it looks like an apron and it totally does and that’s why I’m not feeling it. Separately, excellent pattern and excellent fabric, together – not so much. I think this particular print would be better in tiers.

webDSCF5206

To add insult to injury, I decided to add inseam pockets at the last minute (not part of the pattern) and went fossicking through my scraps for some pieces to use AND ACCIDENTALLY grabbed a back bodice piece and cut a pocket out of it. I nearly cried at that point. Such a stupid mistake. I didn’t have enough fabric to cut another back piece the same, so patched it together. You can barely tell because I did it down one of the vertical lines, but still. I know it’s there.

webDSCF4936

So we live and learn (or maybe we don’t, because I’m super tempted to make it again with one of the other more plain ginghams).

Anyway, onto the third and final dress that I made for this little flame haired angel. I used Simplicity 8661, all pretty standard except I added the ruffle because she’s a tall angel. The black and white gingham is mid weight cotton with the large and small checks, just like the red and pink colourway.

I don’t have much to say about this one. I love it, it worked well and I’d make her 10 more in a heartbeat. Now allow me to spam you with photos of her.

Alright, well done for making it all the way down here. I’ll just recap a little with my top tips for sewing with gingham:

  1. Patterns with relatively straight pieces work well. Curvy bits are more challenging to match.
  2. Let go of some of your high expectations, not all the bits will match unless you’re some kind of magical gingham queen.
  3. The checks can warp close to the selvedge so keep that in mind.
  4. I found it easier to cut pattern pieces individually, rather than on the fold – that way you can make sure everything is square.
  5. Once you’ve cut one of your (say) skirt pieces, you can maneuver it around on the fabric to make sure the horizontal rows match up with the second piece. Same with the sleeves and bodice backs.
  6. Buy more than you think you’ll need, to account for pattern matching and also colourway/check size matching.
  7. Have a think about what scale checks you want on what part of your body. Same with the different colourways (no apron hips if that’s not your jam!).
  8. Don’t cut into your bloody pattern pieces for pockets. I know you won’t though.
  9. Wear gingham if you like gingham. Don’t worry about what anyone else thinks.
  10. Breathe. Make a cup of tea. Eat some chocolate. Sewing is supposed to be fun!

Ok, has that helped? I hope it helps!

webDSCF5241

Quilt It {Simplicity 8298}

webDSCF9876

I am not a quilter and this is definitely my first rodeo. Simplicity 8298 is one of those cute Dottie Angel patterns with the cover images that suck you in, so you think that you too could be that kind of effortlessly adorable. You know – tights, smocky dresses, Mary Janes and long blonde hair twisted onto your head in braids like some kind of perfectly skinned, milkmaidy beauty.

webDSCF9872

webDSCF9873

Just me? Ok. Well, the pattern calls for already quilted fabric and is a bit lightweight with the instructions. Of course, I couldn’t find suitable fabric (hello, polyesterworld) and had to quilt my own. OF COURSE. I turned to my trusty FB sewing group and asked their advice and here were the tips that I used:

– Flannelette instead of wadding. Not as heavy for our mild winters and 100% cotton. I used two layers, one pink and spotty, one plain cream – both from Spotlight. The outer fabric is cotton sateen from Nerida Hansen.

– Basting spray. Now I must admit, as I was using this I had my doubts. It was like beginning of school year contacting books all over again, but I got there. Do recommend.

– Instead of chalking all those lines (which yes, I had intended on doing), just mark two and then use the metal wire  foot attachment thing that comes with your sewing machine to guide you through the rest. Genius. Seriously.

– Quilting can shrink your fabric slightly. I cut my pieces out roughly a couple of cms bigger, quilted each piece and then cut them to size. Fiddly, but doable. Saves you from quilting an epic piece of fabric. I had enough trouble getting the back piece done.

– And here’s a tip that might be obvious to everyone except me: when quilting the larger pattern pieces, the sheer size of them can by difficult to deal with under a regular machine. I rolled mine into burritos on the side I wasn’t quilting, so they fit through the throat space of the machine.

webDSCF9875

webDSCF9881

Other things to note are:

– The elbow patches don’t sit on the elbow for me.

– The pattern says nothing about finishing seams. Because I am a sucker for punishment, I bound all mine. It sure as hell looks pretty though.

– I had to redo the binding around the neckline so many times. In the end, close enough was good enough. I’m not sure if I was missing something or it’s just tricky. Like I said, the instructions are a bit light on. I have a suspicion that the hood would have been easier.

– It’s big. The armholes are low. I have big arms and usually have to grade sleeves up, and these are big even on me. I made mine based on the finished measurements and ended up taking it in a fairly large amount, particularly at the side seams. It was bowing out at the bottom of the back hem heaps. In my wisdom, I had eliminated the centre back seam, so could only take it in on the sides.

webDSCF9870webDSCF9880

Regardless, she’s pretty , she’s cosy, she’s comfortable and I will wear her heaps through winter.

webDSCF9878

webDSCF9864


That 70s Technicolour Dreamcoat {Vintage Simplicity 5289}

webDSCF9817

I know, I live in Queensland. I know, there’s not a huge need for coats here. But here are some more things – our houses aren’t built for the cold, they are built to let the heat out. It’s not unusual for it to be colder inside the house than outside. And that’s welcome most of the year. For the other two months, we layer. Regardless, I feel the cold. And I like to feel cosy. Besides. WHO CAN RESIST RAINBOW TARTAN? Not I.

webDSCF9792

I ordered two metres of the wool/something blend from Darn Cheap Fabrics (sold out, sorry friends) but I didn’t have a pattern in mind. I wanted something hip length (warm butt please) but I didn’t want to cut through the checks too much. I found this 1972 gem in my stash and the pieces just fit on the fabric. Hooray!

webDSCF9796

webDSCF9799

But sorta not hooray, because pattern matching. Oops. Oh well, as long as the fronts match, right? Yes. Right. However, if you stuff that up then you’re in trouble. Which I did. And was. I re-cut, but it meant then having non matching sleeves. Oh noooooo. No fabric left online either. Mismatched it is then. Sorry if that makes you twitch.

webDSCF9833

webDSCF9805

In other news, I cut the pockets on the bias because I didn’t have enough fabric to match those either. So at least they intentionally don’t match. I used red fabric covered buttons that I scored at an op shop and an obscene leopard satin that I’ve had in my stash for ages for the lining. That charming little label is by Kylie and The Machine. I love it.

webDSCF9840webDSCF9837

I had every intention of bagging the lining, even though the pattern instructions say to hand sew the whole thing in. And guess what? I did the hand sewing. My hand sewing isn’t great, but I feel like I get a better finish. That slippery satin was a bit of a bugger to cut and it wouldn’t have been a nice neat fit into the coat if I’d bagged it.

webDSCF9828

In spite of everything, I love it and will wear it forever.

Hello, Holly Valance {Sew Your Own Ruffle Skirt}

If you’re wondering who the heck Holly Valance is, or if you know who she is and are wondering WTF she has to do with a skirt, allow me to connect the dots for you.

webDSCF8900

I was a child of the 80s and had one of those frilly bed skirt things that sat under the mattress and made it really flipping hard to make the bed. Remember those? Tell me you do. I hated that bloody thing. Anyway, it was called a valance (hence the Holly). And now I’ve made one to wear on my body AND I LOVE IT. Look how fun it is!

webDSCF8865

I visited the idea for this a while back, but with a wrap skirt and a narrower frill. It was ok, but I didn’t love it. The frill was a bit conservative, the ties felt like they added too much faff and the fit was a bit narrow (which was a fail for side seam pockets), so it wasn’t all that comfortable.

webDSCF7456

I got a bit hooked on the idea again when I bought this fabric from Doops Designs. It’s just digital print cotton, about quilting cotton weight so nothing fancy. The print is the stand out though, right? I started browsing RTW for inspo, I knew I wanted something frilly but I didn’t want a wrap skirt this time. Was it possible to have curvy cross over front skirt pieces without the tie bit? Yeah. Although not as common and I couldn’t find a similar sewing pattern (they were all wraps). But I figured, why re-invent the wheel? I have skirt patterns that fit and I have my good old faithful curved waistband that I use a lot.

70614c.7

I liked the idea of starting the frill up high and more towards the centre front and away from the hip. I also liked the idea of increasing the width, so it was big and bold. There were two stumbling blocks: where to attach the frill at the waistband (on the wrap skirt it would start at the ties) and pockets. Would patch work?

webDSCF8891

Patch turned out ok! Please admire my pattern matching. I rarely take the time to do that but I’m glad I did here. I used the skirt pattern from McCalls 8033, which I’d literally just made so had the pieces handy. It gave me a fitted but not too fitted fit though the hip and I just walked my waistband pieces on top to make sure they fit. All I needed to change was add seam allowance on the skirt piece at the centre back for a zip. Easy. Here’s a quick and dirty tutorial if you’d like to do the same:

curvedskirtinstr

If you don’t have a skirt pattern, try one of the circle skirt calculators. Full circle will be very full (duh) and quarter will give a similar look to mine (and use less fabric). Change the front pieces so they curve and cross over each other, I curved the back pieces so they drop down at the back but you can leave it straight if you’d like. Your frill should be about 1.5 – 2 times the length of the curved skirt edges. I hope that makes sense. I did double and my frill was 5.6m. It’s a lot of gathering. Use two or even three rows of gathers and a bit of patience. I divided mine into quarters so it was easier to get the gathers evenly spread across the skirt pieces.

webDSCF8868

1. Firstly, stay stitch the top of the front and back skirt pieces. They are curved, so stretch out easily.

2. Next, add your patch pockets to the front of the skirt pieces (if you want them). Keep in mind the ruffle will mostly obscure one of them, so bigger is better.

3. Sew your skirt front and back pieces together at the side seams and finish the raw edges however you like. Finish the raw edges on the centre back (where the zip will be) and then stitch from the BOTTOM UP about 15cms. Leave the rest open for the waistband and zip later.

4. Gather and hem that big old frill. Try not to cry. Figure out which front skirt piece will go on top and which will go underneath. Pin that frill starting about 1.5cms (or whatever your seam allowance is) from the top – you want to just catch the edge of it in the waistband and then continue pinning it around the whole skirt. I didn’t take it all the way to the top of the under skirt piece because I didn’t want the added bulk. This is what it looks like underneath:

webDSCF8886

5. Once you’ve sewn the frill on, you can finish the raw edges, taking it all the way along the edge of the under skirt piece, beyond the frill. Then fold that down that bit and stitch in place, like a little hem. You don’t have to, no one will see it, but it keeps everything neat.

webDSCF8888

6. Frill is on! Yeah! Then cross your front skirt pieces over and baste along the top so it won’t move when you attach the waistband.

7. Assemble your waistband pieces. One side should be interfaced. I always use that as the front of the waistband, but whatever tickles your fancy. Sew the waistband fronts to the waistband backs so you have two separate waistbands. Then sew those together along the top. Pin and sew the front to your skirt (leaving the inside (or facing) of the waist band free). Press the seam up towards the waistband.

8. Sew in the zip with the appropriate foot. I used an invisible zip. Finish sewing that centre back seam.

webDSCF8894

9. Finish off the waistband. I flip the waistband over the zip so the wrong sides are facing out and sew another row of stitching next to the zipper stitching. It’s hard to explain and I haven’t got photos, but here is a good little tutorial.

10. Press up the seam allowance on the inside of the waistband, so it covers the waistband/skirt seam. Pin from the outside, making sure you catch the inside and stitch from the outside so everything is nice and enclosed.

webDSCF8869

And that’s it! You’re done! Enjoy your Holly Valance!

webDSCF8871

PS My tshirt is designed by Rachael Castle and is from the very good Dangerous Females.


Will You Ever Learn? {McCalls 8033}

webDSCF8777

Oooh, now what is this piece of bohemian goddessy goodness floating around in my front yard? Why, it’s McCalls 8033 (Sophia to her friends) in rayon from Spotlight! Yes it is. And if you’re in Australia, it will probably be three long summers before the pattern arrives in stores here, so you might need to buy it online like I did. It’s a different offering from them though, no? Please note that the skirt is tiered. I totally missed that when I ordered it, but like it. The version I made had four tiers, which brings it to maxi length. I ran out of fabric though, so have three tiers and don’t mind the midi length.

webDSCF8786

But before you sew that sucker up, make a damn toile. I didn’t. I should have. But I hate them. Don’t preach to me about toiles. I understand the concept. Truly. But by the time I sew one up in boring fabric, I have lost the will to make another in decent fabric. Even in these times when we’re mid-pandemic and have plenty of time to spare (I still don’t, what’s with that?). So just toile the bodice, how about that?

webDSCF8795

So, going by the finished measurements (as I always do) I decided to make a size 18D (oh yes, we have cup sizes on this one – a treat!). Bigger than my usual 16 in McCalls, but I’ve become a bit rounder over the last 12 months and am happy to accept that. Before I did anything, I shortened the bodice by 1.5cm, which is standard for me – I’m short waisted. There aren’t pockets in this pattern and I didn’t add them, I thought in-seam ones might gape and pull because the skirt is a bit more of a close fit at the hips than I usually wear. Patch could work, but probably not in this light weight rayon.

webDSCF8800

Allow me to list the other things that needed altering:

  • Still too long in the bodice, needs to come up another smidge, more so in the centre front(?!)
  • Mega in the shoulders. Like, massive. Apparently if you’re a D cup, you’re also a 6ft 4 Amazonian Princess. I ended up taking a wedge from the shoulders, which helped heaps but it’s still too big around the armholes. I do enjoy having plenty of space in the bust, especially with buttons.
  • Big all over, should have made the 16. Took it in at the side seams and moved the buttons further across.
  • The darts are very big (height and width). The width I get, big boobs need big darts. But these suckers finished up and over my bust. Not helped by the fact that I took it up at the shoulders, but still. Huge. Making them shorter was a problem because (a) the wider the dart, the harder it is to make them finish shorter and (b) because the darts are so big, the instructions have you trim them, so I could only shorten them a wee bit. Now they’re kind of a weird shape, but whatever. Maybe they’d be better split into double darts? And curved.
  • There seems to be a bit of pulling at those bottom buttons, which I didn’t notice until I saw photos. Images can be a bit unforgiving that way. I’m not bothered by it, but I reckon my facing probably got off grain there. Not surprising with rayon. Maybe block fuse it before cutting.

webDSCF8787

It’s not all bad, just more changes than I’m used to and admittedly, I am way more fussy with fit now than I was when I first started sewing. I’d probably accept all this from RTW even. I do like the floaty blue pain in the bum, so I will get some wear out of it. I’ll wear it with docs for winter and pretend I’m in a 90s grunge band.

Falling Leaves {McCalls 8040}

webDSCF8479

A while back I ordered a few of the new McCalls patterns, shipped directly from the company because it takes us approximately three seasons to get them in Australia (not even joking). The shipping is a bit costly, but if you get the patterns when they’re on sale and make the most of the shipping, it’s a bit more worthwhile.

webDSCF8247

Out of the patterns I ordered, M8040 topped the list as the one to make first – quick, straight forward and those sleeves. I don’t have a whole lot of woven top patterns, so it’s nice to have something to wear with jeans and work pants.

webDSCF8229

I used some Dear Stella quilting cotton I’d had hanging around for a while and made the cropped version. The only change I made was adding a bit of extra volume to the sleeves. if you’re going to have a crack – the cropped version is proper cropped. I’m quite short waisted and it’s pretty short on me, often I still have to shorten cropped bodices, but not this one! And, as always, check the finished measurements. I get the vibe that McCalls are trying to look a bit more like the indie pattern companies with their new line drawings and pattern names (this one is called Emmie), and it seems like the heap of ease they used to have is shrinking. I usually make a 16 in McCalls (even though my measurements put me in an 18 or 20) and I made a straight 18 in this one.

webDSCF8497

So what’s the next logical step for a girl who likes a top? She turns it into a dress bodice, of course. With double gauze from Spoonflower. I threw caution into the wind with this one, which I would like to say is due to the state of the world at the moment, but it’s not. I just get a bit like that with sewing.

webDSCF8472

I shortened the top another 1.5cm above the ‘crop’ line on the pattern pieces, but once I’d attached the skirt pieces later it was still a bit long in the bodice, so I had to decide whether to unpick and shorten or add elastic to the waist seam.


webDSCF8468

I decided on the elastic because I figured it would give my wardrobe a bit of variety and the gauze gathers up quite nicely. I thought it might end up pulling at the button at the waist though (and it did), so I added a hook and eye there to secure everything.

webDSCF8470webDSCF8471

I ended up with 14 buttons in total and I stitched the facing down so it doesn’t curl up and flap around, as it tends to do on lighter weight fabrics.

webDSCF8508

I just squeaked it out of three yards of fabric and even then, my sleeves had to be cut shorter and one of them on the bias. Ooops. I wasn’t willing to forgo my giant sleeves though, I love them.

webDSCF8519


Kick Out The Pleats {Simplicity 8652 + Megan Nielsen Rowan Hack}

webDSCF8376

Hi. It’s me again, sewing things for the job that I might not have very soon. Don’t ask me why I had an overwhelming desire to sew a pencil skirt when:

(a) I don’t think I’ve ever worn one in my life

(b) I struggle with the shape of my lower half

(c) I was convinced it wouldn’t fit me

(d) the whole job vs pandemic thing

webDSCF8346

BUT HERE WE ARE FAM. So, this is an excellent pattern (Simplicity 8652). Quite excellent. The little pleated kick pleat is a particularly nice touch. I also like the fact that it’s for wovens because I’ve had a bad experience with a knit pencil skirt pattern a while ago. Apparently I needed one then too. Actually, maybe that was part of the reason I was convinced this one wouldn’t work out. It’s the whole hip to waist ratio thing.

webDSCF8393

I used sateen from Spotlight because once again, that forgiving smidge of stretch is quite excellent. Using the finished measurements, I graded between the 18 (waist) and 20 (hips) and also swapped out the straight, rectangle waistband for the curved one from the Peppermint wide legs pants pattern. I’d just made those pants and knew that waistband was a good one. I had to adjust it slightly to fit the skirt pattern (longer front, shorter back pieces – which makes sense because they’re reversed on the pants because the fly is at the front).

webDSCF8382

The jumper is another Megan Nielsen Rowan hack, more details in this post. The cable knit is from Spotlight and I love it. It was easy to sew with, has a nice weight and came together quickly. The only thing is I bought it online and didn’t pay much attention to the composition. It does have a bit of poly in it, making it a definite winter item.

webDSCF8367

And now I’m ready to get called up for the part of Joan in Mad Men. Excellent.

webDSCF8352


Guess Who’s Back? {Megan Nielsen Rowan Hack + Peppermint Wide Leg Pants}

Phew. While things go a bit bananas all around us, I figured now was the time to catch up on a bit of blogging. And why not? I have a (mostly) captive audience and who knows, maybe some of you will use your isewlation to start sewing or just need some inspo to keep boredom from completely devouring you.

webDSCF8329

AND WHAT BETTER PLACE TO START THAN WITH A FREE PATTERN? Oh yes. The Peppermint x In The Folds wide leg pants pattern has been around for a while now, but as always, I was a bit slow to jump on the bandwagon. I’m guessing Officeworks isn’t an essential service, so there goes the A0 option, but if you’ve got more patience than me, you can download it from here and get sticking.

webDSCF8300

Here are the things I like about this pattern:

– It’s free (c’mon)

– It’s well drafted

– It has a curved waistband, which is perfect for curvy selves like me

– The wide legs mean that the fit is pretty forgiving if you’re generous of thigh (also me)

The only downside that I can think of is that there is a mistake in the instructions. When referring to the fly, it’s called the fly shield and vice versa. But if you ignore that and just go by the diagrams, you’ll be golden.

webDSCF8323

The pattern is for medium and heavy weight non stretch wovens, but I cheated for my first pair and used sateen from Spotlight, which has a smidge of spandex but is still a pretty nice weight. Just because my hips and thighs are forever a pants fitting nightmare and that bit of spandex forgiveness is nice if your hips don’t lie. Next time, if I do use something without stretch, I’ll need to grade the hips up. For this pair though, I just used a straight size F.

webDSCF8291

And lets talk about the hare in the room. Look at this delicious See You At Six French terry from Maai Design. Gosh. Is it not amazing? Not a colour I would have normally chosen either, but I love it. The clever thing about See You At Six is their perfectly matching rib. Look at it. OMG. The quality is as amazing as you’d expect too.

Pattern wise, I used Megan Nielsen’s Rowan pattern because I already had it on hand. Here’s what I changed:

– I sized up (the fabric doesn’t have as much stretch as the pattern required and it’s still pretty fitted, although that’s what I was after – something to wear with high waisted skirts and pants),

– Cropped it

– Added a nice wide band for the bottom

– Shortened the sleeves to accommodate the ribbed cuffs

– Scooped the neckline a smidge

I think that’s it. Of course, over the last few days we’ve reverted to summer, but when it cools down again I am ready. So ready. I have to consider work outfits suitable for school these days and this one is a winner.

webDSCF8287