Battle of the Bras {Orange Lingerie Marlborough, Pin Up Girls Classic and Pin Up Girls Shelley}

webDSC_7286

Is the world of bra sewing confusing and daunting? Yes. Does it require a bit of engineering, guesswork and prayer? Yes. Is it worth doing anyway? Hell yes.

webDSC_7548

I’ve been sewing bras for a couple of years now and I’m at the point where there are no longer any store bought bras in my drawer and there hasn’t been for a while. Why sew bras? Well, considering you can grab one at Kmart for the princely sum of $10, it’s not cost.  Why then? Fit, baby. And if you can get store bought bras to fit you like a glove, then you’re probably scoffing at me right now. That’s ok, I can take it. I didn’t really realise how badly my bras were fitting until I starting making my own and actually researching what a well fitting bra looks like. I no longer want to burn them by the end of the day. Plus they can be sewn in a rainbow of colours and prints.

webDSC_7280

Wanna know? Here’s some general fit guidelines (for wired bras):

– The bridge (that bit in the middle) should sit flush against your chest

– The straps shouldn’t dig in or slide off your shoulders

– The back band should sit parallel to the floor and not ride up

– The wire should encase all of the breast tissue, not cut through it or dig under your arms

webDSC_7492

Now, we are all different and unique individuals with different and unique boobs. Different shapes require different bra designs, who knew?! Here are my quirks:

– Close set

– Side boob that wants to head, well, sideways

– Underarm flab

– Broad back

– Very little upper cup fullness

Being close set means I need a narrow bridge, my wires need to kiss in the centre to fit flat to my chest. The broad back and underarm flab means that I have a preference for nice wide bands, at least 3 hooks in the back but 4 is better. My lack of upper cup fullness (this could be pregnancy/breastfeeding, age or even genetics-related) means I gravitate towards full cups – I basically ‘fall out’ of demi cups. A power bar is ideal to direct that side boob back to front and centre. Isn’t it funny that it’s taken me about a year to realise all this stuff?

webDSC_7246

Let’s talk wire because omg, that confused the hell out of me for a long time. When I first started sewing bras I would just shove any old wires (from old rtw bras) that would fit into my new bras. Wires that probably never fit me in the first place. When I decided to refine my fit a bit more, I did a lot of reading and found out you can find out your wire size first and then basically reverse engineer a bra to fit. Order a few different wire sizes, stand topless in front of a mirror and measure those babies against your breast root to find the Cinderella wire. Turns out mine is a 44, which corresponded with the bra sizes I was already making, but good to know, right? Here’s a helpful post about wires.

Of course, within those wire sizes are variations on length and style. But cross that bridge when you come to it.

webDSC_7248

webDSC_7262

webDSC_7467

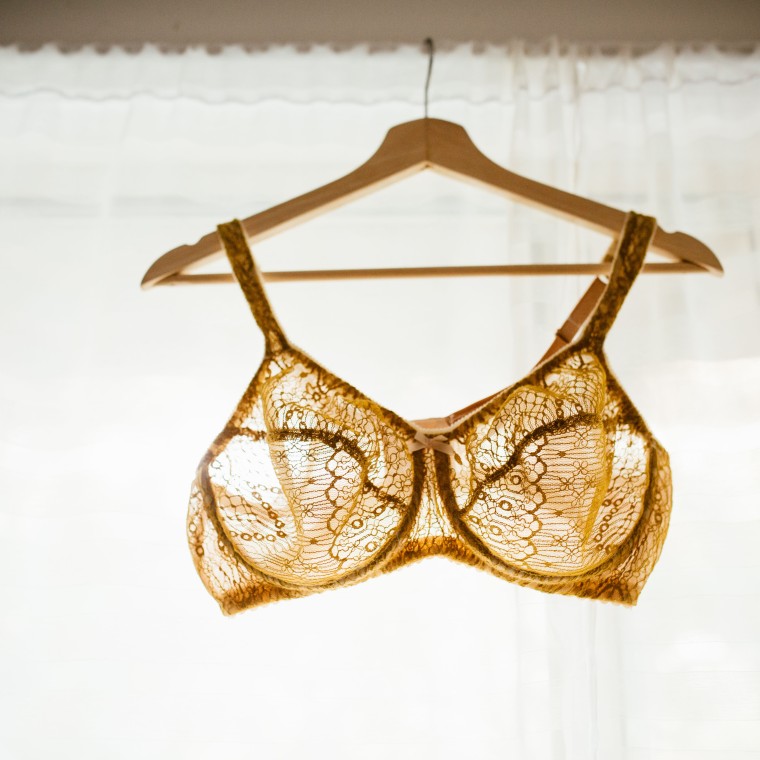
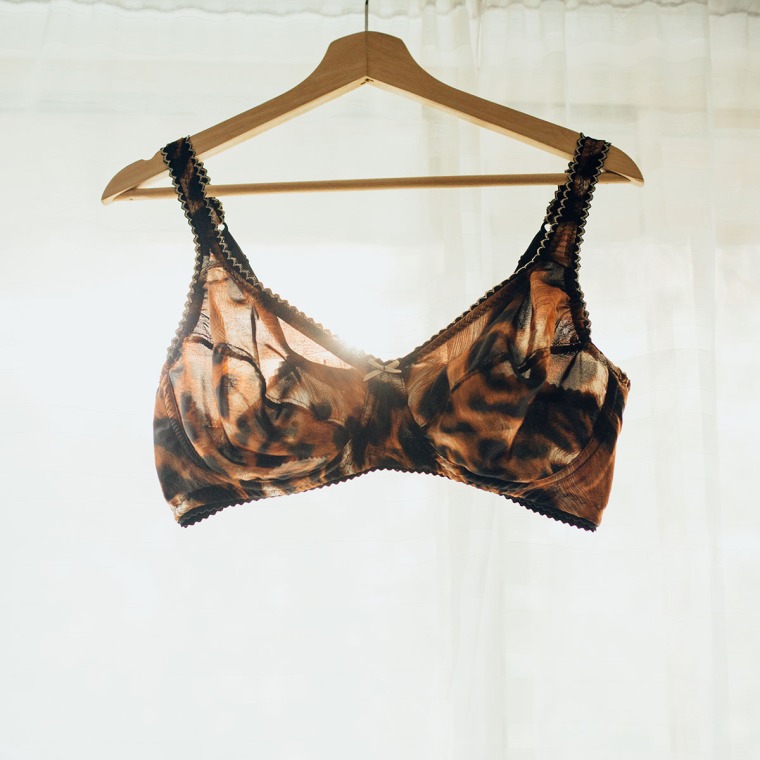
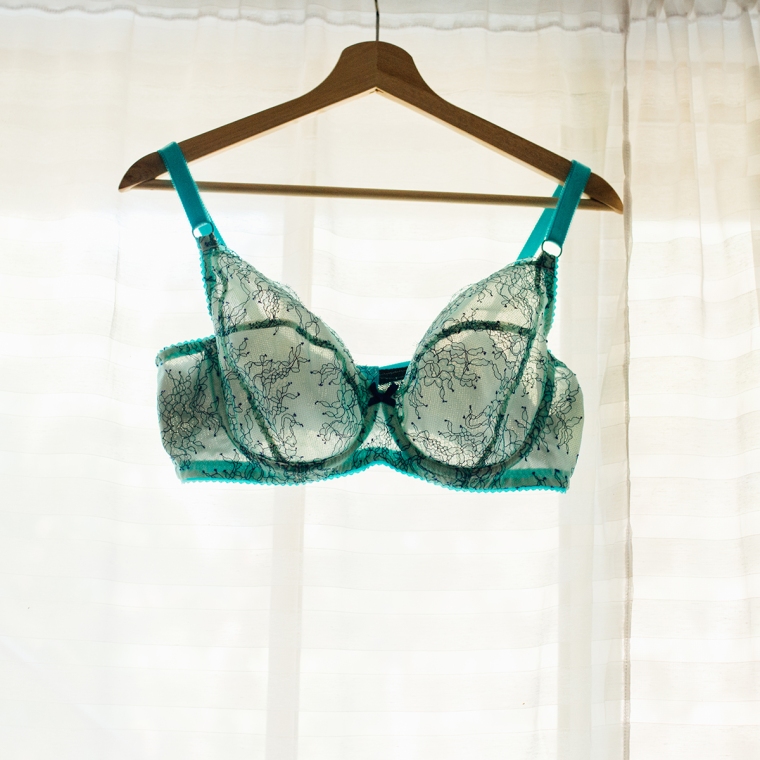
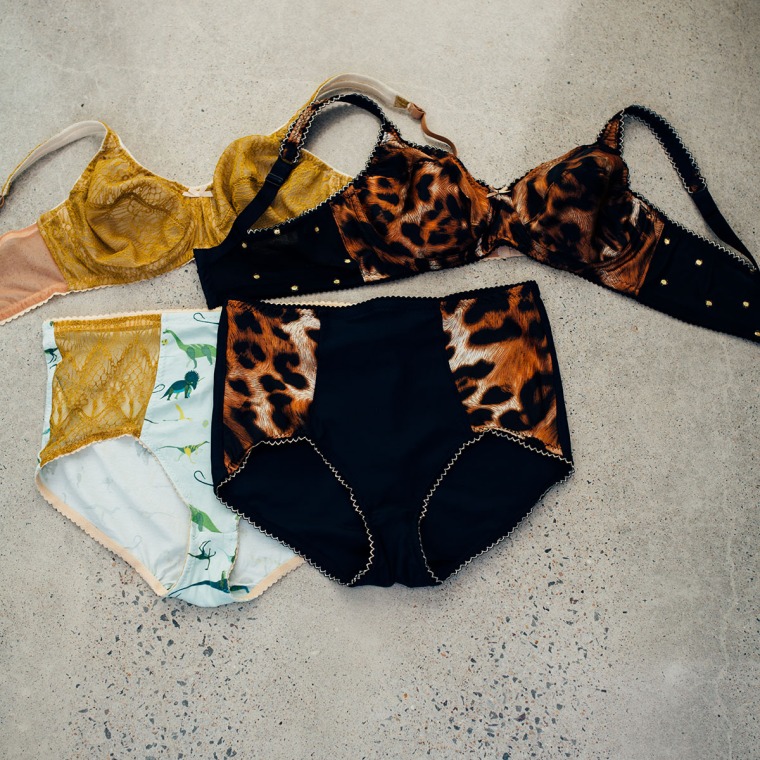
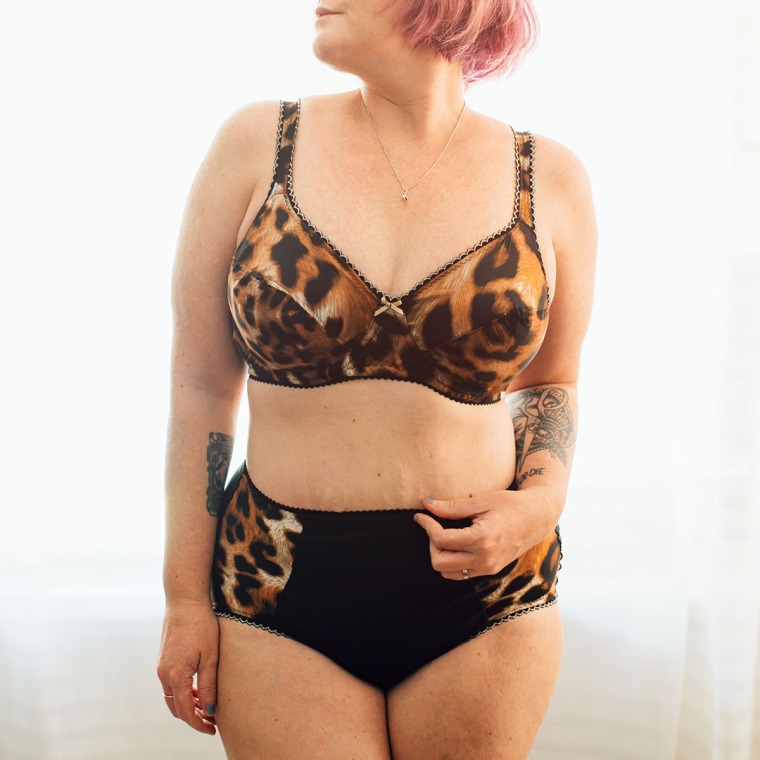
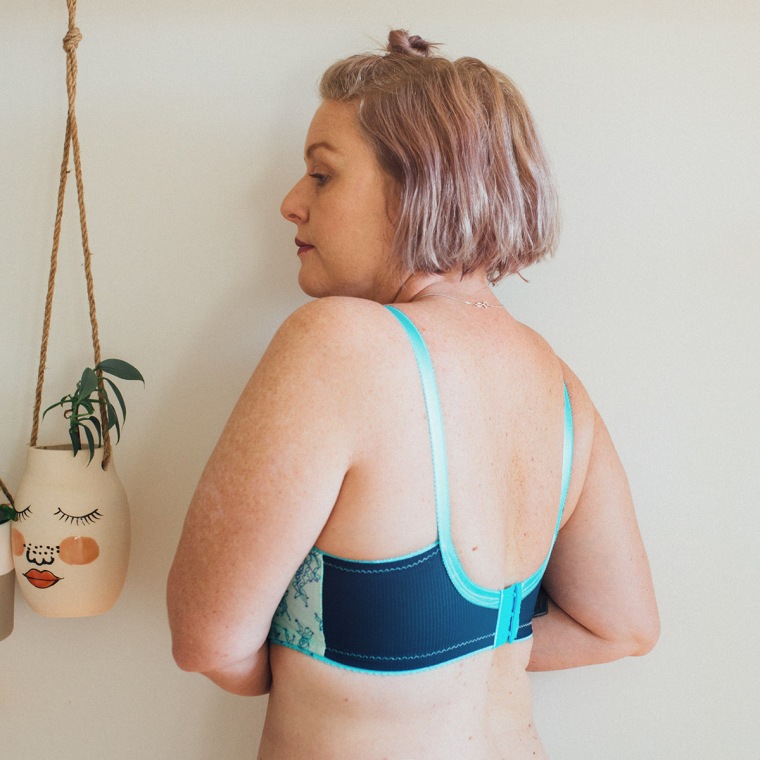
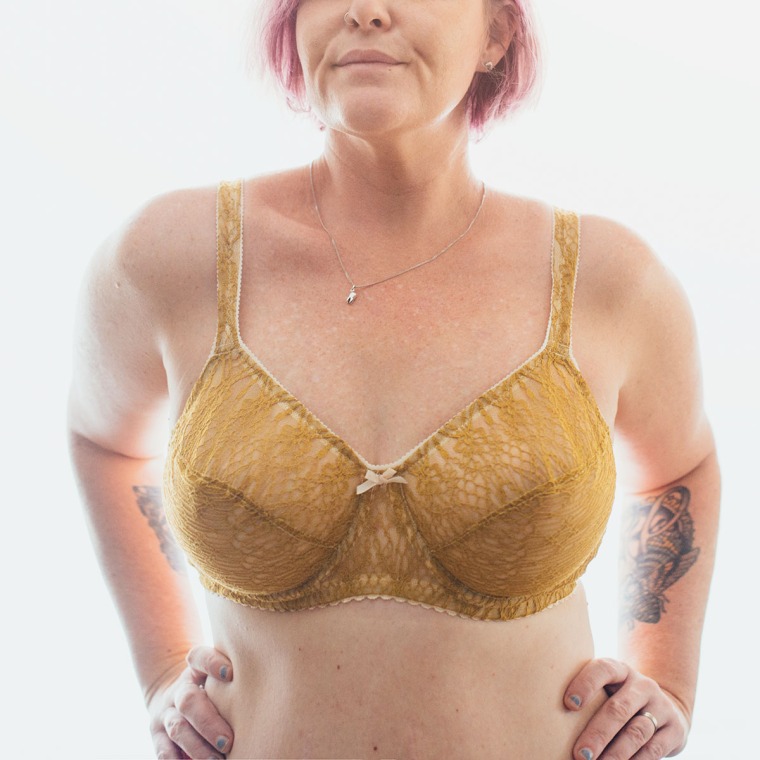
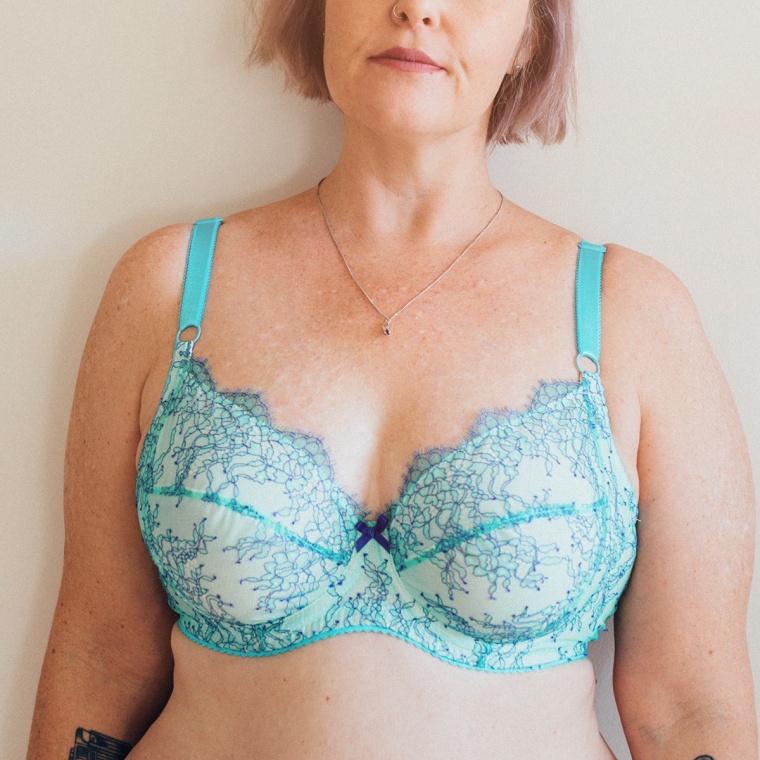
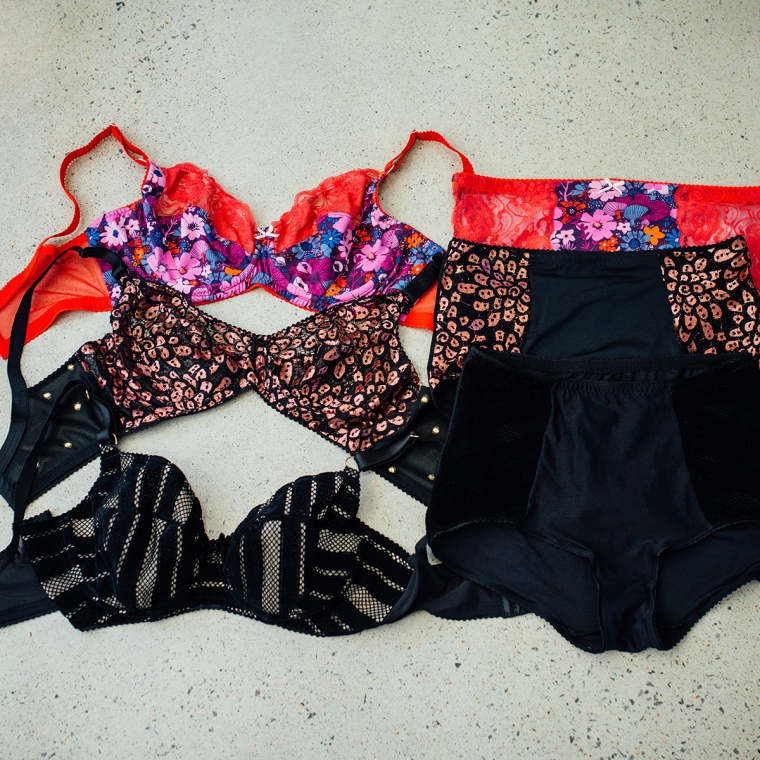
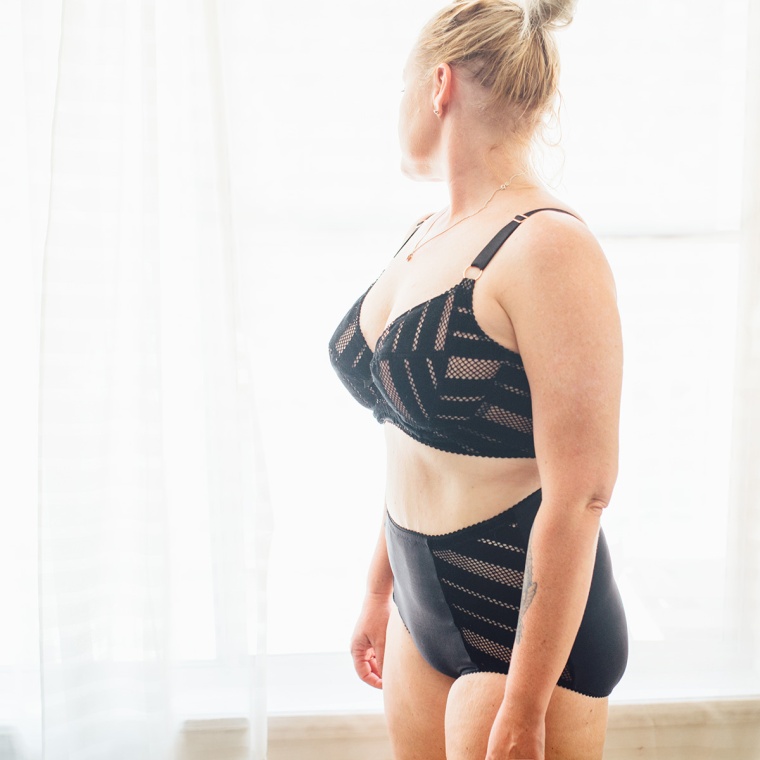
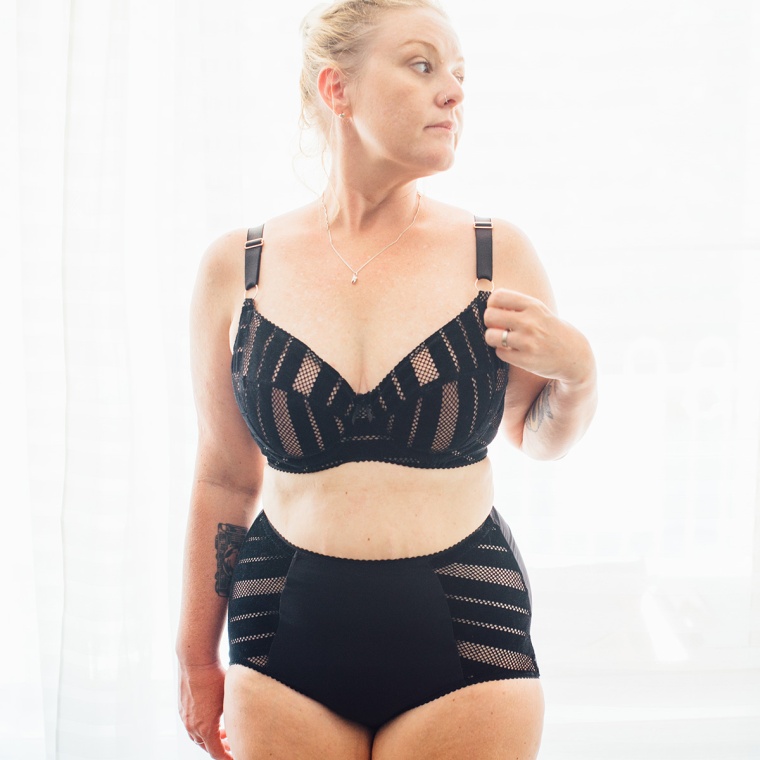
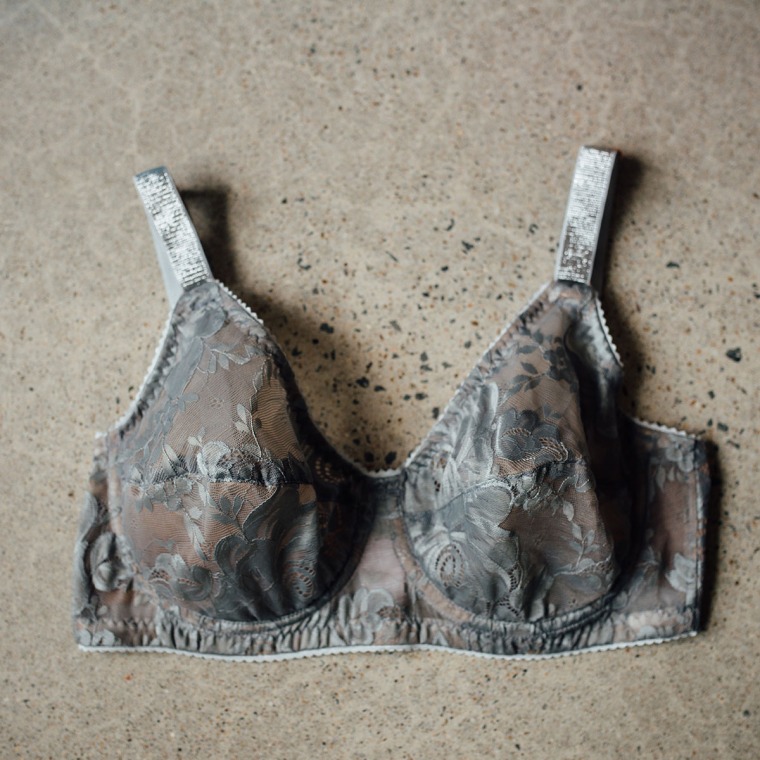
The two bras I make the most are the Pin Up Girls Classic (shown above in the gold lace and leopard satin) and Orange Lingerie’s Marlborough Bra (the blue lace). The Classic has a full band and full two piece cup, while the Marlborough has a full band and 3 piece cup (with a power bar). Here’s how they fit:

webDSC_7281

webDSC_7244

webDSC_7495

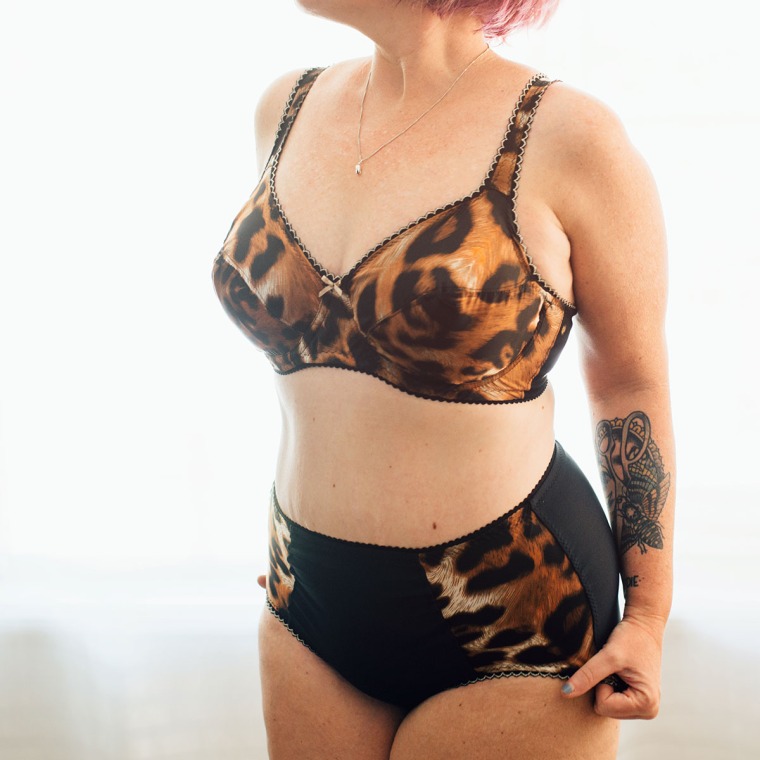
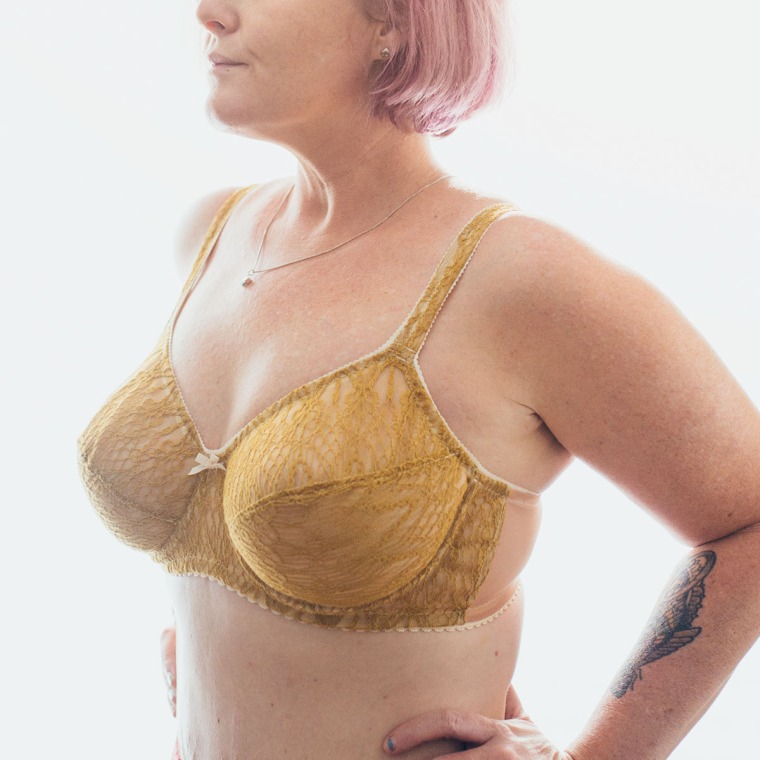
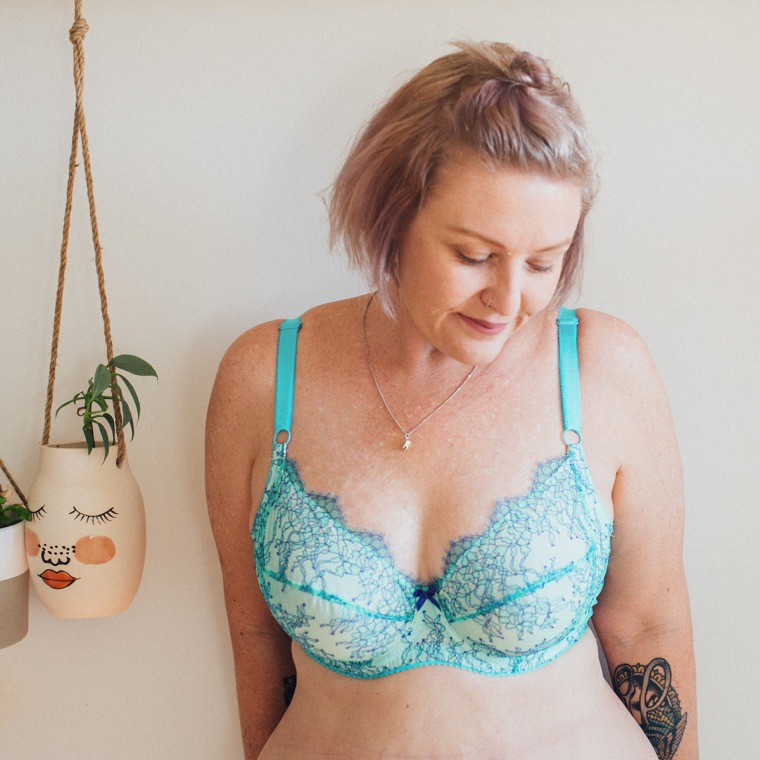
The Marlborough is my favourite, but only by a tiny bit. The combination of slight plunge in the front with the power bar pushing everything front and centre makes it a winner. I still get a good amount of lift from the Classic too.

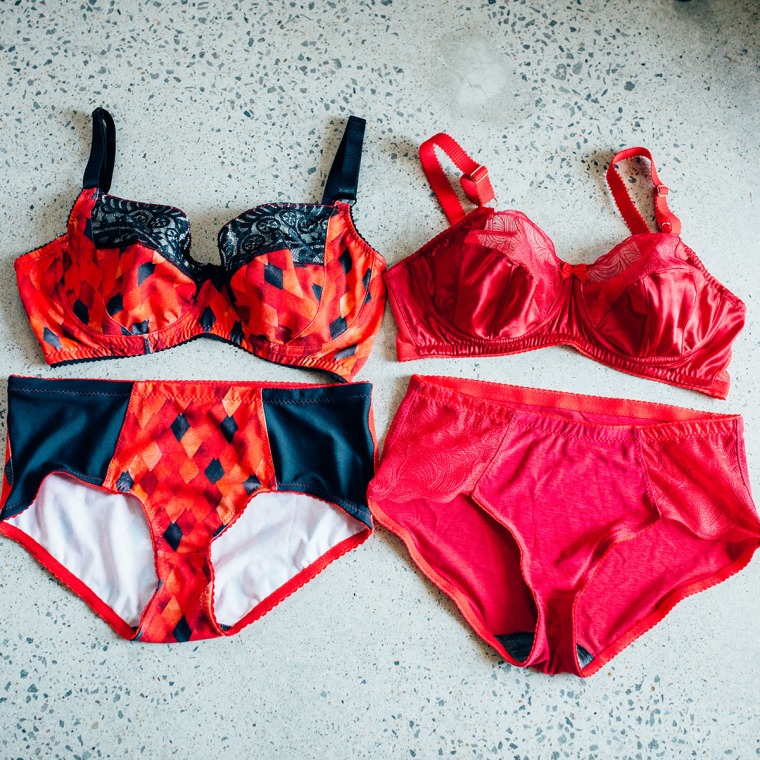
There’s another Pin Up Girls pattern which I’ve only ever made once, the Shelley bra. It’s similar to the Marlborough in that it has a power bar and a full band, but has four pieces in the cup. The one I made was a bit small in the cup (going by the designers directions for measuring, bras always end up too small in the cup for me). So I decided today was the day for a bit of a scientific comparison, because I am nerdy like that. I traced off my new upsized Shelley and sewed it up to see if I liked it as much as the Marlborough, after all – how different could they be?

webDSC_7552

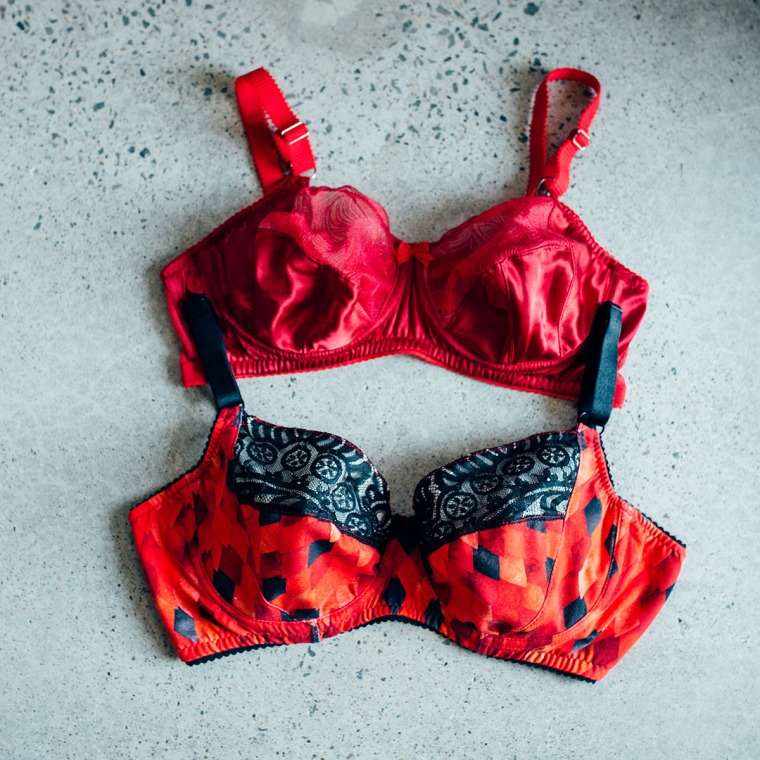
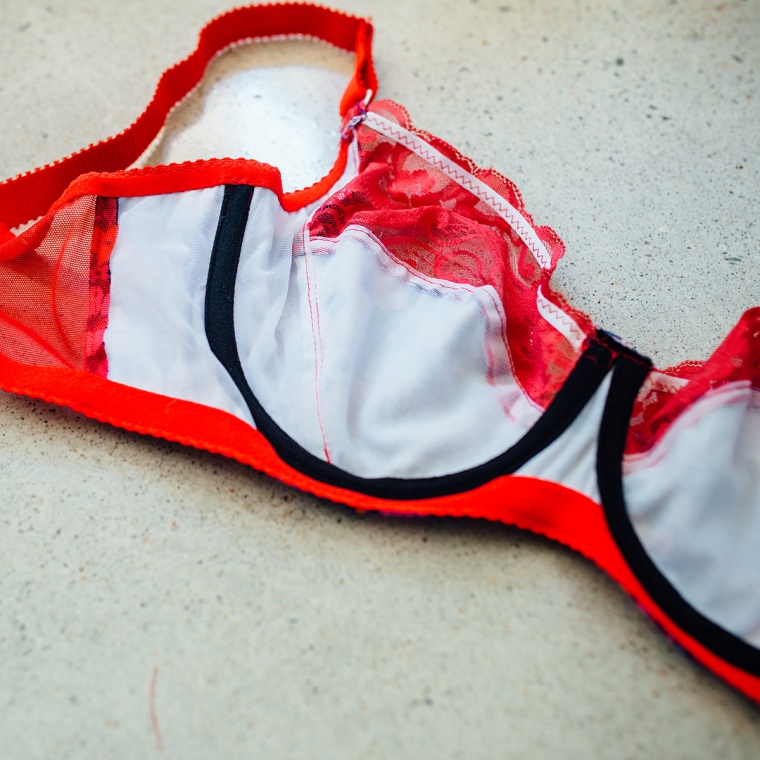
That’s the Shelley in the red satin and lace on top and the Marlborough on the bottom in the red and black. I did raise the underarm on the power bar and band of the Marlborough so the wire sizes could be exactly the same in both. I mean, for proper science they would both have to be created from the same fabric, but I was hoping to get two wearable bras out of this and who wants two exactly the same? Variety for me, please.

webshelleyvmarlborough

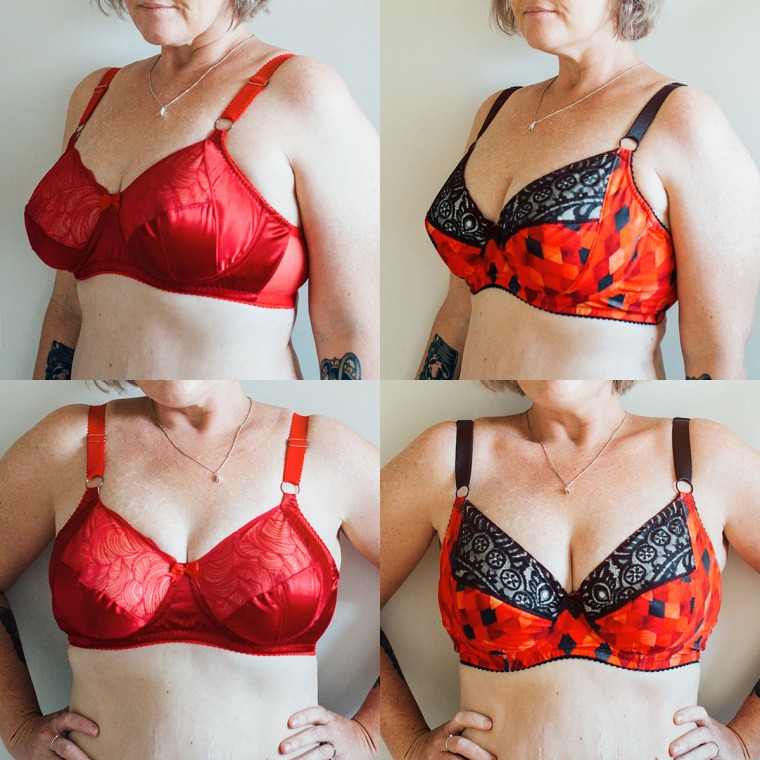
As you can see, they ended up quite different! While the Shelley feels supportive, it gives me no where near the same amount of lift (look at that bottom cup in the side on view) and it feels like it actually flattens out my upper bust. Plus there is a heap of breast tissue bulging out at the sides, which has all been pushed forward in the Marlborough.

webDSC_7509

I’ll just keep sewing all the Marlboroughs then, ok? Ok.

PS Most of my supplies for bras come from Booby Traps and Sew Squirrel. All of the bras pictured are lined with bra lining to keep everything from stretching out. That’s really important.


Bra-Bra-Bra, Bra-Bra-Bra-Anne {Orange Lingerie Marlborough Bra}

webDSC_4859

Over the weekend I had a craving for some rock solid bra sewing. Can you have sewing cravings? I do. I love bra sewing for the same reason I love swimwear sewing. It’s very different to sewing a dress, it’s a bit challenging and it’s one of those things that really throws people when you tell them you made it. I always feel very accomplished when I have a bra that fits.

webDSC_4861

Of course, the extra level in bras is the fit. Especially wired bras. I always say that sewing them isn’t the hard part – it’s the fit that can drive you nuts. Once you have that down though, you’re golden.

webDSC_4921

Even though these aren’t my first Marlborough bras, I went the extra fitting mile this time and compared wire sizes to my breast root. This basically involves standing topless in front of a mirror and holding up a variety of wire sizes along the underside of your breast to check which size fits best. Then you make the bra to fit the wire, rather than buying wire to fit the bra you made. The theory is the fit is more accurate and I totally agree.

webDSC_4919

So, turns out I had been making the correct Marlborough size all along (a 40D, although my measurements put me in a 40B according to the pattern), but using a slightly different wire size has really elevated the fit. They are so comfortable. I used to scoff when people would say that you don’t feel the wires in a correctly fitting bra, but it’s definitely true in this case.

webDSC_4883

webDSC_4882

The floral print in the first bra is Cotton and Steel cotton spandex jersey. Not recommended for this particular pattern because it stretches, but I’ve lined it with bra lining to counteract that. The fabric for the second is a rigid lace from The Remnant Warehouse and the fabric for the third is some sort of mesh with velvety stripes (also from The Remnant Warehouse). I wasn’t even sure that fabric would work for a bra because it’s quite heavy, but it turned out really well. All are lined with bra lining and the seams are enclosed.

webDSC_4862

webDSC_4886

All the side panels in the knickers are non stretch, which meant I compensated by cutting the front and back panels a bit bigger. The top pair use that lovely cotton lycra for the main part and I’ve used nice stretchy black spandex for the other two pairs. Bra hardware, strapping and elastic is all from Booby Traps.

webDSC_4901

Is there anything that boosts your self esteem like well-fitting, comfortable lingerie?


Slip, Slop, Slap…. Iced Vovo. {Megan Nielsen Rowan x Spoonflower}

SF-BLOG-HandmadeBlogHop-Header

Recently, the legends at Spoonflower got in contact and asked if I’d like to take part in a little blog hop they’re organising to show how makers around the world are celebrating the holiday season. They suggested that perhaps I’d like to make an Australian themed swimsuit or similar from their sport lycra (which is the tits and I’ve used many times). WOULD I? Of course! This time of year is alllllll about the water based activities for us. While half the world is freezing their butts off and singing about letting it snow, we are sweating and eating mangoes in the pool.

webDSC_6982

Now, if you are Australian you’ll totally get the references in the title. If you’re not, let me explain the Australian summer to you (at least in my neck of the woods, we’re a big country, it varies a lot), our sun will burn you in minutes. The whole ‘slip, slop, slap’ thing was a campaign launched by the Cancer Council in 1981 (the year I was born!) and refers to slipping on a shirt, slopping on some sunscreen and slapping on a hat. Apparently it’s one of the most successful health campaigns in Australian history. There you go. No wonder the jingle has been stuck in my head for 36 years.

webDSC_6987

And iced vovos are a pretty iconic biscuit made by Arnott’s (which is no longer an Australian company, but lets ignore that). I have very fond childhood memories of iced vovos with tea.

webDSC_6990

I was browsing through Australian designer’s stores on Spoonflower, looking for a print that would fit the brief, when I stumbled across Natalie’s amazing iced vovo design. YAS. This was it. I knew what it had to be – a rashie that I could easily create from Megan Nielsen’s (another Aussie, can you see how loyal I’m being here?) Rowan pattern.

webDSC_4363-2

So while Rowan isn’t technically a rashie pattern, I have made swimmers from it quite successfully before. This time was even more simple – I used the t shirt version of the pattern, added a seam allowance to the front pieces for the zip and cut it in two pieces instead of cutting it on the fold. Easy.

webDSC_6934

I sewed most of it up in about 15 minutes on my overlocker, finishing the centre front edges, hem and sleeves – which isn’t even necessary because the lycra won’t fray, it just looks nice.

webDSC_6935

While you can sew the band on folded, I decided not to. I wanted to encase the scratchy edges of the top of the zip in the neck band – even though when I checked my RTW rashie I found out it wasn’t done this way.

webDSC_6937

Just a warning, attaching the zip might make you cry a little bit. To make it less painful, you can add some fusible tape to the edge of the fabric, but if you find that’s not enough (like I did), heavier interfacing is better. Basting helps too but I found that it’s not enough on its own to stop the fabric stretching.

webDSC_6939

After that I just pinned the rest of the neck band in place and zig zagged it above the neckline seam. I finished the hem and and sleeve hems with a zig zag too, you need lots of stretch for this baby.

webDSC_6943

I managed to piece together my scraps to get a matching pair of bikini bottoms. I didn’t have enough fabric for my usual high waisted pair (pattern cloned from my favourite pair of RTW knickers), so they are lower than usual and I didn’t have enough for the top band either. Still, they aren’t bad and I do like making the most of my fabric scraps. Ooh and the bottoms are lined for obvious reasons. The rashie isn’t because I’ll always wear a bikini top under it for support. Or it will go over something else in a fantastic clash of prints.

webDSC_6996

Spying on my neighbours.

webDSCF3049

Submerged.

Yes there’s a dolphin in our pool, his name is Dave. He was there when we bought the house although we didn’t know it at the time because the whole thing was pond green.

webDSCF3068

If you ever need a reminder that you are not a graceful mermaid, just get some photos of yourself underwater. YOU’RE WELCOME.

webDSC_6988

If you made it this far through my incessant chatter, I have a reward for you – use the code katie17 to get 10% off your Spoonflower purchases until the 31st of December. Happy Dance!

SF-BLOG-HandmadeBlogHop-TagforBloggers


The Great Finishing {Tilly and the Buttons Rosa Dress}

webDSC_7393

This weekend was spent finishing off a pile of UFOs I had languishing in a basket, mocking me for too long. Most of it was really boring and involved unpicking and sewing on buttons, but this Rosa was pick of the litter.

webDSC_7422

I wasn’t sure why I had ignored it for so long. I cut it out just after making my last one and I adore the fabric, so it’s not that I was feeling particularly uninspired. Then when I was getting towards the end, it hit me. Buttons. Twelve of them. It always feels like a huge task, but when I get into the swing of it, it’s fine. And yeah, my machine has a one step buttonhole function. If I had to do those suckers manually it would be a different story. There’s also a lot of top stitching, which I have done in grey thread because my top stitching isn’t something that I want to draw attention to.

webDSC_7396

I would also like to point out that I’ve made everything I’m wearing except my shoes and tights. And I hear you say ‘Yeah? So you made a dress? That’s nothing new, Katie.’ That’s true, but think about what you can’t see. Yep, bra and knickers are made by me also. And since I’m bragging, would you take a look at the projection and shape of that right boob? God I love this bra. It’s Kwik Sew 3594. I have four of them now. A lot of women prefer a rounded shape to the well, boob shape. But I personally do like a boob-shaped boob. Yeah, we went there. I just wanted to highlight it because a lot of people seem to think handmade bras are unsupported-wrestling-puppies-in-a-sack kind of situations, but I assure you they aren’t.

webDSC_6910

Onward. You want to know where everything is from:

Pattern: Tilly and the Buttons Rosa Dress

Fabric: Robert Kaufman Chambray

Buttons: thrifted. Got a bag of about 200 wooden buttons for $2. Do recommend.

Shoes: Vintage Dr Martens scored on ebay. Not sewn obviously, but lots of people ask me about them.

webDSC_7442

Ignore the orange ear. Apparently he’s been wandering through the garden, helping the bees pollinate. Still tilted to the left, as you can see. Bloody dog and his bloody ears.

I haven’t shared much about the construction of this Rosa as I covered it in my last one. I didn’t make any changes except the placement of the sleeve tabs – I just rolled them to where I wanted and put them in the right spot. Easy. Now excuse me as I swan off to the yacht club in my nautical dress.

Kidding. I’m going to reheat leftover Thai and do some work.

webDSC_7436

A Million Bucks {Ohhh Lulu Cindy + Ava}.

That’s how this set makes me feel. A million bucks. My favourite set I’ve made so far, even though the velvet was a bit of a nightmare, not only to sew with, but also to photograph (as you will see). But worth it.

web-1791

Both patterns are by Ohhh Lulu, the knickers only purchased yesterday after my search for a lower leg. Ohhh Lulu nailed it, obviously. Links to everything I used here:

Cindy Bra – Ohhh Lulu

Ava Knickers – Ohhh Lulu

Main fabric – purchased an an Op Shop and hoarded by me for about two years.

Powernet – Remnant Warehouse (just as an aside, the pretty gold bits started flaking off after I washed this net. Very bloody sad).

Elastic, bra clips, casing, wires, boning etc – Booby Traps

Straps and tiny satin buttons were rescued from an old bra, may she RIP.

So the Ava pattern is simple and brilliant. A great place to start if you’re new to sewing lingerie. Three pieces, that’s it. Front and back go together with gusset cleverly tucked in behind the back (sounds confusing, but it works), side seams get sewn up and then I just used picot elastic for the waistband and legs because I find it much easier than fold over elastic. EASY.

web-1767
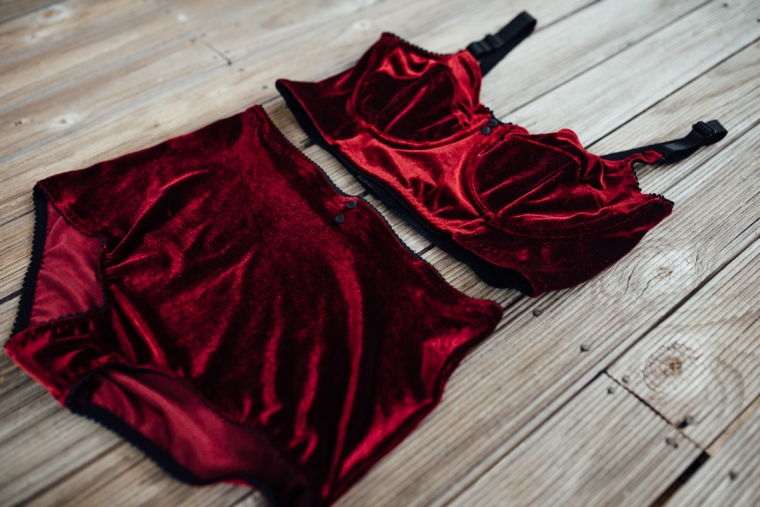
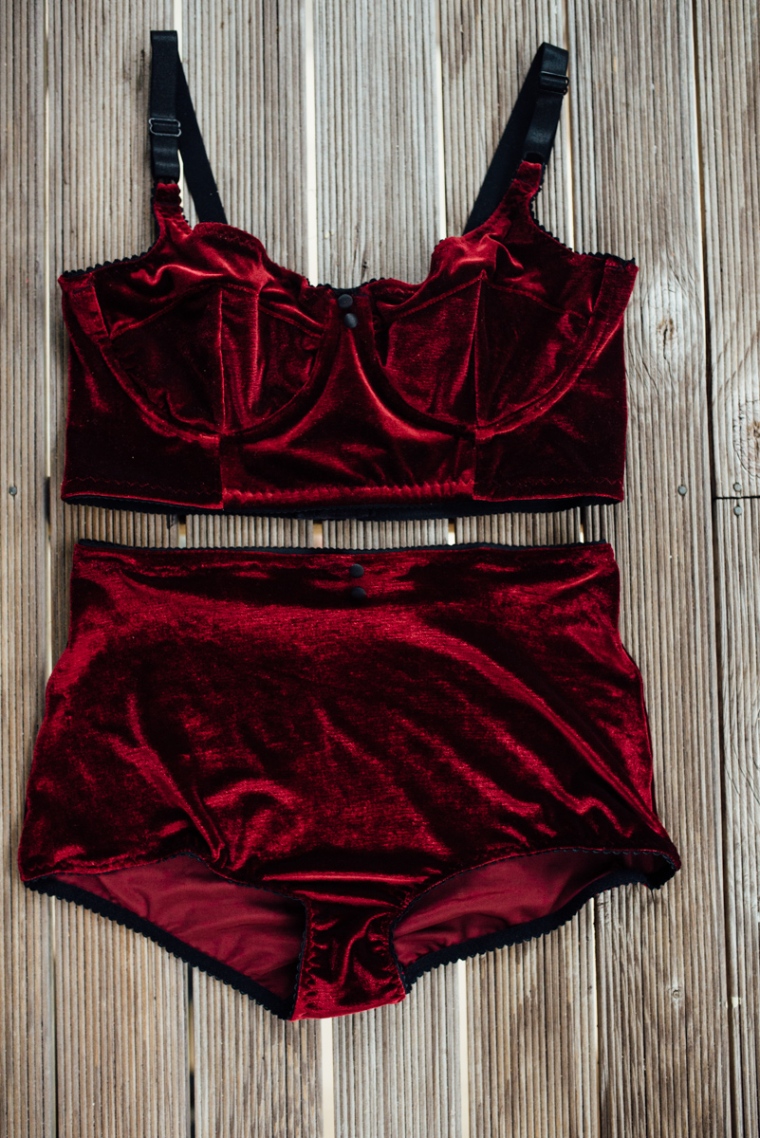
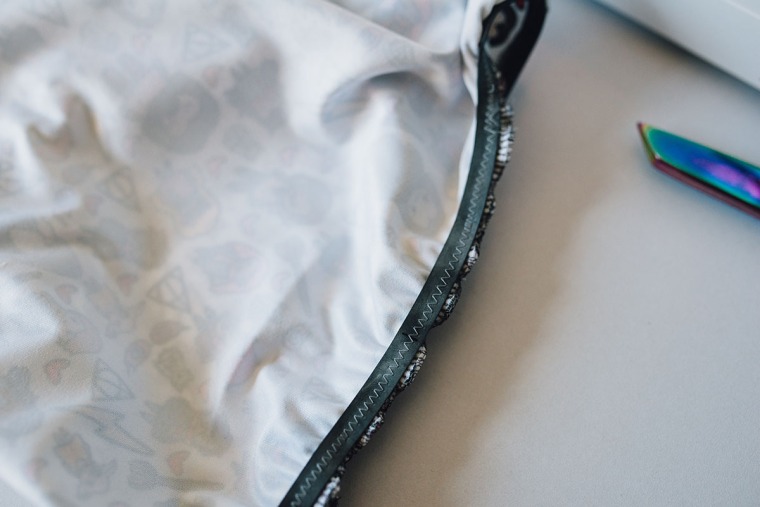
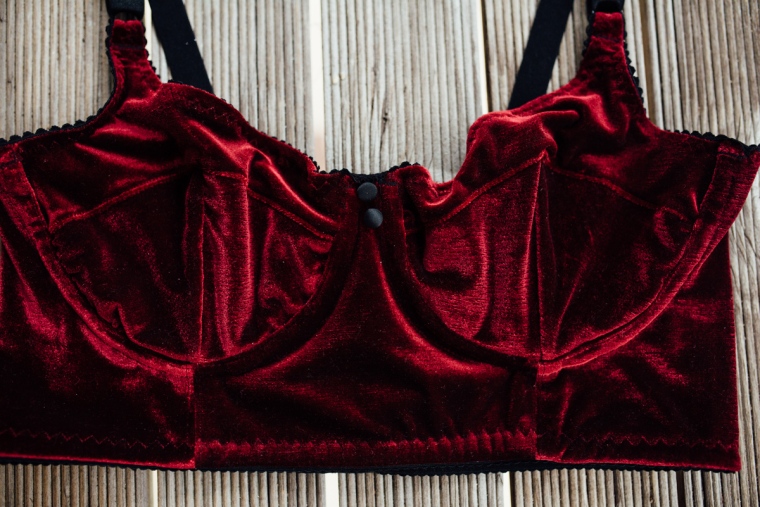
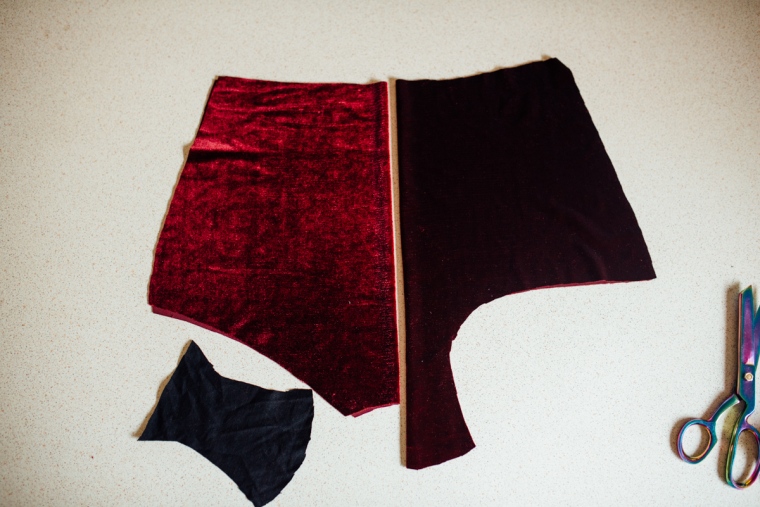
The velvet looks like two different fabrics. What a trickster. Gusset is black jersey.

web-1768

Picot gets sewn on the right side of the fabric, soft side up, picots facing towards knickers with a regular smallish zig zag, then flipped and attached again with a bigger three step zig zag. You can do it, I swear.

web-1779
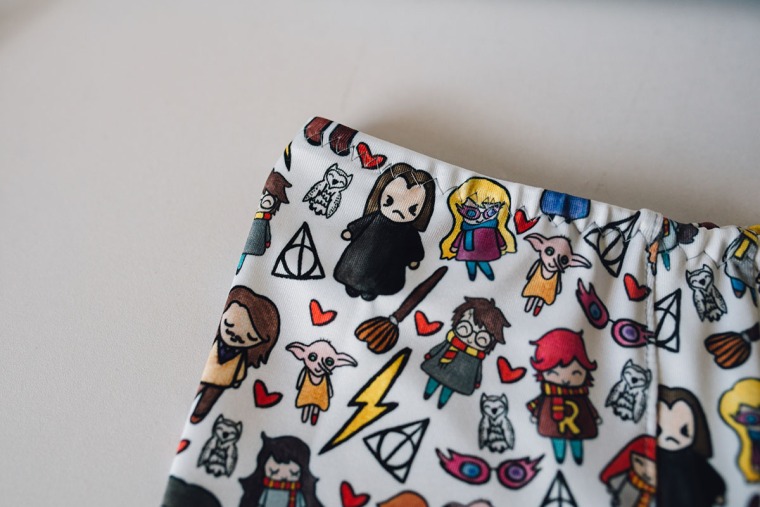
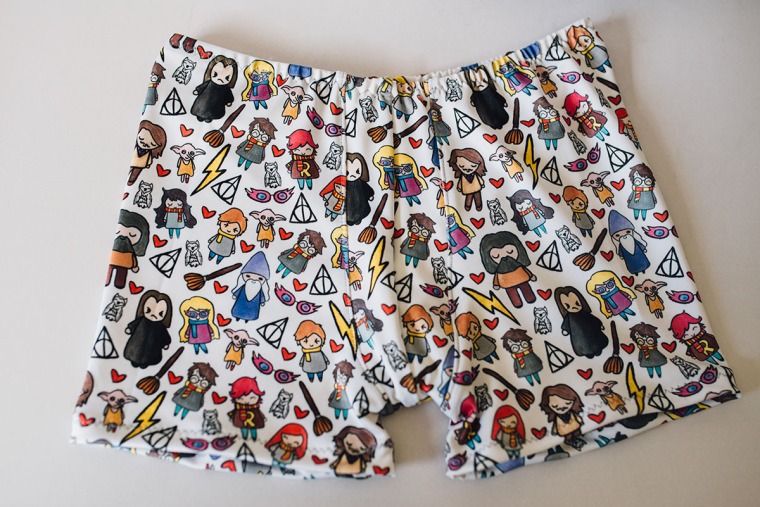
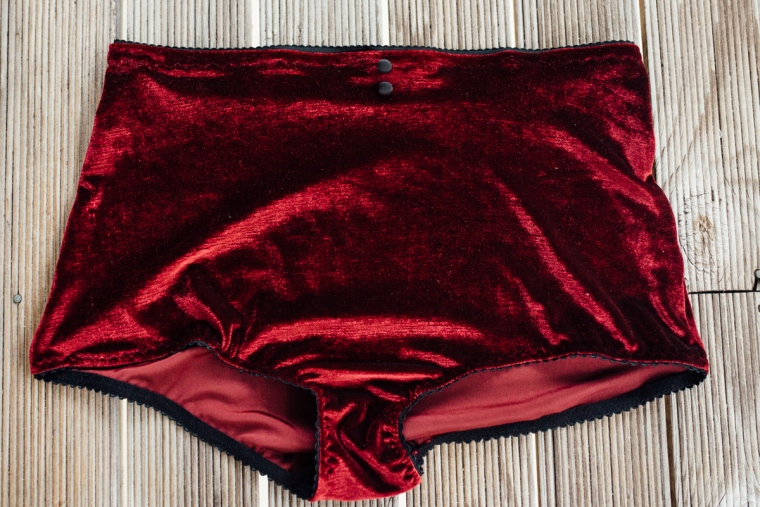
Hello pretty Avas. Finished in about 20 minutes, for real. Also, lingerie is a bugger to photograph flat. Much better on a body, but even I’m not going that far. Sorry.

Now to Cindy. I’m going to tell you a secret:

Bras aren’t that hard to make.

Don’t tell your non-sewing friends, they will seriously be so impressed to know you can sew a bra. Like mouth gaping floored. This Craftsy class taught me to sew bras. It’s amazing. You need it. Do it. I get absolute nothing from telling you that, by the way. It just changed my life and I’m not even kidding.

Alright, that said I put the Cindy bra together mostly by the instructions provided, but occasionally I veered off course and did it the way I learned in the Craftsy class. Because it makes sense. I think this is my sixth handmade bra, so I feel pretty comfortable with the process now. Cindy calls for more fold over elastic, but again I used picot elastic. This is the first time I’ve used the picot on the neckline and underarms of this particular pattern and I was concerned about it ending up a bit too low in the front, but it turned out absolutely fine and will be the way I finish it from now on. I love the three piece cup of this bra and the long line band helps smooth everything out too. What’s not to love about that, really. Since making bras with longer bands, I actually can’t stand wearing my RTW bras with the narrow back strap now. Something about it feels really uncomfortable.

web-1766
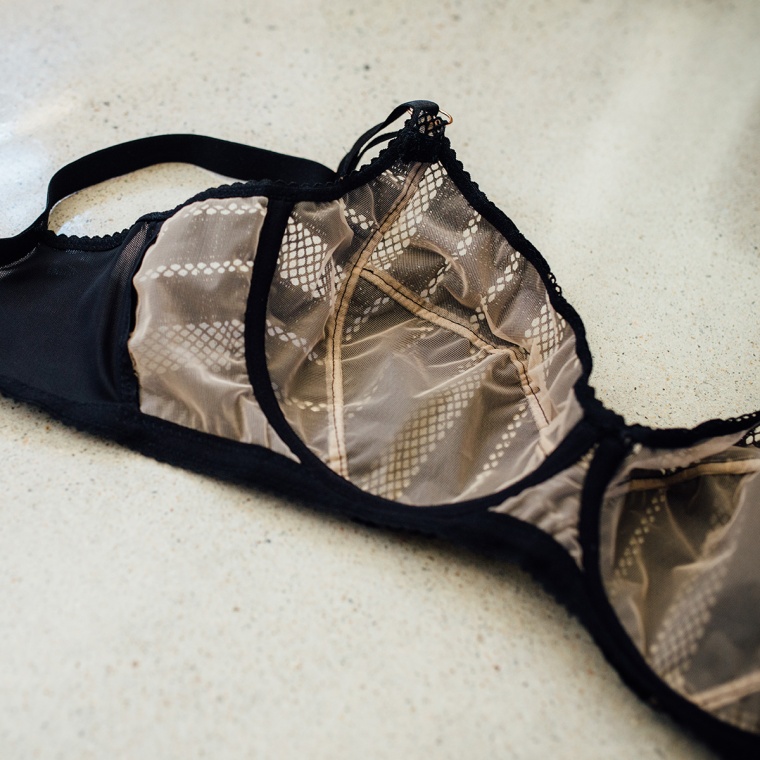
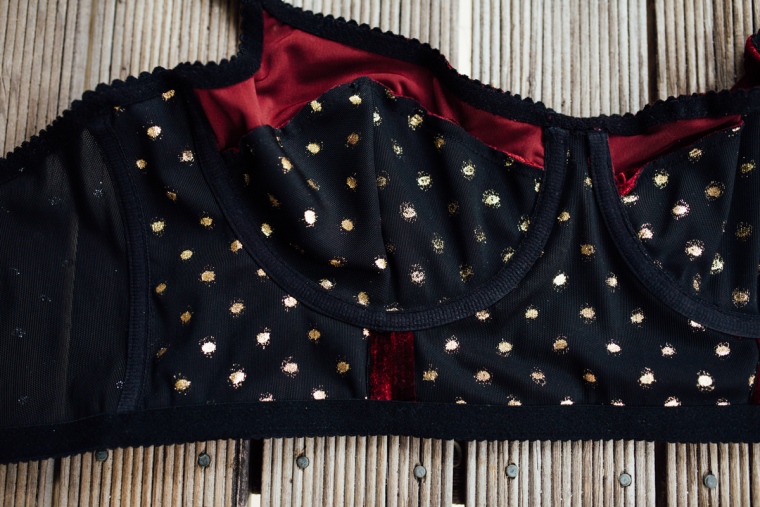
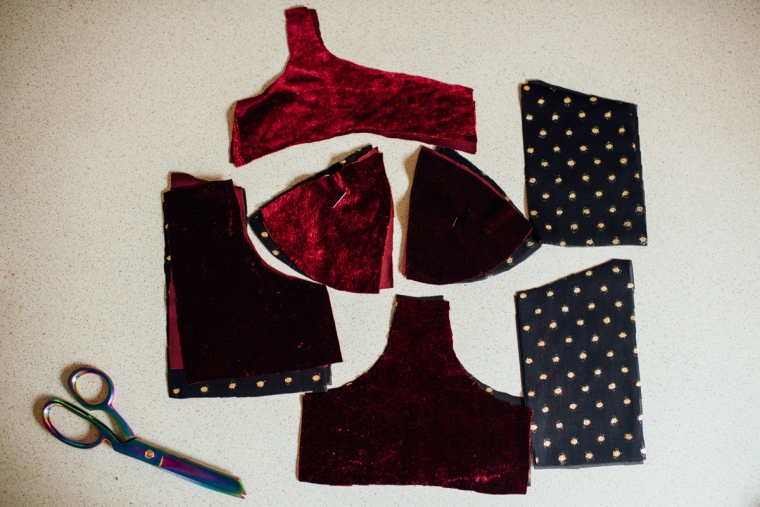
I decided to line this baby with powermesh because the stretch velvet needs the extra support. It felt like overkill, but I’m so glad I did it because it definitely wouldn’t have been wearable without it – the velvet just has too much give and I need the support. You’ll notice I didn’t line the top cup piece because I sort of forgot and then was too lazy to go back and cut more pieces. It’s fine as is really, but would have been better with the extra support. Next time.

web-1770
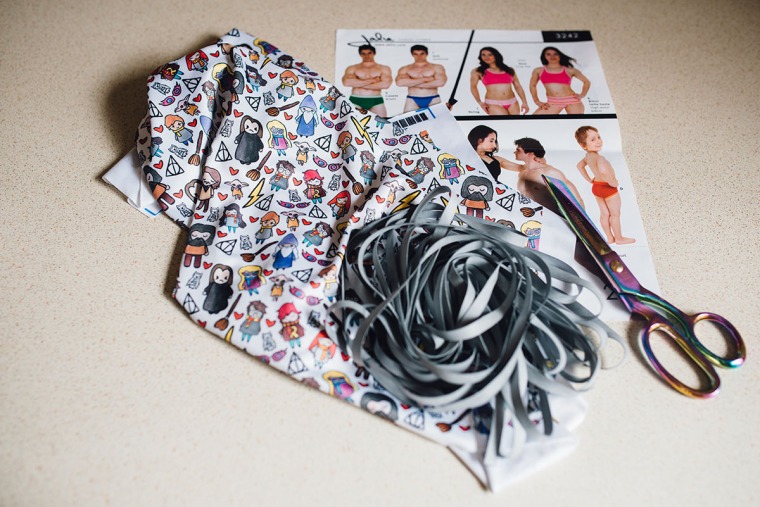
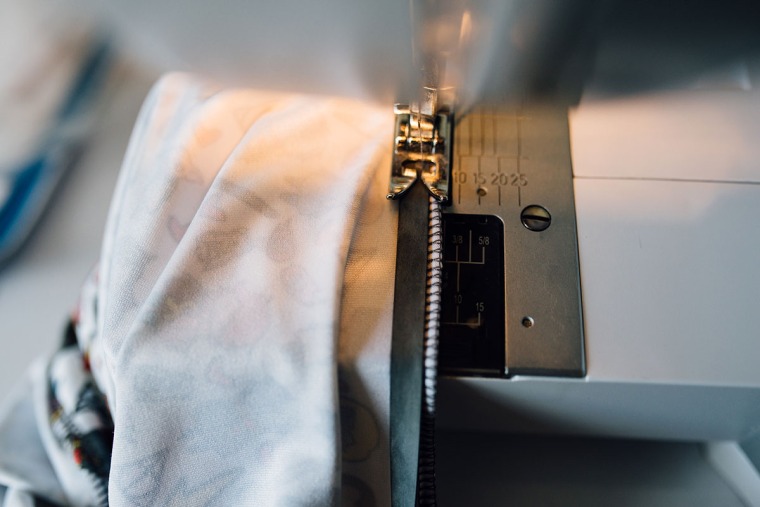
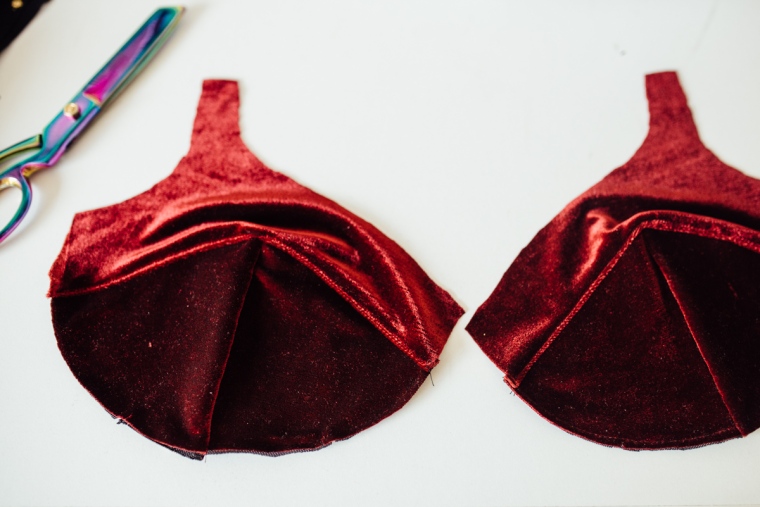
This bra has boning in it, which supports the band and stops it from rolling up when you’re wearing it. One of the comments I always get when I say I’ve sewn bras is ‘But with wire?!’ like it’s a really complex thing. But it’s honestly not. The boning and wire aren’t difficult at all. Even if you’re sewing a wireless bra, most will need the underwire casing in them anyway, as it covers the raw edges where the cups meet the band. Putting the actual wire and boning in is only another step.

web-1771
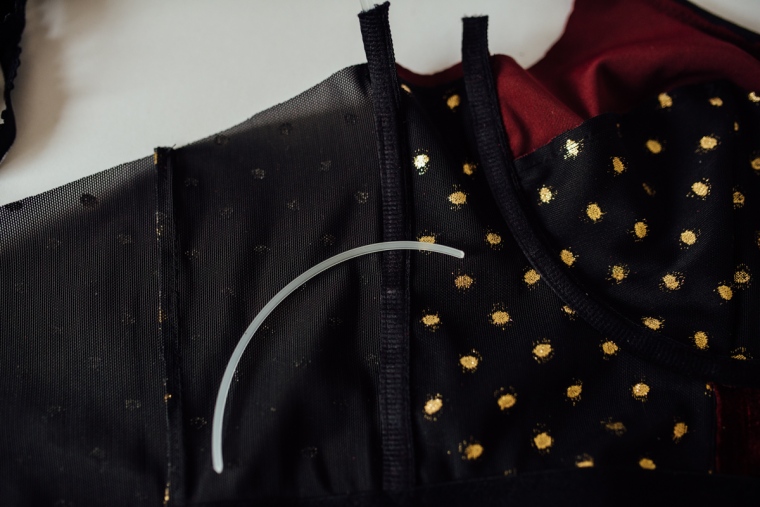
Boning. Just boring plastic stuff. Sounds way more hardcore than it is.

web-1773

Done. Look at the guts of this bra, isn’t it pretty? When I first started sewing, I would never worry about the insides of what I was making because pffffft, no one will ever see it. But now I’ve realised how good it makes me feel when the insides are as pretty as the outside.web-1780web-1781web-1782web-1783web-1785
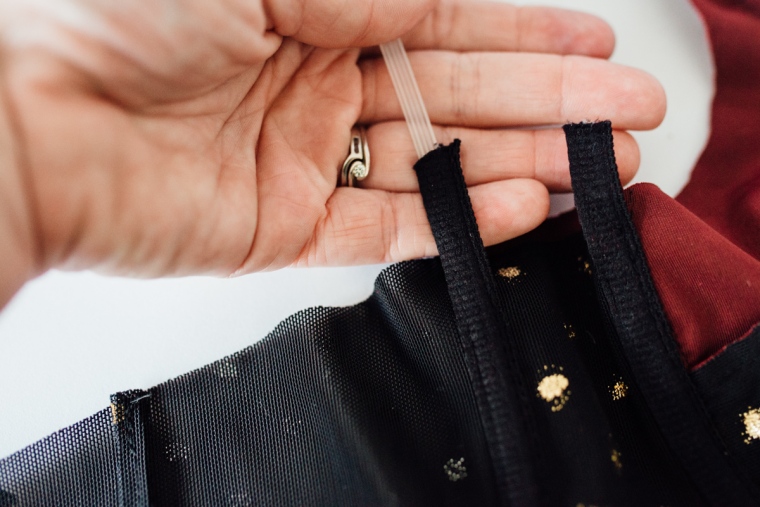
Fun fact: I had my first bra pattern stashed away for over a year because I was so intimidated by that thing I felt too scared to attempt it. Now I feel ridiculous. If you can sew a dress, you can sew a bra. I don’t even touch my over locker when I sew a bra. So if you want to, go for it. You got this, legends. A million bucks.

web-1786


Harry Potter and the Philosopher’s Swimming Jocks {Jalie 3242}.

In our house, there are shirts and swimming shirts, shorts and swimming shorts and of course, jocks and swimming jocks. Because when your youngest has a severe speech delay, communicating is done in the easiest, simplest way and sometimes those words stick. Swimming jocks are here to stay. At least 9 months of the year, we are around some body of water or another – be it river, ocean or pool, so the differentiation between regular jocks and swimming jocks becomes important. No one wants to hang out in damp jersey.

blogDSC_7902

OLYMPUS DIGITAL CAMERA

OLYMPUS DIGITAL CAMERA

Jalie 3242 is a pretty kick arse pattern. It has a variety of styles for the whole family on the one pattern. Perfect. I’ve made the knickers for me, the briefs for the men of the house but by far the favourite are the boys’ trunks. They are such a quick sew, the only elastic is the waistband and there is no butt seam – that has to be comfy, right? Regardless, they are loved. I’m sure in a few years homemade jocks will be unacceptable, but for now they’re awesome.

Last summer, I decided the Jalie trunks would be alright as swimmers. And if they looked too much like underwear, the boys could just wear them under boardshorts (aka swimming shorts), so no biggy. I grabbed the only spandex I had at the time, which was sourced from a local Op Shop so I had no idea if it was even chlorine resistant. But I figured we are barely in chlorine anyway (our pool is salt) and it wasn’t a big deal if they fell apart. So I made these cool little red and white striped trunks for the boys and they wore them all summer and they held up really well. They are still tucked away in a drawer actually, although they’ve probably grown out of them by now. So I decided to make more for this summer, but this time I decided to do it all proper like and bought Sports Lycra from Spoonflower in the coolest ever Harry Potter print. I also bought legit swim elastic. Today I dragged out my old faithful Jalie pattern and had those suckers made within an hour. So satisfying.

webDSC_1502webDSC_1504

There’s only one piece for the body of the trunks and four little pouch pieces. It’s a bit of a different sew, and this tutorial is the bees knees because to be honest, the Jalie instructions are a little lacking. But once you’ve done that bit, it’s all really straight forward.

webDSC_1505webDSC_1506

The pattern uses an exposed elastic waistband, which obviously isn’t ideal for swimmers, so I just added a bit more height to the pattern to compensate for the folding of the waist with swim elastic. I finished the raw edges, marked the elastic and waist of the trunks at quarters and attached with a zig zag stitch. Then folded it over and zig zagged again.

webDSC_1507webDSC_1508webDSC_1510webDSC_1511

webDSC_1512

webDSC_1517webDSC_1523