I was given this pattern in exchange for a review. Just in case that’s not clear below.
You lot know how I am about swimmers, right? The same way I am about sewing underwear. I love it. It’s hard to explain, but there’s something very satisfying about those little seam allowances and stretching that elastic so it’s juuuuust right. Or maybe it’s because I don’t have to try them on my size 14 dimpled and pale body in little change rooms under fluro lights anymore. Or maybe it’s because they are not traditionally ‘home-sewn’ things and when people ask where you got your rad swimmers and you say you made them, their minds get a little bit blown. Plus they are fast to sew.
Now, for the most part my swimmers are based on underwear patterns because there aren’t a heap around that tickled my fancy. In fact, some of my faves are based on Megan Nielsen’s Rowan bodysuit pattern. So when lovely Anita from Megan Nielsen got in contact and asked if I’d like to review one of the new patterns, I was keen. Super keen. But I had a lot on my plate, so I tried to be a responsible adult and decline the offer. Anita told me that was totally cool, gave me a later deadline and flicked me the Cottesloe pattern anyway, just in case I could make it work.
WELL. Curiosity got the better of me and I opened the files to have a look. One thing lead to another and here we are. I couldn’t resist. It was the simple swimwear pattern I’d been looking for. I knew it wouldn’t take long to make and I was super keen to give it ago. In fact, I managed to bash out two pairs in one afternoon.
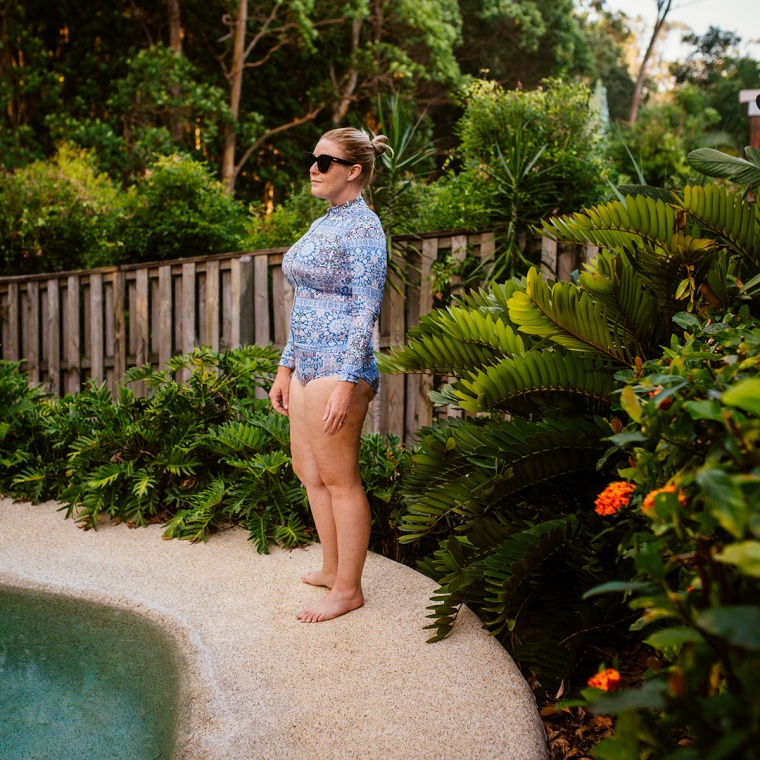
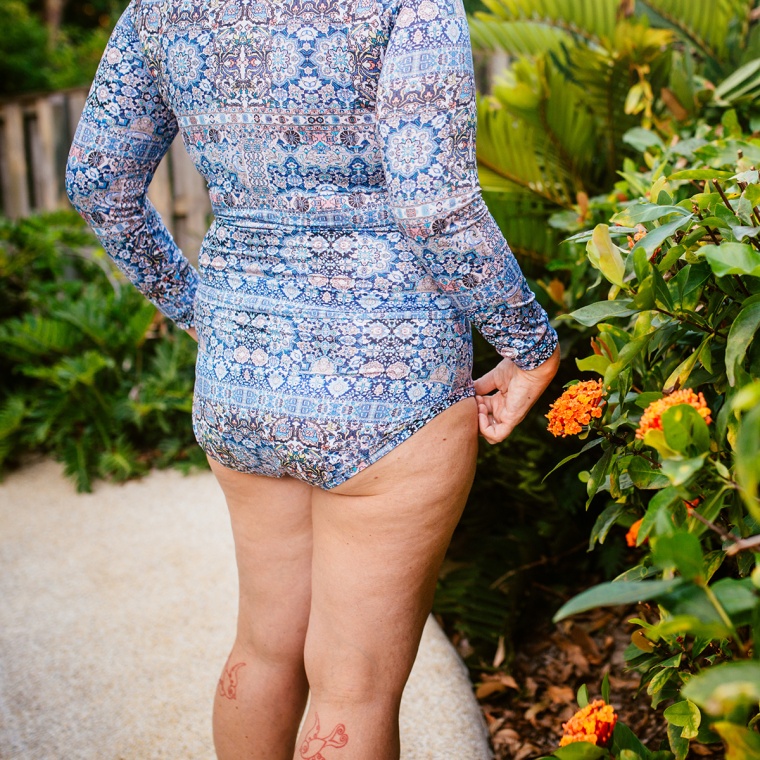
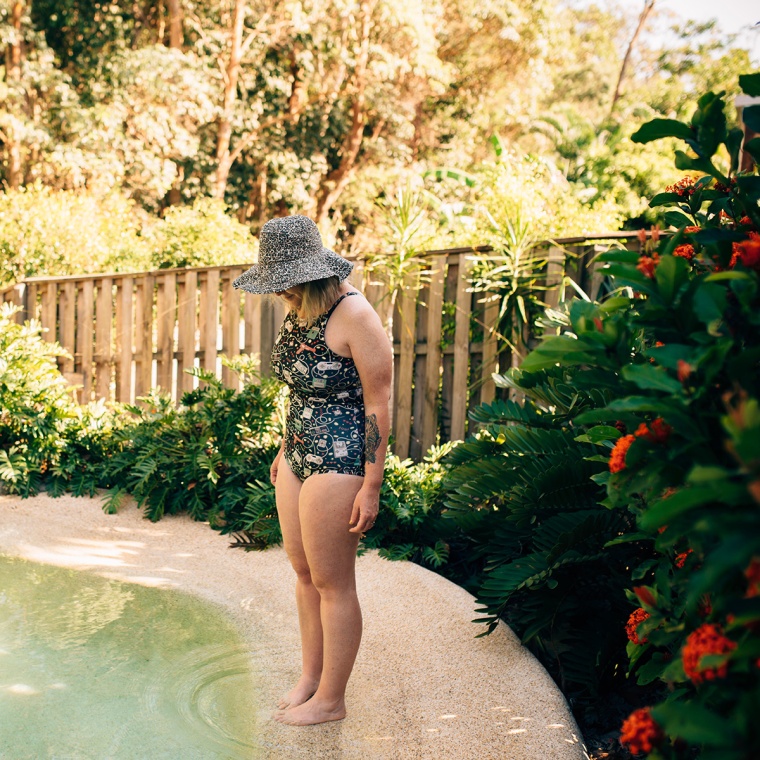
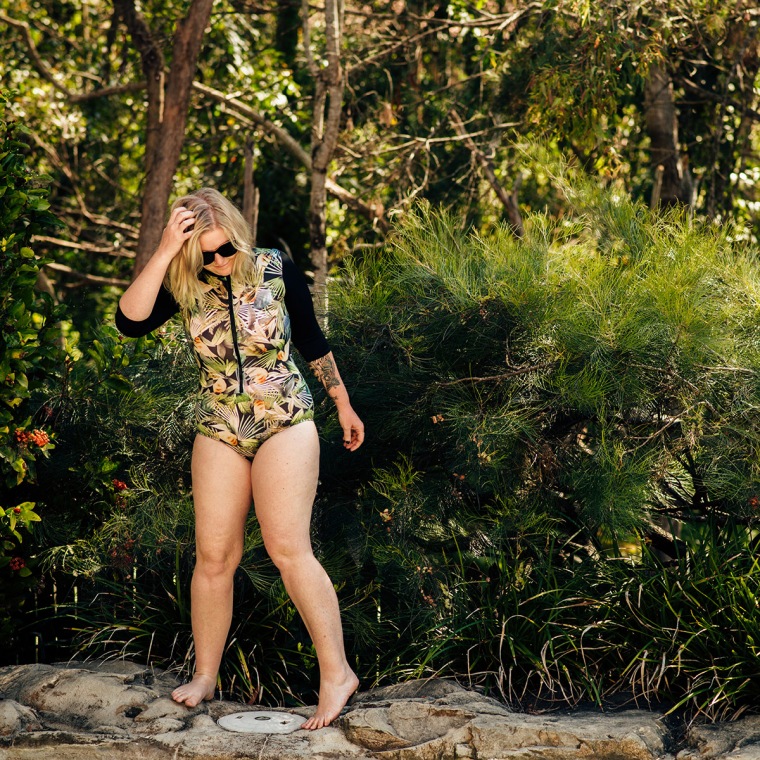
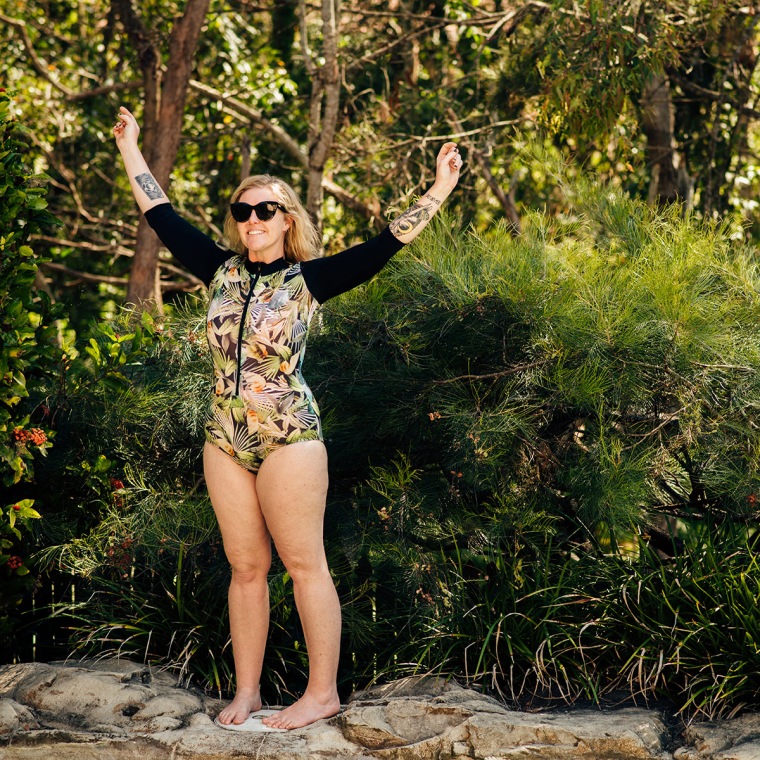
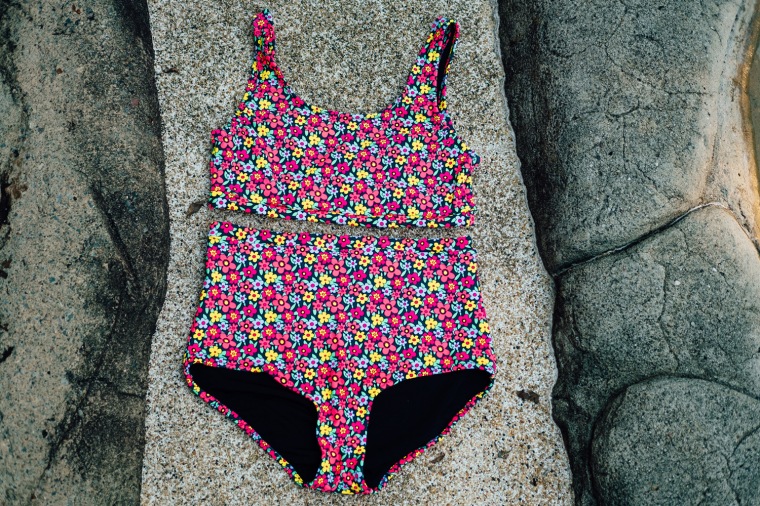
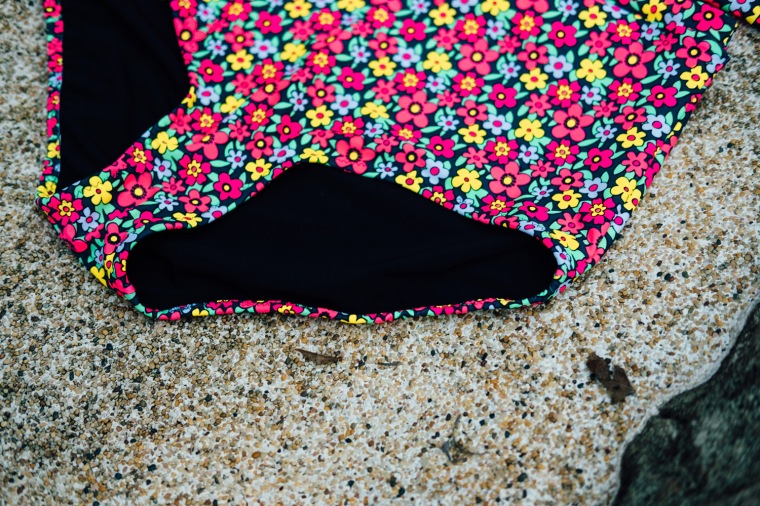
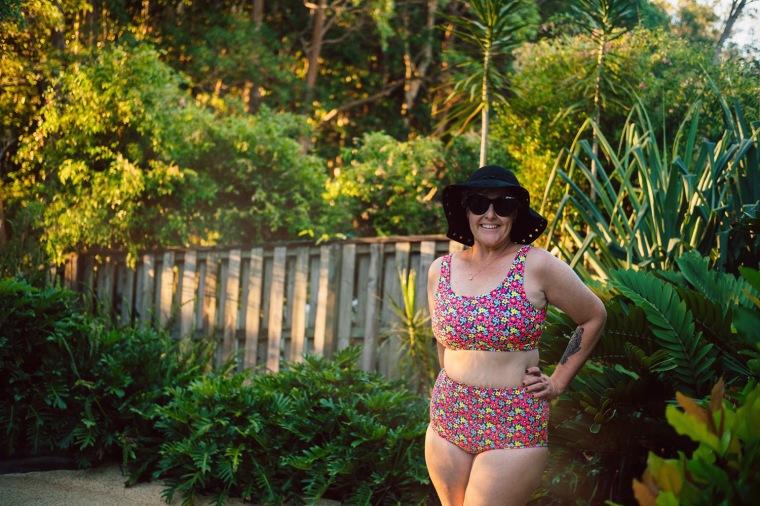
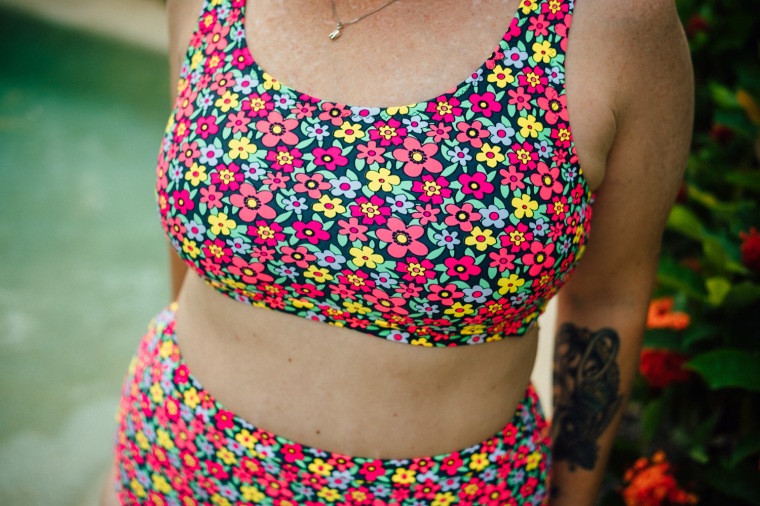
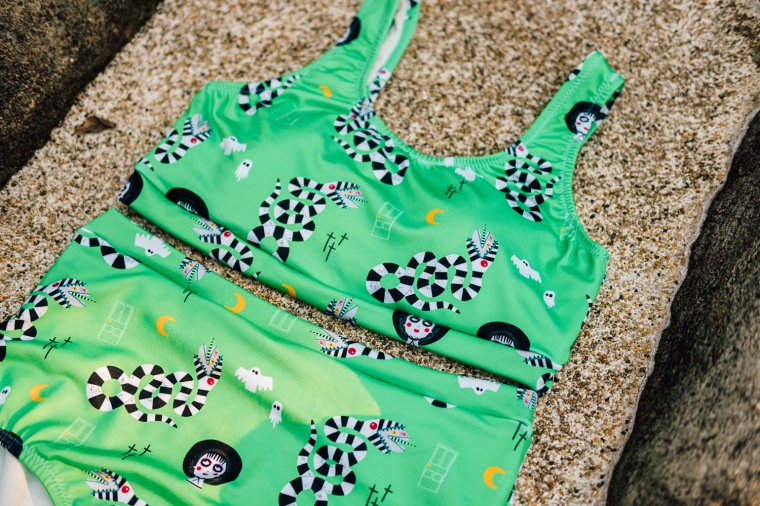
This floral version was my toile. I made the straight size 14, from the standard 0-20 pattern (my measurements put me in between the 14-16). The fabric was given to me quite some time ago, but is quite possibly from Boo Spandex and I’ve lined it with lightweight black swim spandex (as opposed to lining, it’s nicer to work with and a bit more supportive). That’s it. No changes, all very simple and the fit is pretty close to spot on. It’s got a surprising amount of support (no foam cups in this version) and the fit is better than I expected – especially since there are no bust seams for shape. For reference, I’m somewhere in the vicinity of a 38DD.
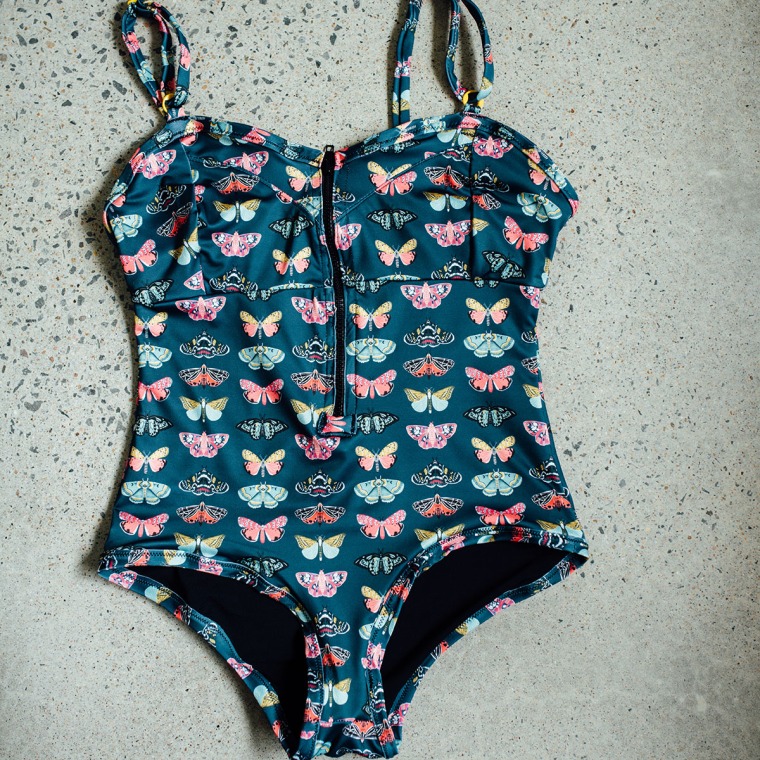
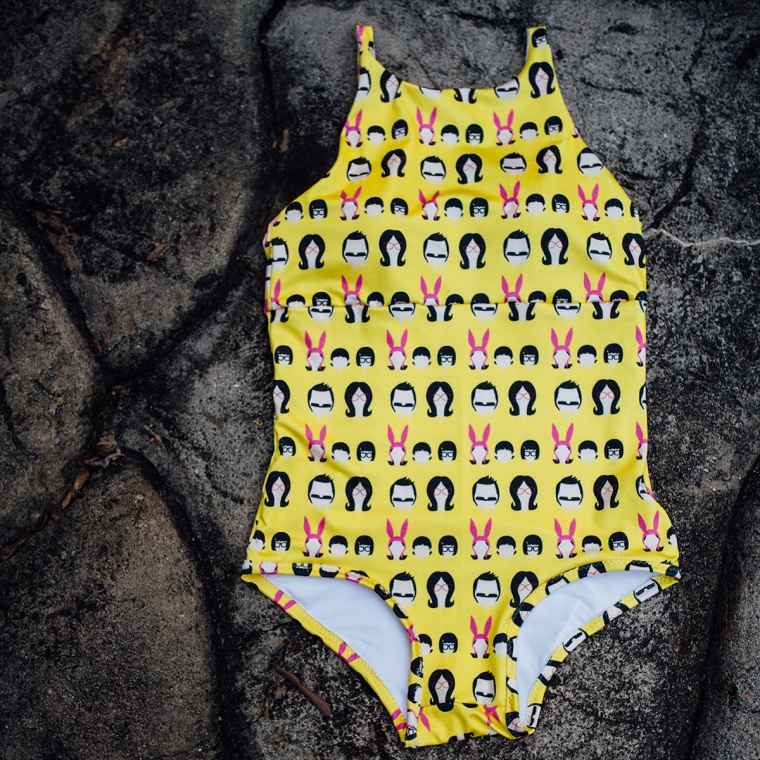
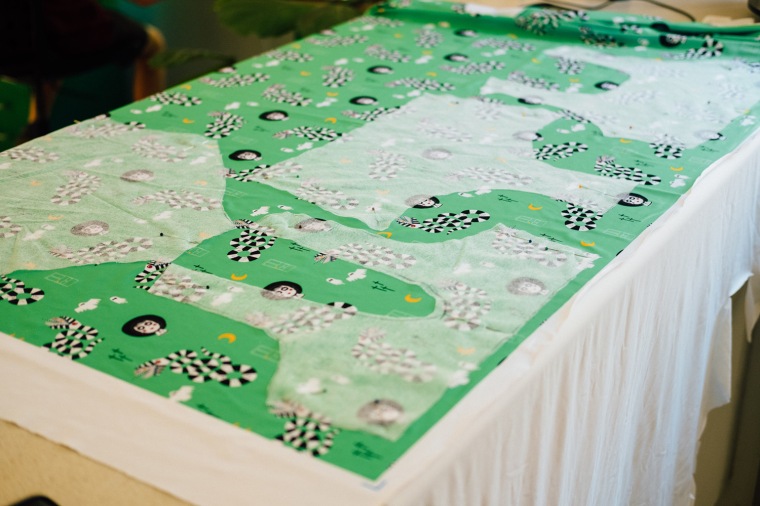
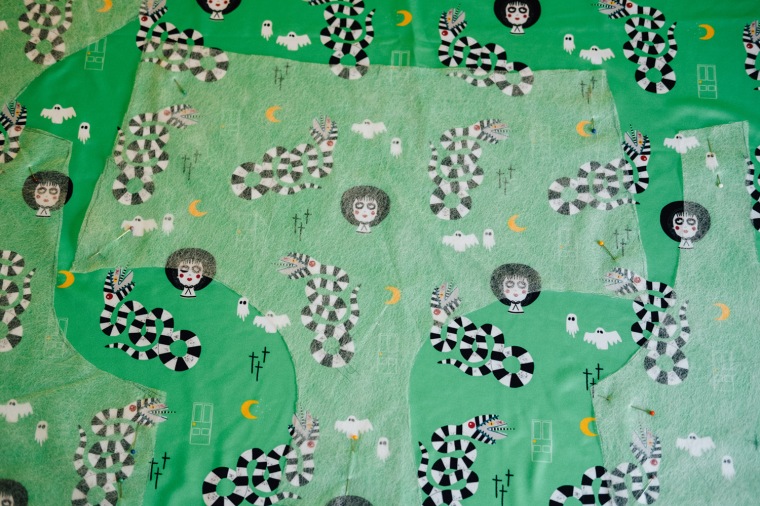
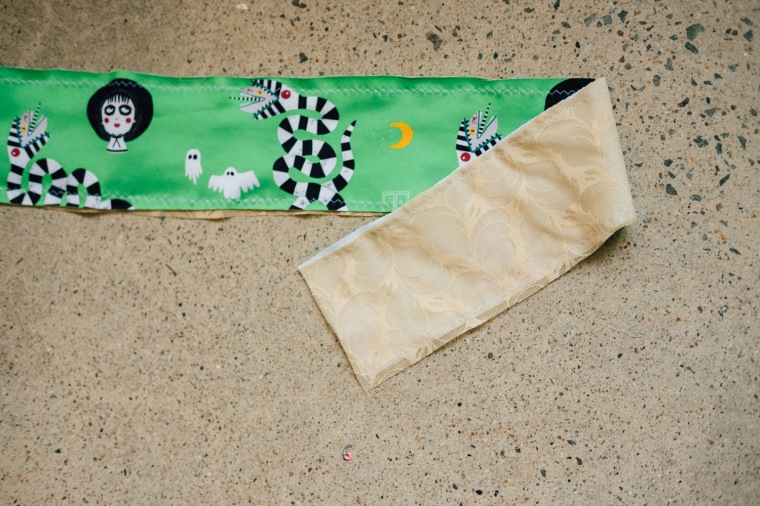
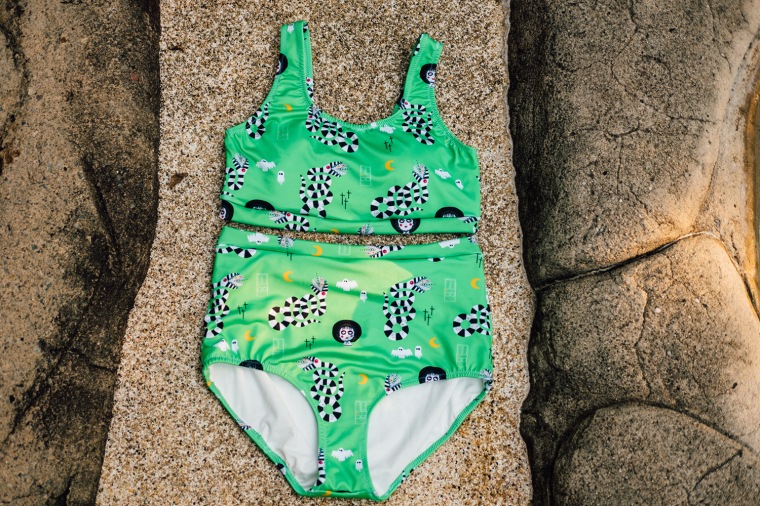
With my very wearable toile complete, I moved on to my good fabric. Spoonflower sport lycra in a Beetlejuice themed print I designed. I’d been holding out for the right project and this was it – no seams to cut into those sandworms. Here I’ve got my lining (again, lightweight swim fabric) underneath and my fabric on top so I can cut them out together. Did I mention I love that nothing is cut on the fold? More accurate when working with knits like this, for sure. Plus, you can check how the print is placed.
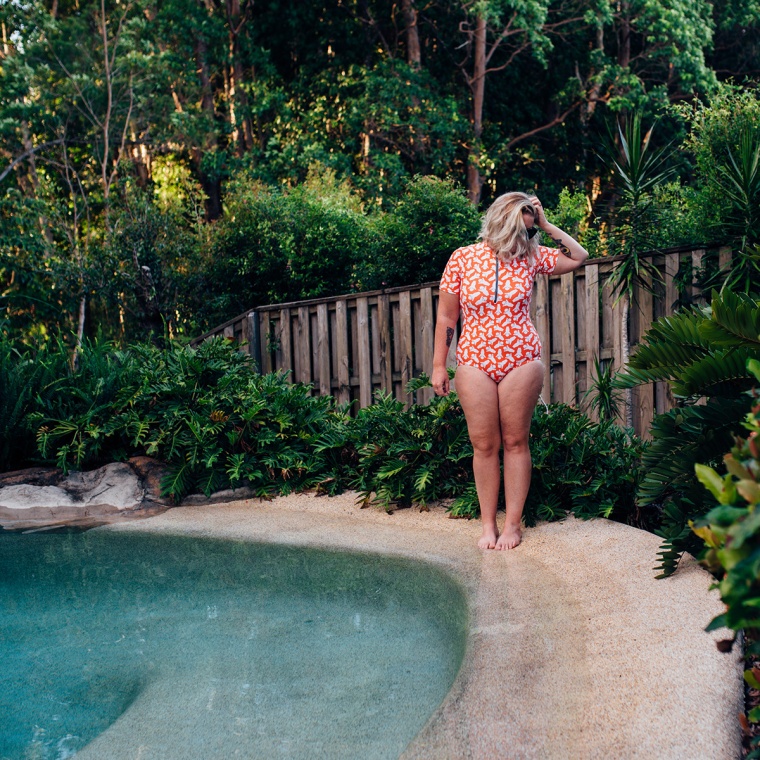
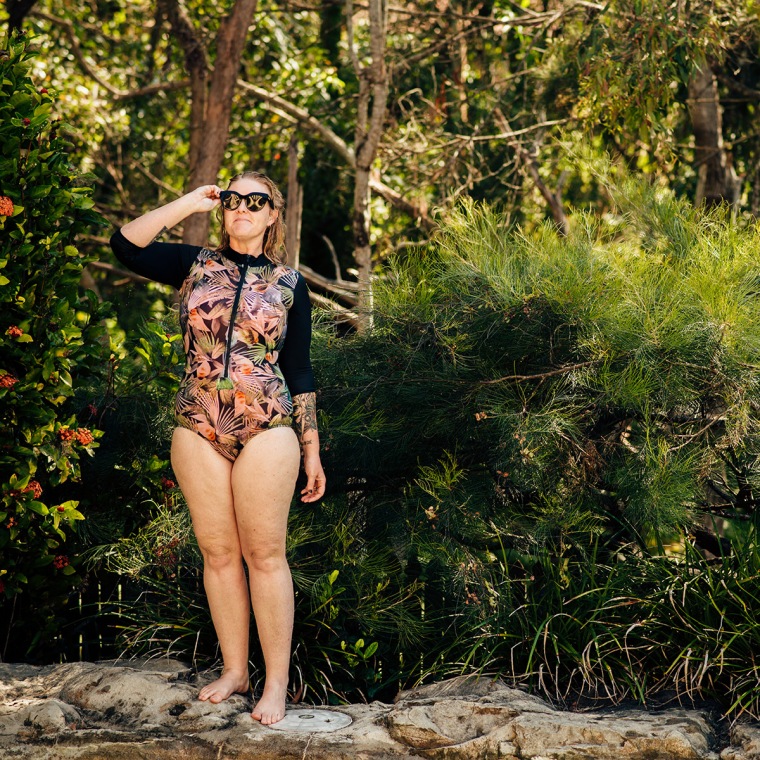
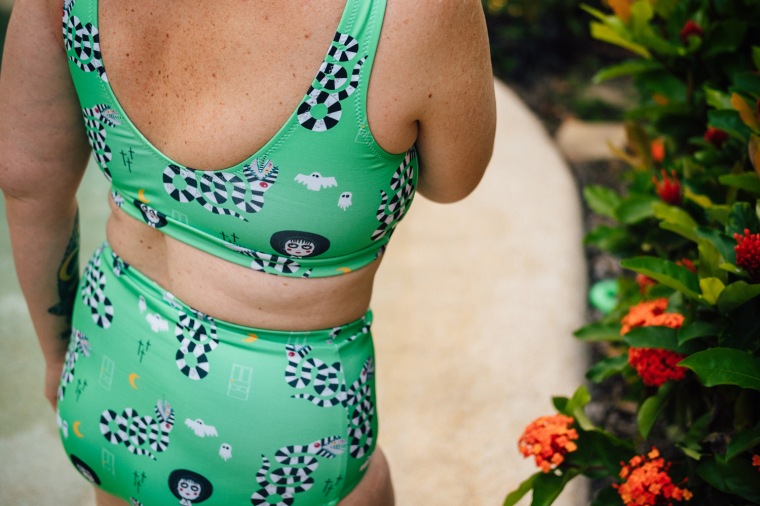
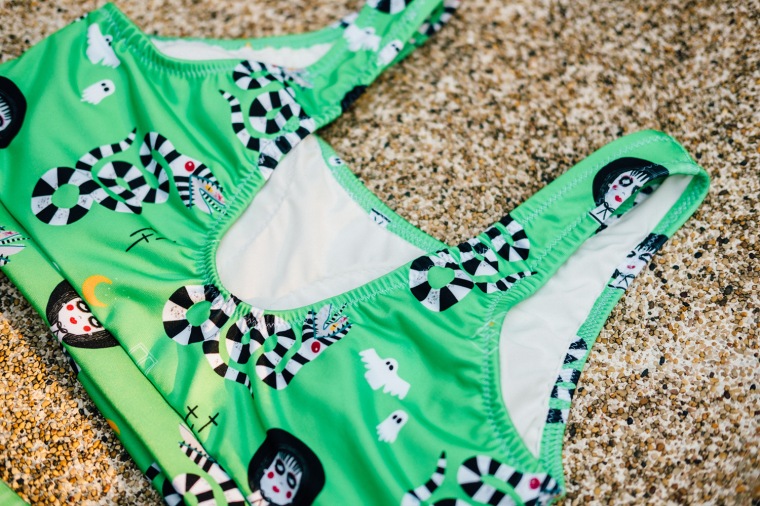
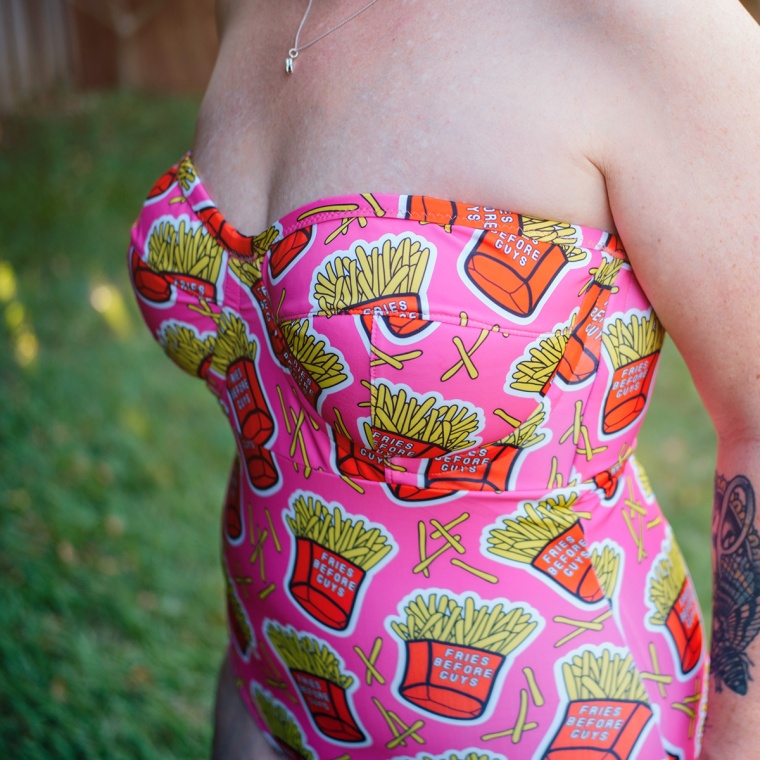
One slight change I wanted to make was to move the back straps more toward the centre back. This is a common adjustment for me. I literally chopped the straps off the pattern piece just above the armpit curve, moved them about 2cms in towards the centre back and then redrew the curves. I’m not sure if that’s technically correct, but it worked well. You can barely see a difference in the images above, but I can definitely feel the difference when they are on.
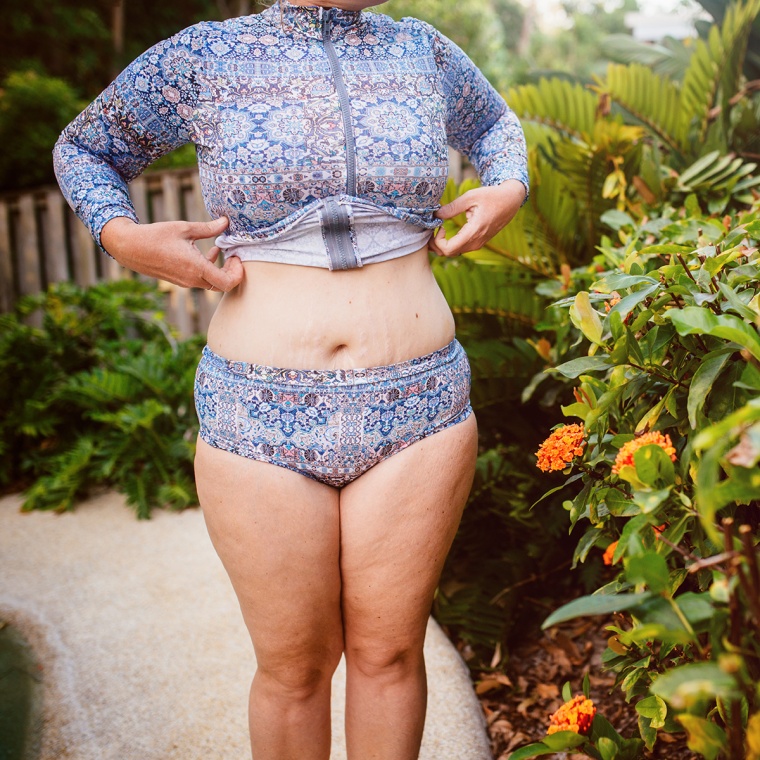
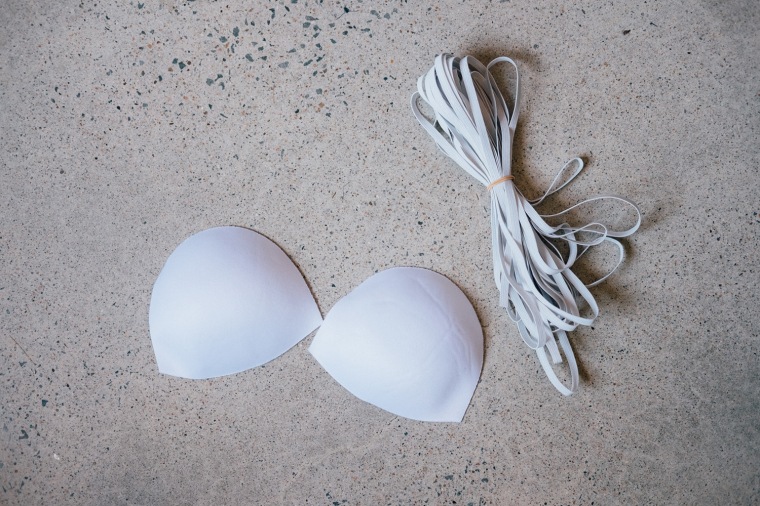
I added foam cups to my second version to see if there was much of a difference in support. There is a little bit of a difference, but not a huge amount. I didn’t find my first version unsupportive though. The foam does give you slightly less stretch across the front too. Not enough for it to be a problem for me, but maybe something to keep in mind.
I ran out of wider swim elastic for my second version, so lined the band with powermesh instead. It worked very well.
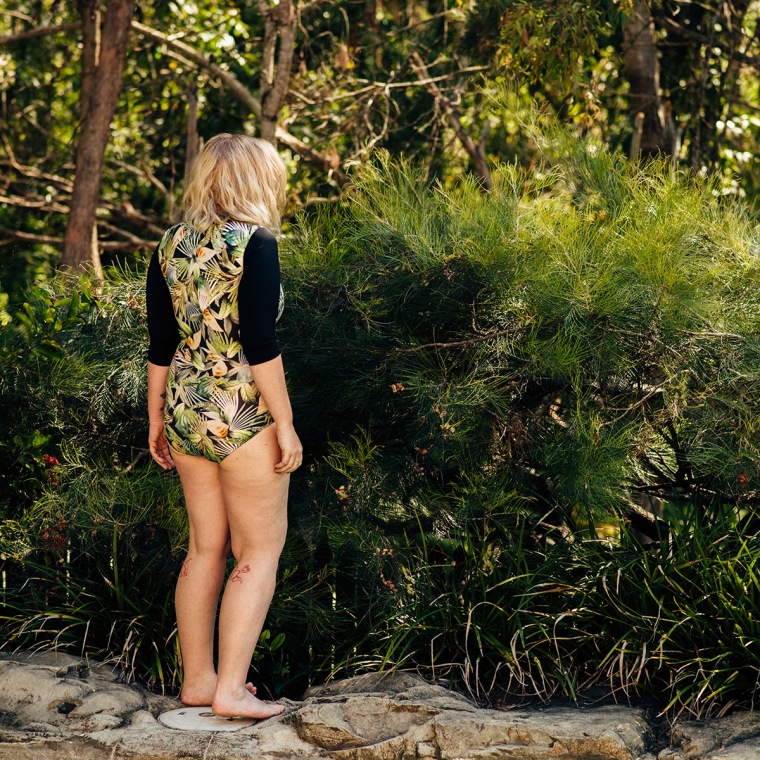
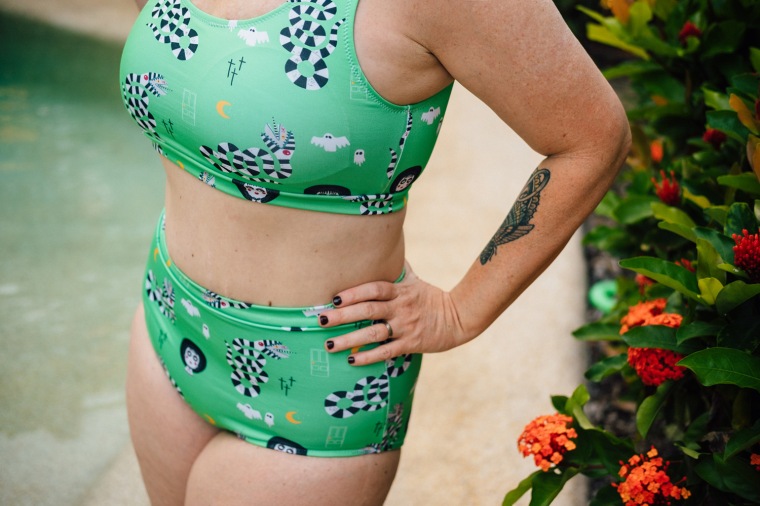
You can see the scoop of the back is more pronounced since I moved the straps across.
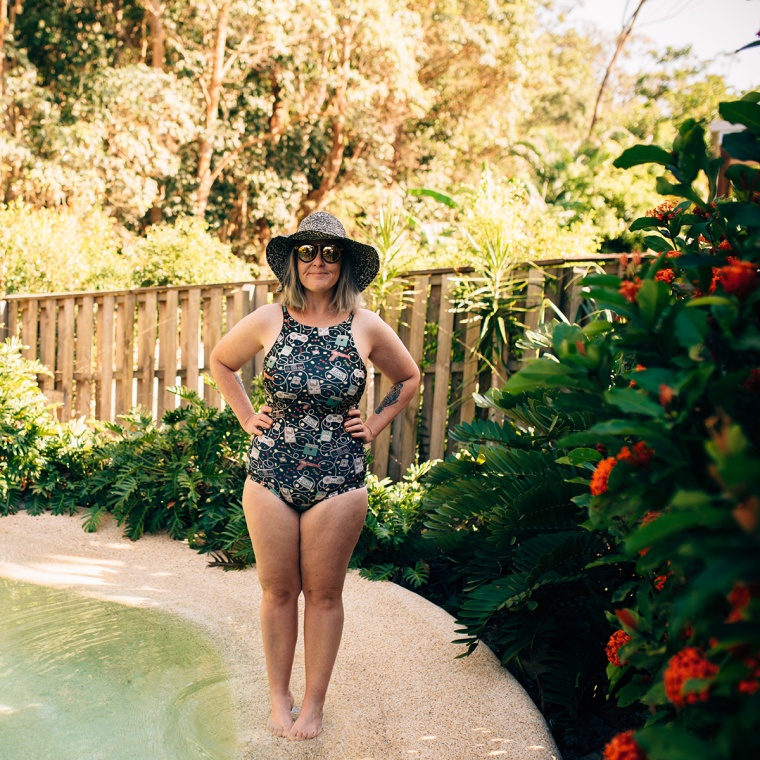
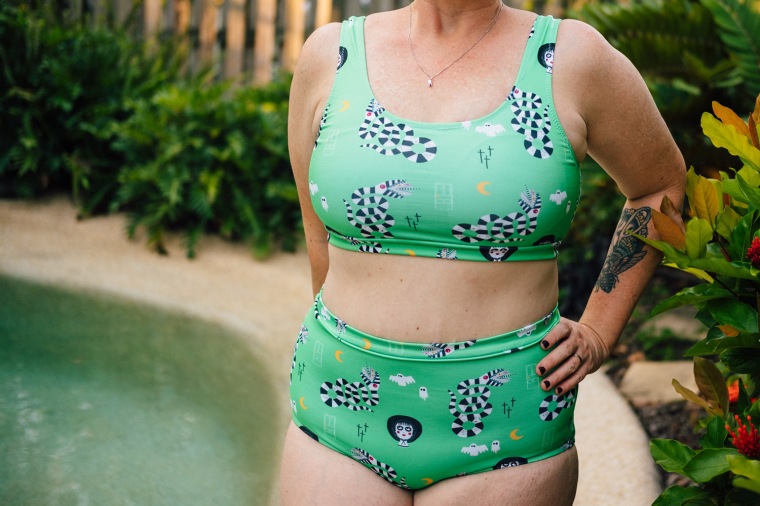
This is a simple, fast sew and a great introduction to sewing swimwear. As always, Megan Nielsen’s patterns are well drafted with excellent instructions. She’s recently extended her sizing, so these go up to a size 30, which is bloody brilliant.
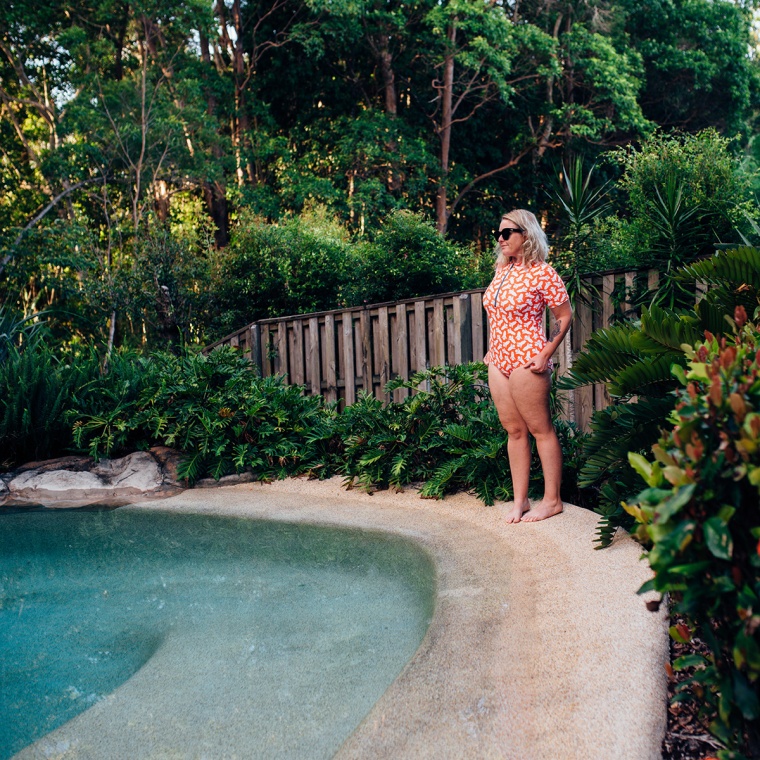
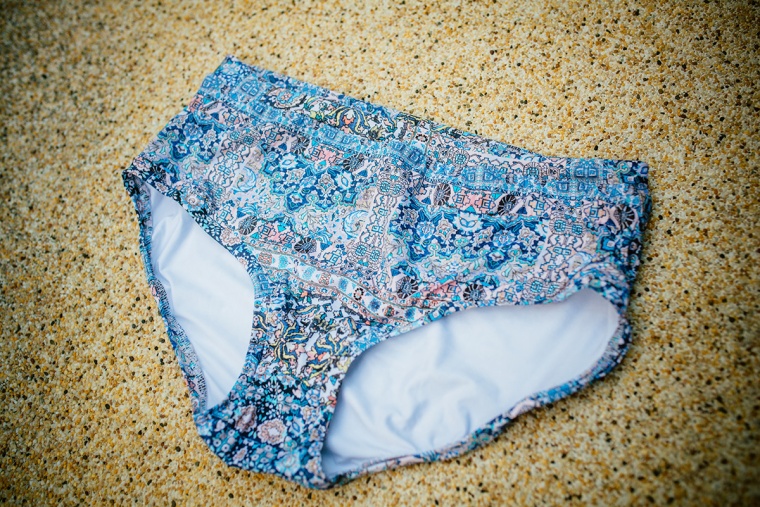
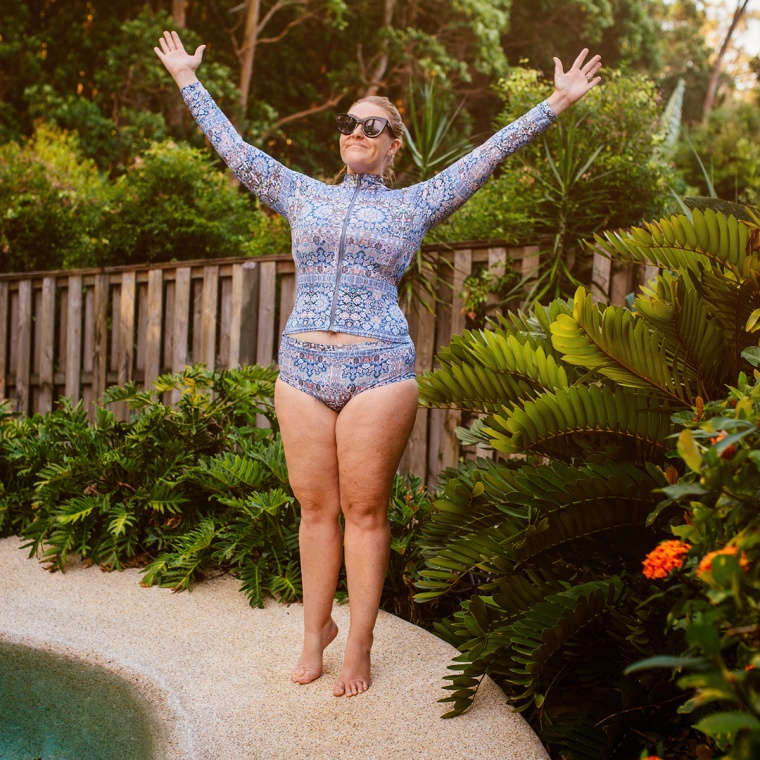
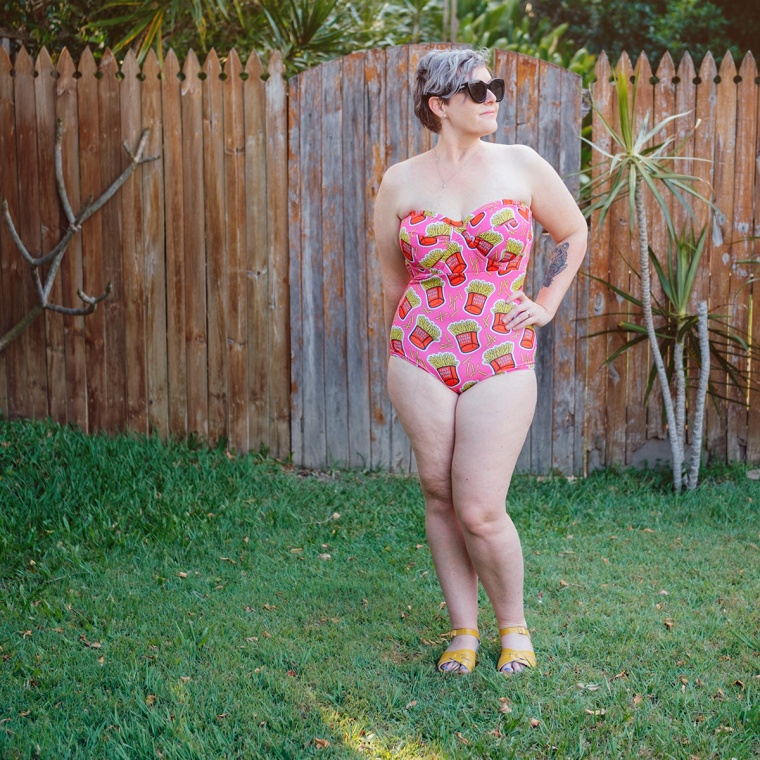
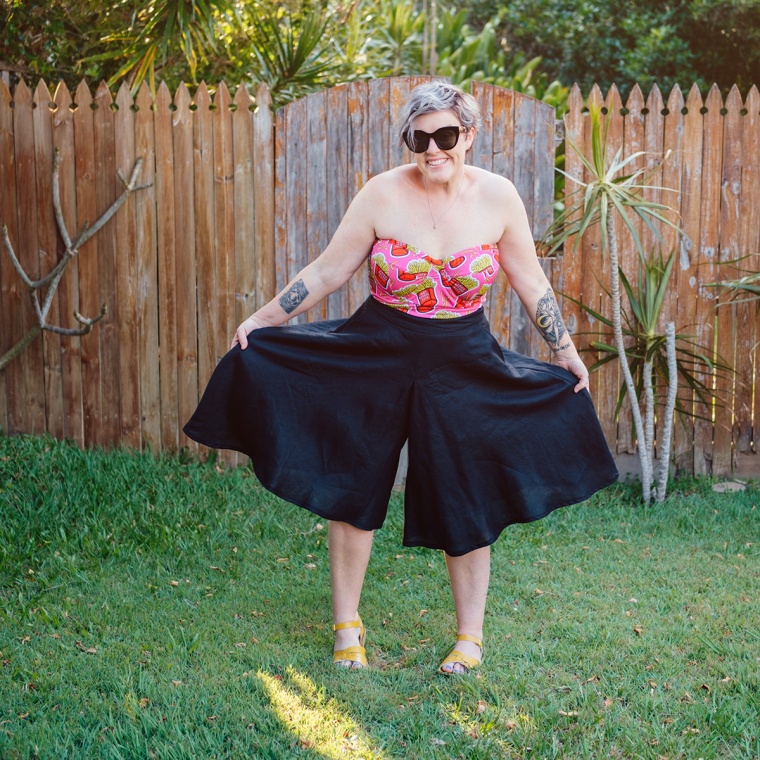
I love the high waisted bottoms and am impressed with the amount of support I get from the top. A top in this style is always going to provide more compression than shape, but I think it’s one that will suit a variety of sizes. When summer comes around again, I’ll definitely give the one piece a go too.
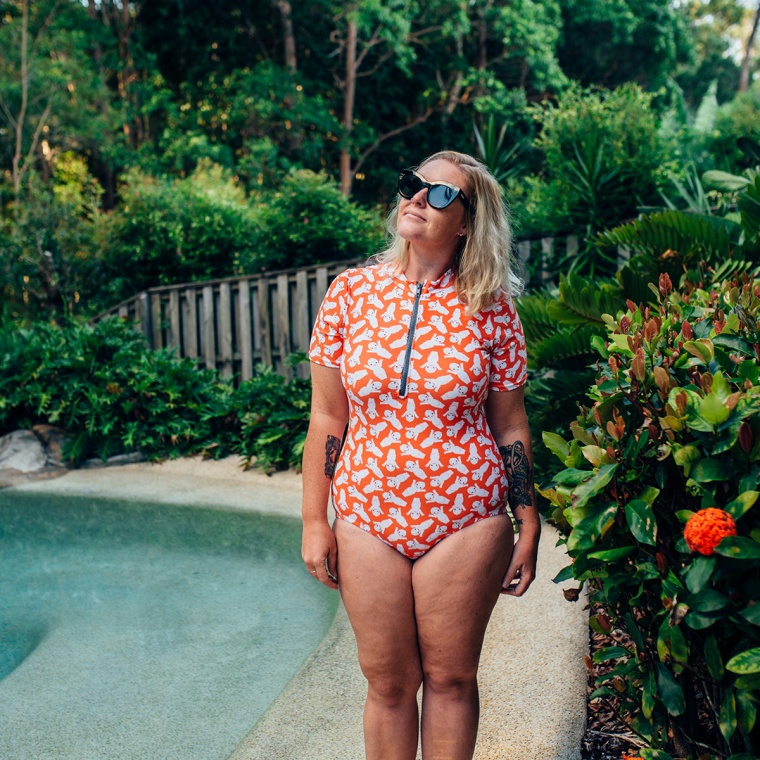
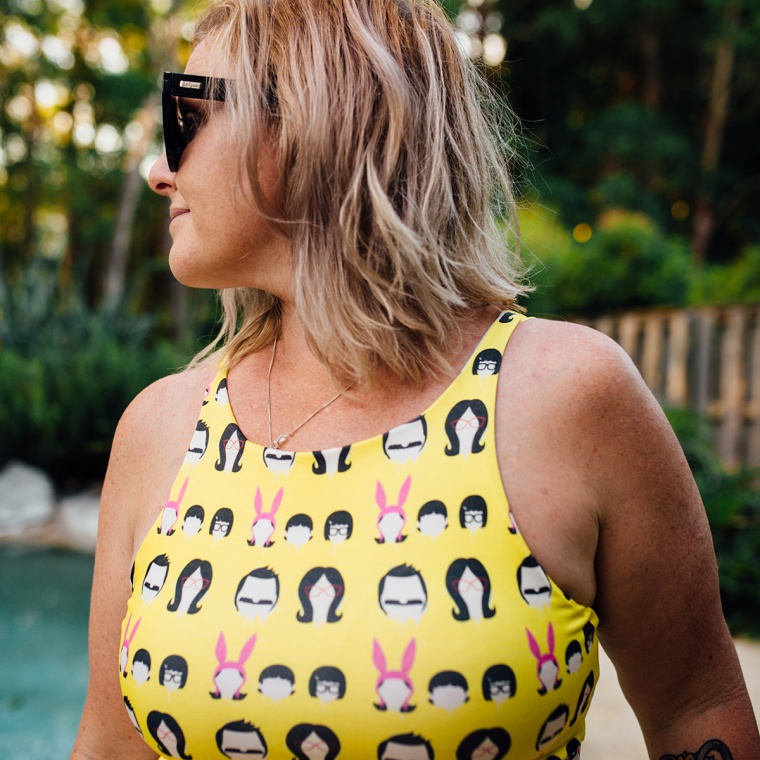
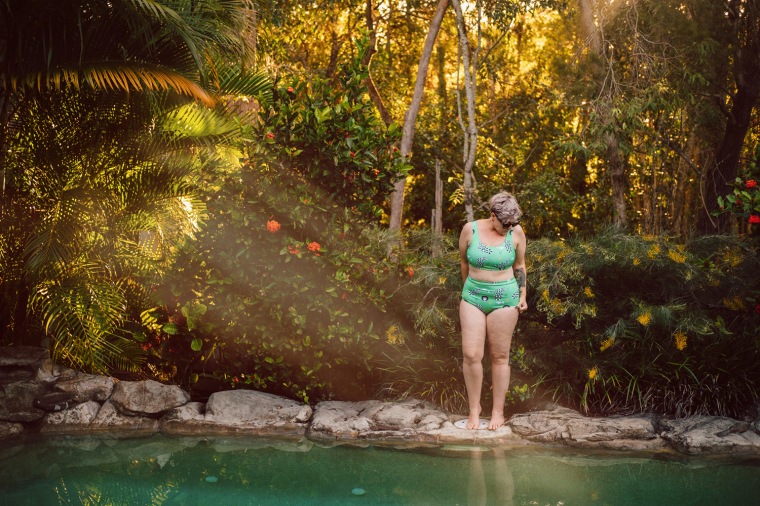
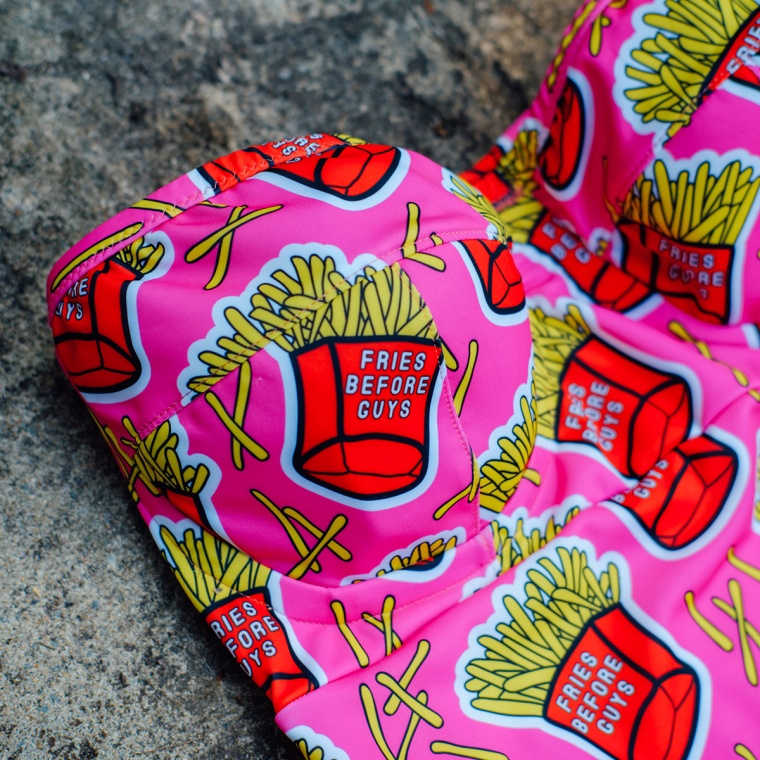
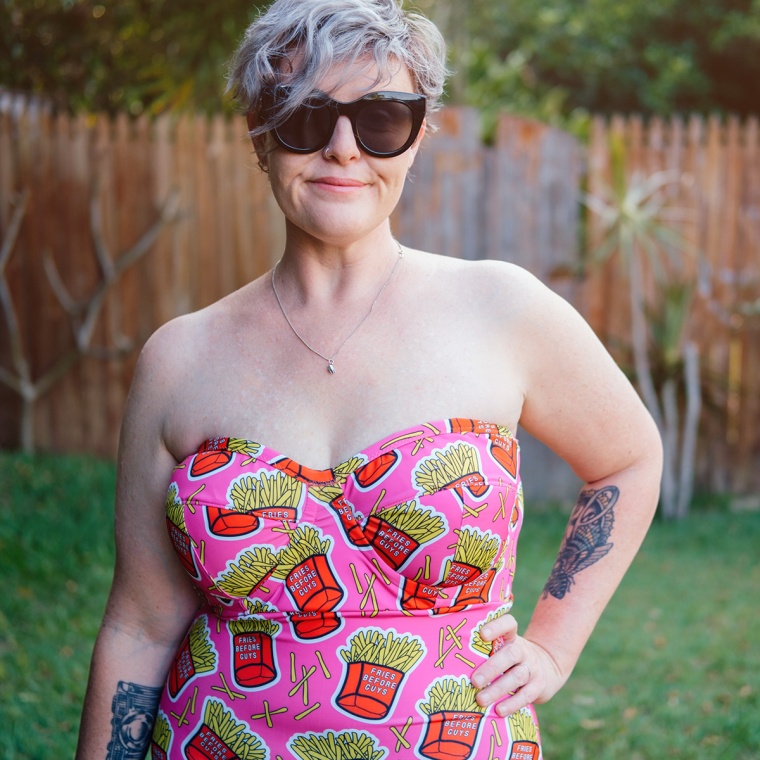
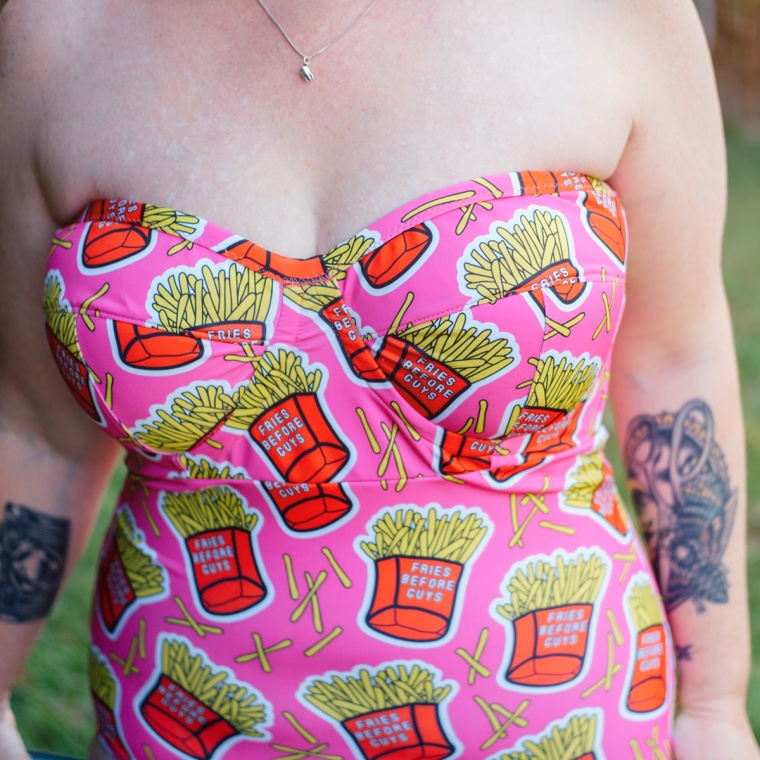
Look, I’m a bit of a fraud because my body tends to reject chips (fries, chips to us here in Australia), even though I love their crispy, carby, salty goodness. Most of the time my skin is like ‘nah, we aren’t about those anymore. Have some acne for your attempt, though’. Who could resist this print though? It’s a bloody winner.
I know you want to know where the fabric is from and what the pattern is, but you’re going to hate me for it. The fabric (which is swim) was a pre order from Indie Skye fabrics and I don’t tend to go for pre orders because I’m damn impatient and hate waiting longer for my fabric than is entirely necessary. But I decided this fabric was worth waiting for. The lining is lightweight swim spandex from The Remnant Warehouse because it has a bit more body than regular old swim lining. And it’s nicer to sew.
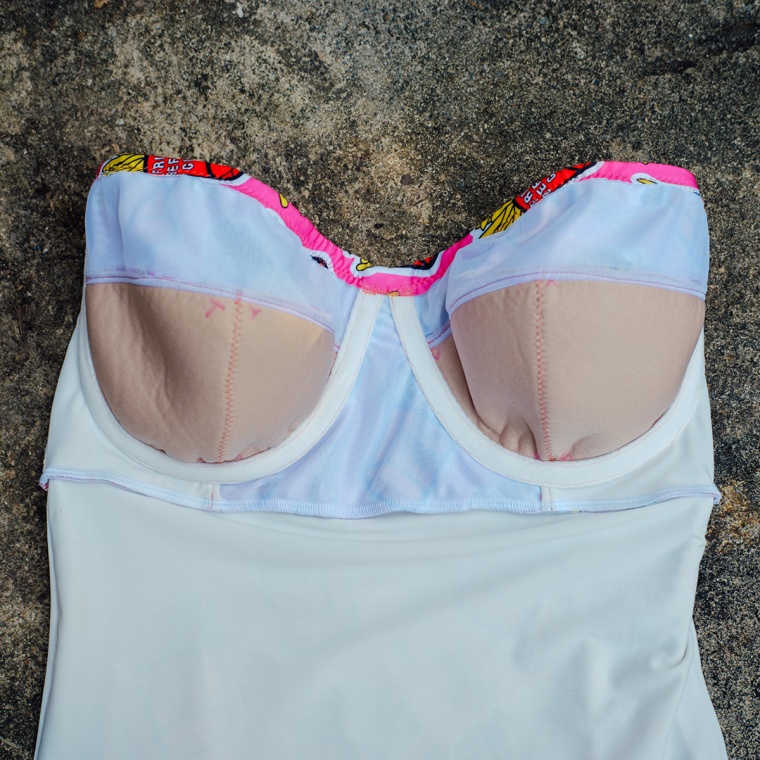
What else? Well there’s some foam (complete with my markings still, please ignore. But it is good to mark all the points on your cups so you don’t sew them around the wrong way, they look very similar) from Sew Squirrel, underwire casing, underwires, swim elastic (all from The Remnant Warehouse also, from memory) and some sheer cup lining for the upper cups and bridge (pretty much because I wanted those pieces to stay stable and maintain their shape). Also there’s some boning in the side seams of the bra portion, which is just cable ties cut down.
Pattern, well bear with me for that one. The lower portion is Megan Nielsen’s Rowan bodysuit. If you’ve read posts on my one pieces before, you’ll know I’ve used this many, many times. I like the fit. Obviously I line it, eliminate the crotch snap part of it and bind or band the legs, but you could use swim elastic and fold over too. I have big legs, I don’t really need the elastic to pull everything in. I just use good old zig zag because I don’t have a coverstitch machine, I hate twin needling and even though it’s very Becky Home Ecky, if someone on the beach is judging my zig zag, that’s their problem. Because they’d have to be in my lap to see it and that would be weird. You know they aren’t though, just as they aren’t judging my body. But more on that later.
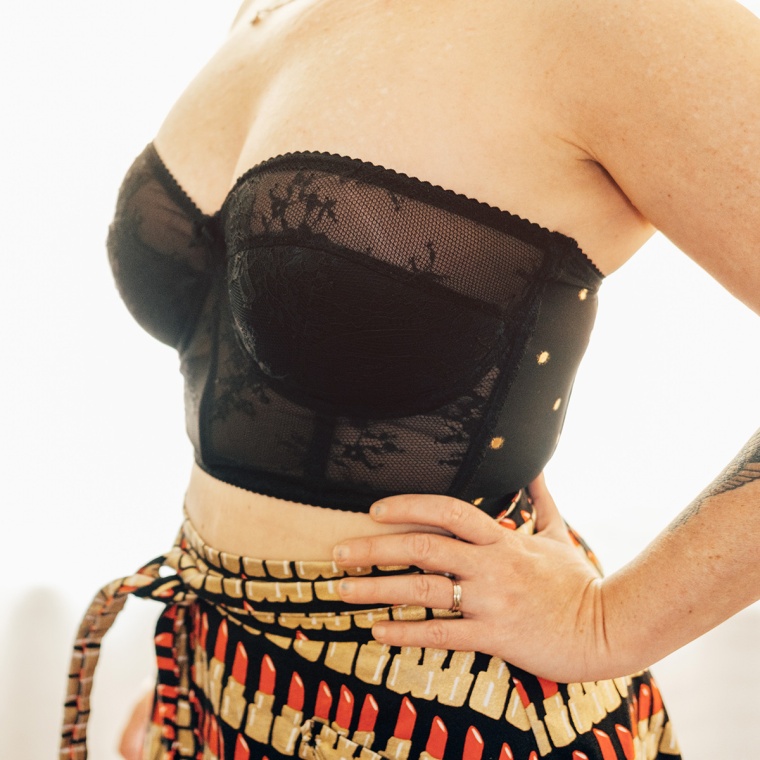
So, the bra part. I know, it’s a bit of sorcery and I wasn’t even sure that it would work. In fact, I was almost positive that it wouldn’t and I’d try it on and have cups folding over and boobs heading towards their old friend, my belly button. I figured I could add straps at the end if I wanted to, but I also wanted to just see if it would work. FOR SCIENCE. You know I love bra sewing though. I love the challenge of it, I love the precision, I’ve even grown to love the little 1/4″ seams. I love watching cups go from flat to boob shaped with foam and wire, I love making the finish really lovely and enclosing the seams. It’s just my happy place. You know?
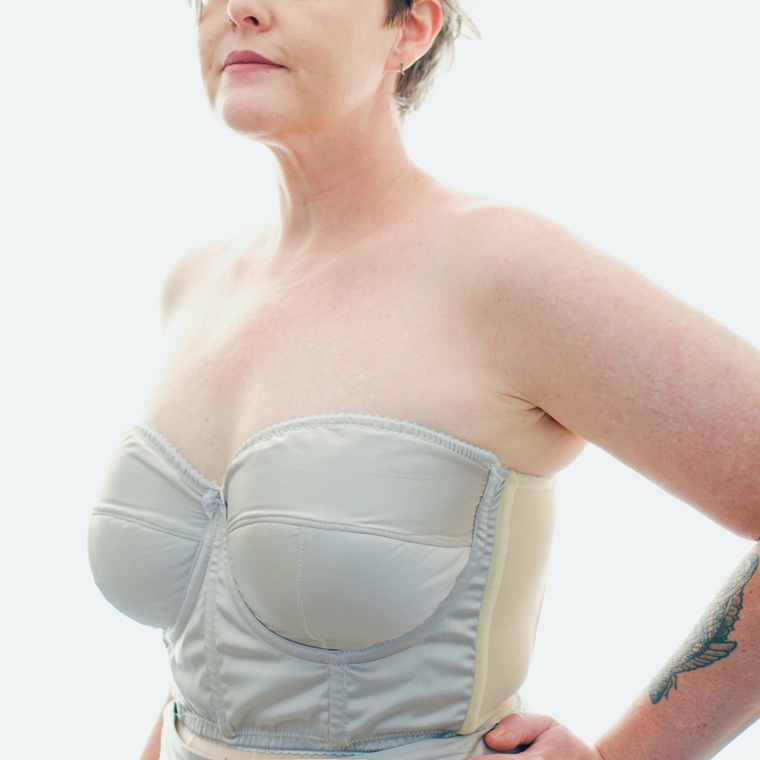
If you’ve been following along lately, you’ll recall my strapless bra journey. The new guy is the same pattern, shortened, with a bit taken off the upper cup (because it was too high and also to compensate for not folding over with the picot) and boning left out of everywhere except the side seams. On that note, I think the boning is part of the engineering magic. It stops it from wanting to roll down with the weight of my bust. Also, those extra long wires help for the same reason. The keep it tacked to my chest and in place under the arms.
Here are some technical construction and fit notes you can scroll past if you want:
– Stabilising the bridge with bra lining (which is strong but super light) stops it from stretching out and distorting the cups shape. But it also makes the whole thing a bit harder to get into. Next time it might be wiser to add some sort of closure – either a zipper down the front or some kind of clip at the back. I do like the comfort of not having any closures though.
– To make sure the bra part would fit on the body part, I just lined up the pattern pieces. They were super close and I didn’t need to change a thing. I cut the back band piece of the fold and there’s no hook and eye like on the bra versions. This made it a bit smaller across the back, but the fabric has a bit more stretch than the traditional power mesh band of the bra version, so they sort of cancelled each other out.
– I was very close to cutting the upper cup pieces out of swim lining, but realised my bra versions have no stretch there, which is really important – it needs to hug in close. If it stretched out, there might be some gaping and more risk of a wardrobe malfunction. So I used the very stable bra lining there too.
– Contrary to popular opinion (I see this all the time in sewing groups!), the foam is for support, not to enhance bust size. If the foam wasn’t there, the whole cup portion would drop. Same for sports bras, especially if there’s no wire. I often see people request sports bra patterns without wire OR foam, stating that they are already big and don’t need extra padding. But foam is great for support and is often necessary for bigger bust especially. Don’t fear the foam. I’ve used straight stitch to top stitch the cups (instead of zig zag) because they don’t really stretch and I don’t want them to. The foam has a tiny bit of give, but not much else. But you can totally use zig zag if you prefer the look.
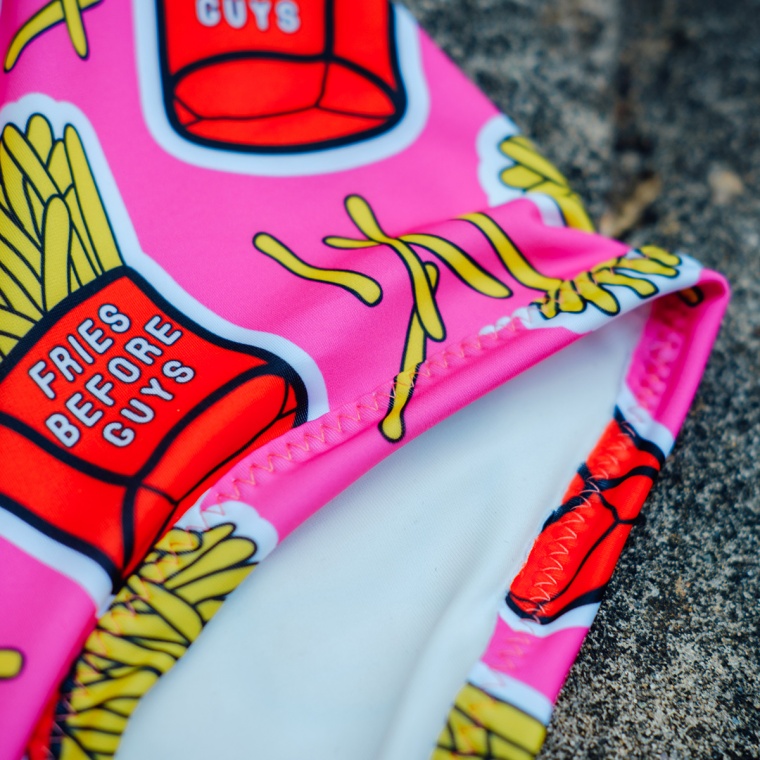
– The only other part that made me stop and think was how to finish the top of the cups. In my bra versions, I’ve used picot because I like the look and the finish. It’s a bit too ‘I’m a bra’ for swimmers for me though and using binding in matching fabric is usually the way I finish raw edges. Obviously in strapless swimmers, the top part really needs to stay put, so rather than just using strips of fabric as binding (which doesn’t need to be cut on the bias like woven, FYI), I used swim elastic in there too. Same method as usual, which is putting a bit of tension on it all the way around so it hugs towards the body. There’s a little mention of that method in my video here, but in relation to finishing the leg openings.
– I decided to run the binding all the way around the top edge, as opposed to finishing the bridge first without binding (ie sewing lining and outer fabric right sides together and flipping, which is how I generally do my bras) and finishing the upper cups before adding them into the frame for a couple of reasons. Firstly to minimise bulk. The binding plus elastic adds a fair bit of bulk, which in turn makes it harder to sew down the underwire casing at the underarm and bridge. Much easier to sew over everything at the end. Plus, I would have had to fiddle around with seam allowances at the upper cup – cut them down to counteract the fabric lost when folding over picot to make sure it lines up with the finished bridge. God I hope that makes sense. It’s really hard to explain. Anyway, much easier to cut the upper cups down as needed to line up with the bridge once they’re already sewn into the frame. Then bind the whole thing in one hit.
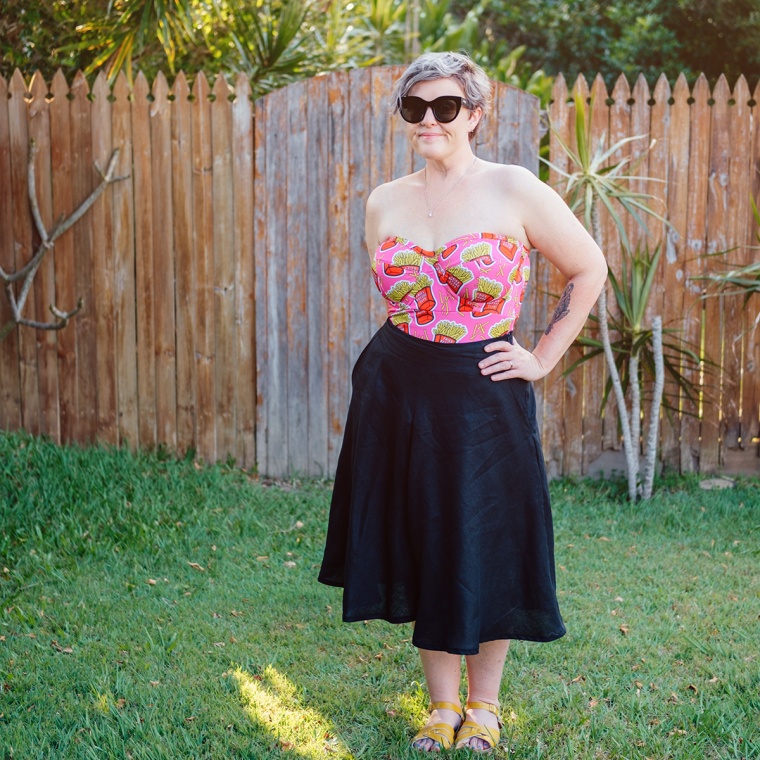
As usual, I’ve used far more words than I had planned. If you have any technical questions, just comment and I’ll try to answer. I’ve never had any proper bra training, but have learned so much from trial and error. And what is that sensible black skirt I’m wearing? Is it a skirt?
No! It’s the Tania culottes in linen from Potter and Co! Trickery! This is the updated version, which Megan so kindly sent me. Its now got pockets and extended sizes. Truly one of the most wearable things I own, especially for work. Photography work, that is. I’m often getting down on the floor and these make it much easier. The only change here is that I’ve used my own curved waistband, because as I’ve mentioned many times in the past – rectangle waistbands don’t work on this short waisted, curvy body. There’s too much of a difference between my hip and waist measurement and I get gaping in the front and back. Imagine pinching a dart out of the top of the front and back waistband pieces – that’s the shape I need.
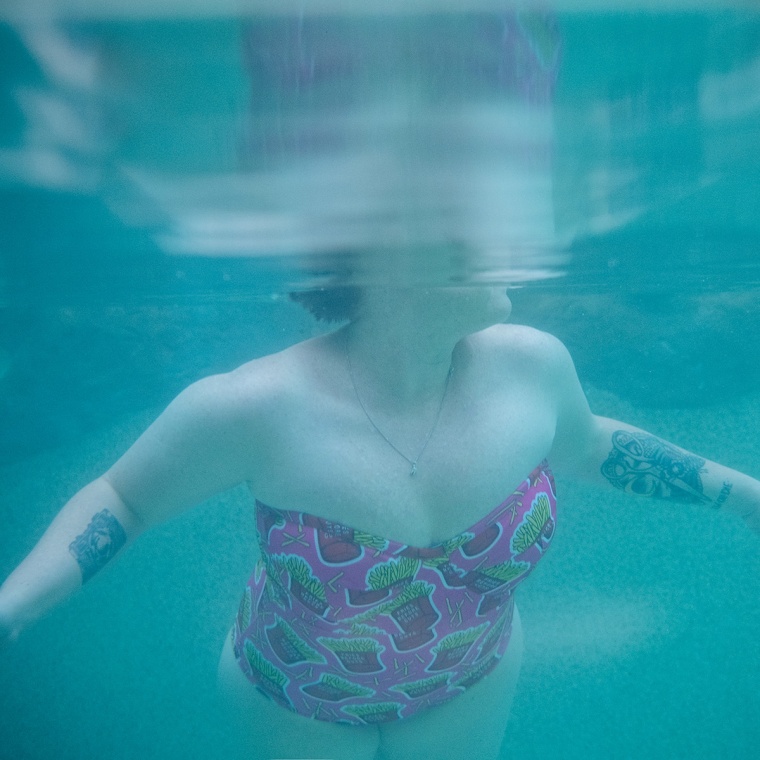
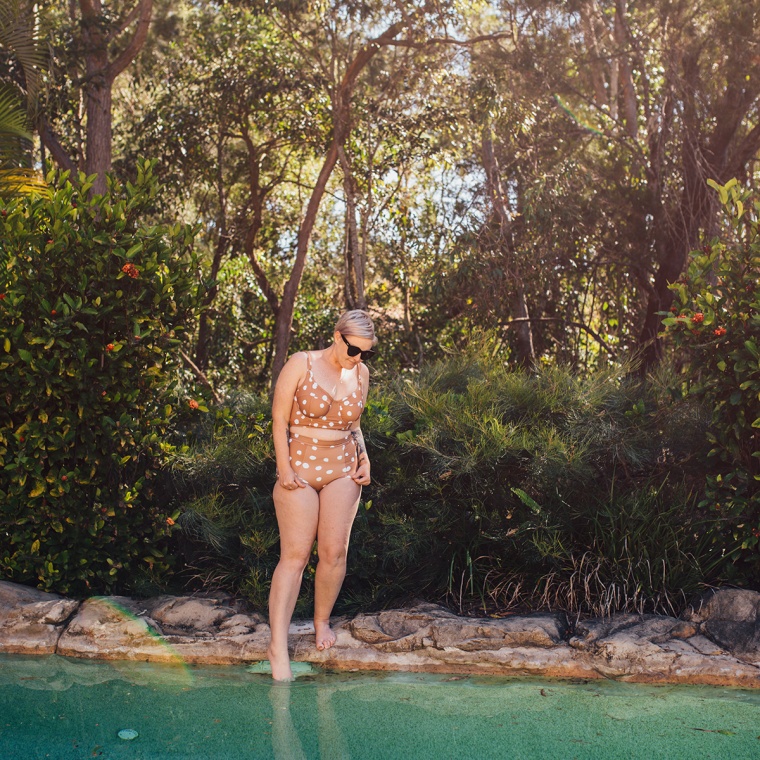
So, back to the swimmers. I’ve tested these babies in the pool and they passed with flying colours. The real test will be in the surf. But I can still add straps if required, probably removable ones so I have options. I really like how these have turned out.
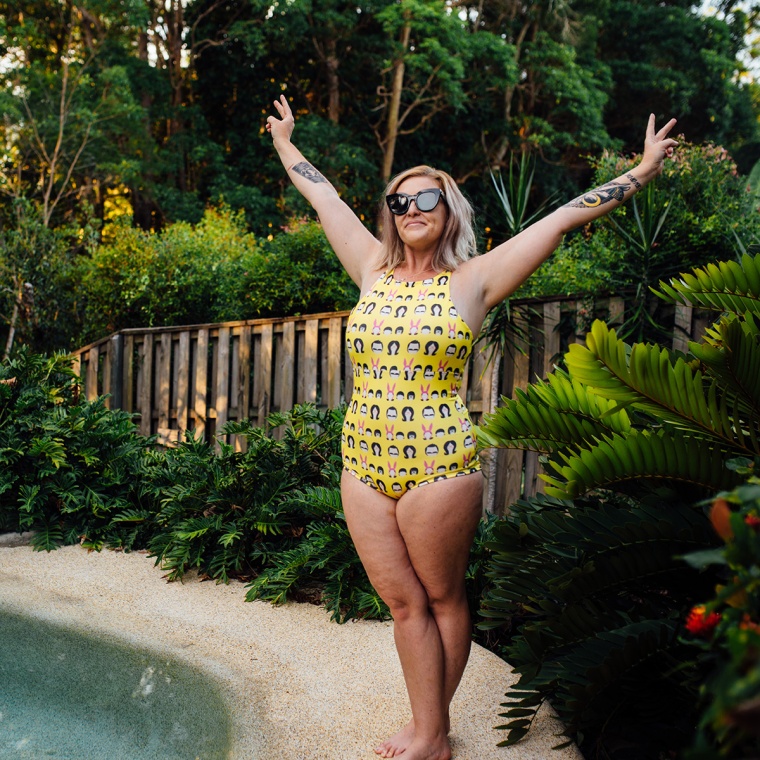
If you’re anything like me, you might have some of those pesky voices in your head – you know the ones, they like to say mean things and make you feel crappy about putting on your swimmers and enjoying yourself at the beach or the pool. Mostly I can shut them up, but there were a couple of persistent ones when making these. The first being that strapless things are for smaller bodies, particularly slender arms and backs. The other one was the fabric. Weirdly, I have had issues about wearing food prints before. I know it’s ridiculous, but I felt like I was saying ‘hey! look at me wearing food that contributes to this fat body!’. So with this fabric screaming its fries-positive message, all I could think of was people would look at me and think, ‘well, obviously true for her’. I know how crazy that sounds. And I’m wearing them anyway, because I made them and I’m proud and I love how fun the print is. So there, voices. You can shut up now.
There’s a little fabric shop about half an hour from here called Johno’s. Now Johno’s has been around for quite some time, but I’d never manged to get to it until recently. I mean, I could have – but to be honest it’s not that appealing from the street. I know. I really should know better than to judge a book by its cover. I’ve since been there twice in the last month. It’s only a small shop, but packed to the ceiling with bolts of fabric in that organised chaos kind of way that old school fabric shops are. Plus the staff are lovely.
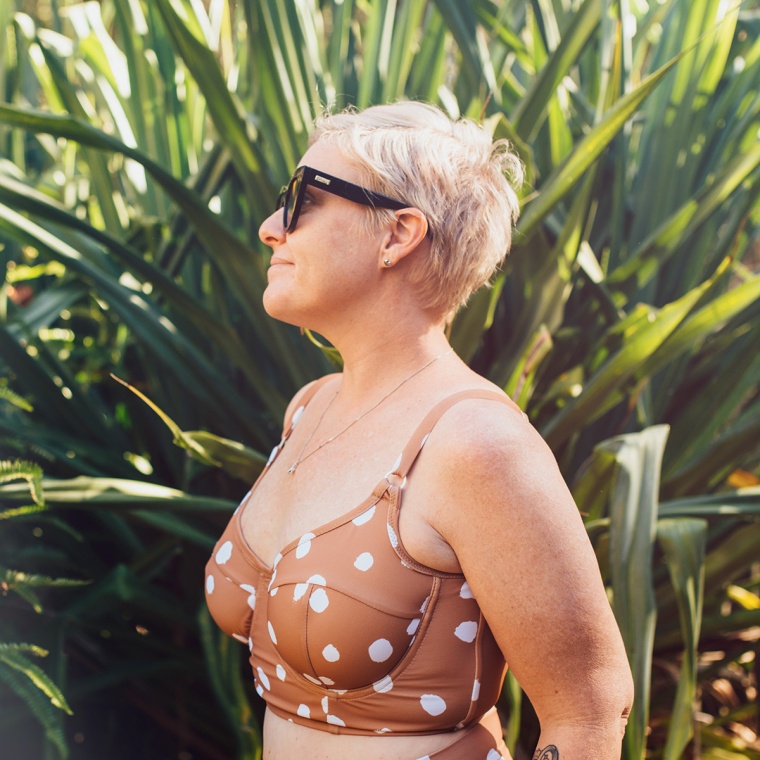
Anyway, the second time I was there, this spandex jumped out at me from its spot (LOL) on the bottom shelf. Something about it pinged in my lizard brain, but I couldn’t quite place it. I loved the colour and those uneven splotches, so I grabbed a metre for future swimwear plans. As I was scrolling through instagram later that week, I spotted (LOL) my fabric. A local swimwear company had been using it for their previous season. Oh well, now I was going to use it too.
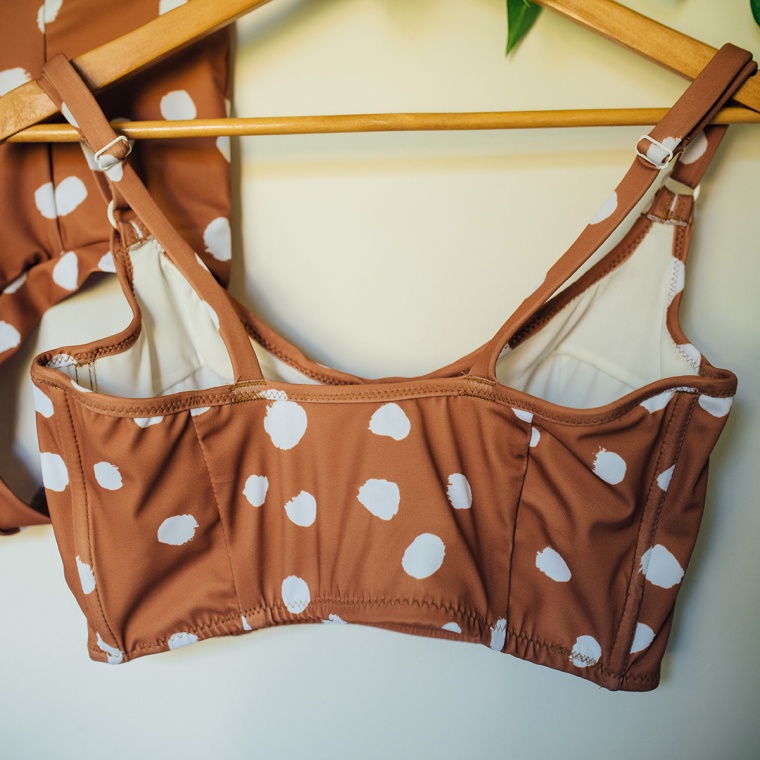
I decided to revisit Ohhh Lulu’s Cindy bra, which I hadn’t made in ages. It was actually the first wired bra I ever sewn, but the cup shape wasn’t quite right on me, so it was pushed aside in favour of other patterns as my bra making skills improved. My body has changed a bit since my first Cindy attempts (as they do, those non static little vessels), so I checked my measurements against the pattern and cut another size. I am so used to making bras now with stable bridges and cups, that making one from stretch threw me a little. Would it be stable enough? Would I wiggle and jiggle like jelly on a plate? Would the cups stretch out beyond all repair and leave me with belly button boobs?
Not really, as it turns out. I mean, I wouldn’t go jogging in it but if you ever see me jogging, there’s something terribly wrong and you should probably run too. I lined the cups and side band in lightish white swim spandex (could have used lining also, but this provides a bit more support), with powernet for the back band and stable bra lining for the bridge. The pattern calls for powernet at the bridge, but past bra making experience made me decide that I wanted a more stable bridge. Well, as always, I probably should have followed directions, because now I’ve got a bit of excess spandex at the bridge forming a bit of wrinkling. Not a big deal, but I know for next time.
The width of these cups is spot on for me, although they do flatten me out so I need a tiny bit more projection. Next time I might narrow the bridge slightly too. If you are a bra sewer, try and forget your sizing in other patterns. I’m mostly a 40D in bra patterns, but this one is a 36DD and I could even go down another band size (I ended up taking a bit out of this one). That’s unusual for me because I am pretty broad across the back.
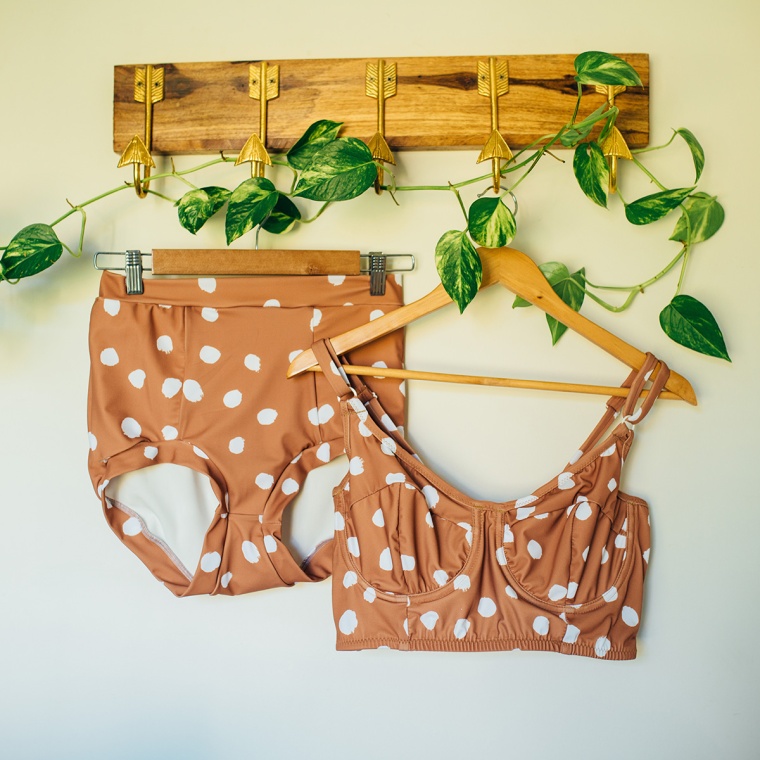
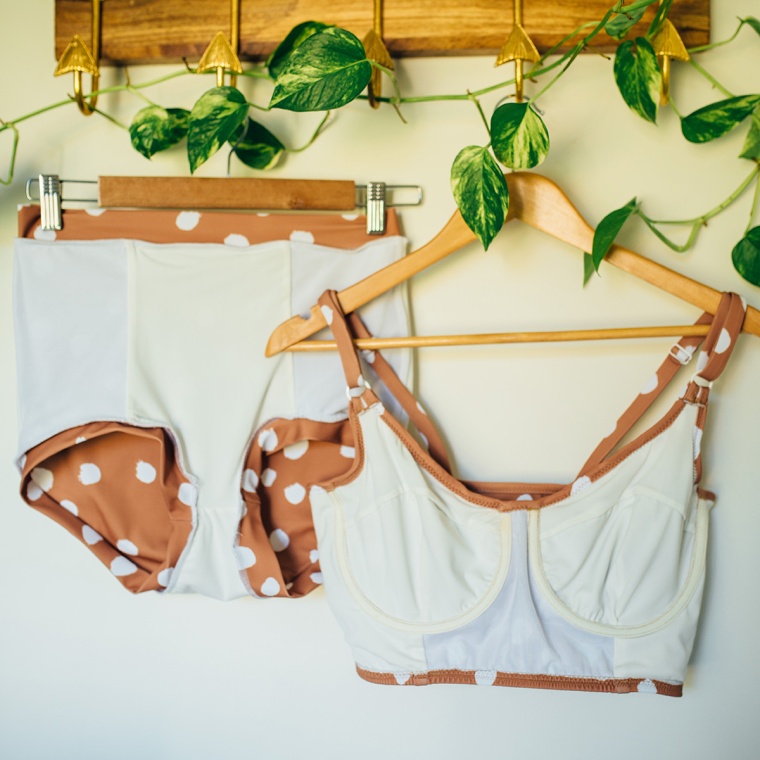
As always, I made a few changes to take this from bra to bikini:
I eliminated the back clasp by cutting the back piece on the fold. I like a firm band and am much more comfortable without a closure digging into my back. You could change it for a strappy back with hooks or a couple of those swimwear clasps. the width makes it a bit more challenging though.
The bottom of the band has regular swim elastic instead of picot.
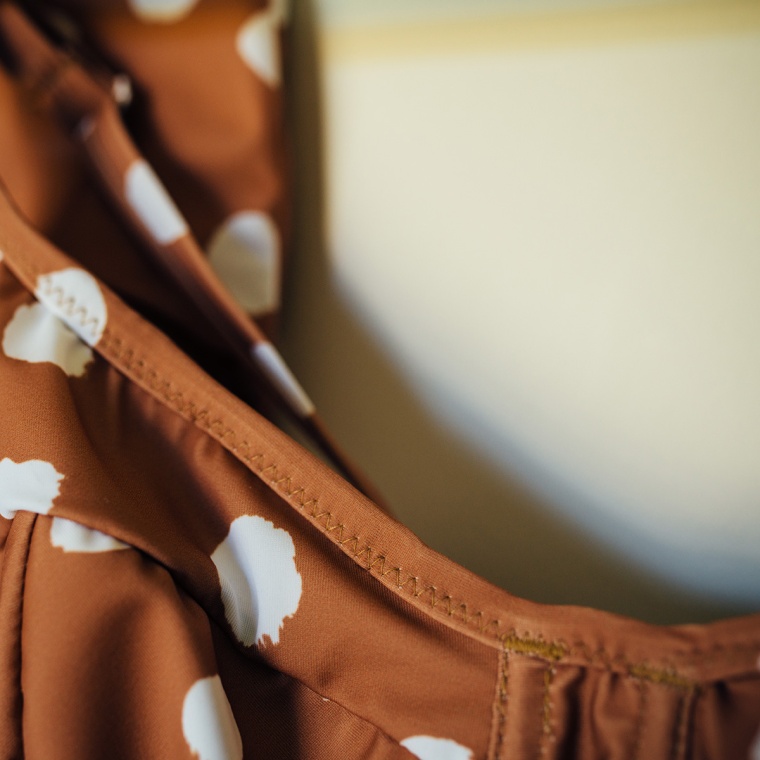
The top edges have binding (instead of fold over elastic) created from the spandex, as well as narrow swim elastic enclosed within the binding. I think it creates a nice clean finish, while also keeping everything hugged against my chest and back. I’ve used zig zag because I don’t mind it, but if you want a more professional looking finish, you could use a twin needle.
I made fabric straps, again with elastic in them for extra support, instead of using normal bra straps.
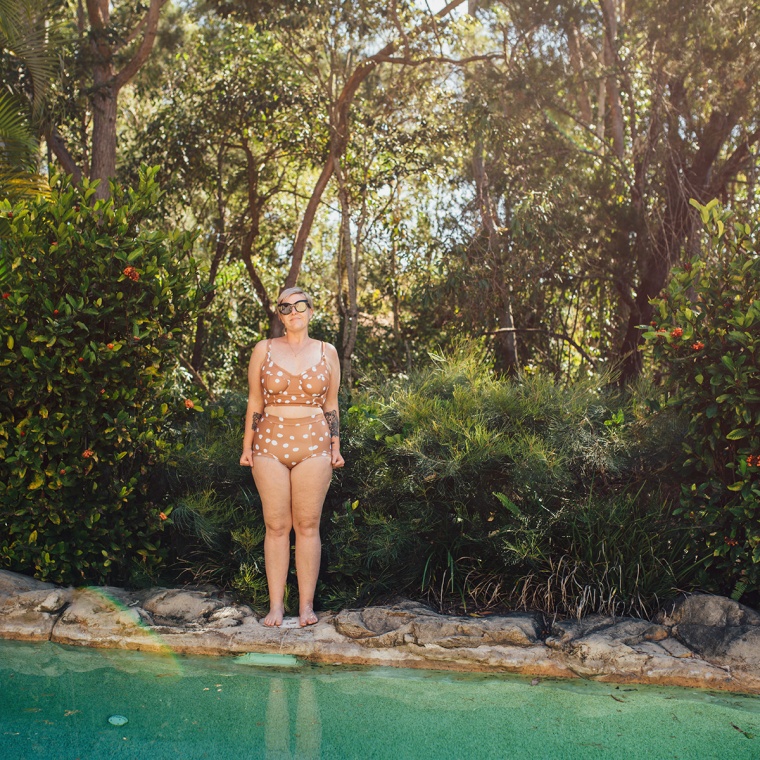
A couple of people have asked why I didn’t add foam. I have used it in swimmers before, but I don’t mind either way. I was keen to see how this would look without and also, I was being lazy and didn’t want to have to cut down pattern pieces for foam (otherwise, I’d have foam in seam allowances, which would be quite bulky). We all have nipples, so I’m not really concerned about concealing mine with foam, but I know some people prefer to. I also don’t mind boob shaped boobs, even though the modern trend is toward foam domes. Foam has the added advantage of providing a bit of extra support too, but honestly – it’s really not a problem for me with this one.
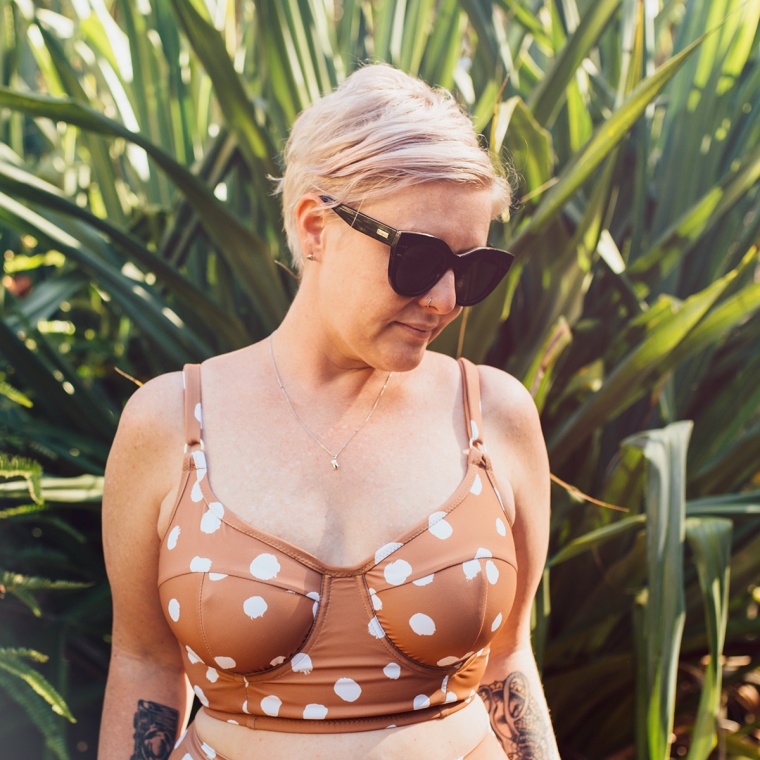
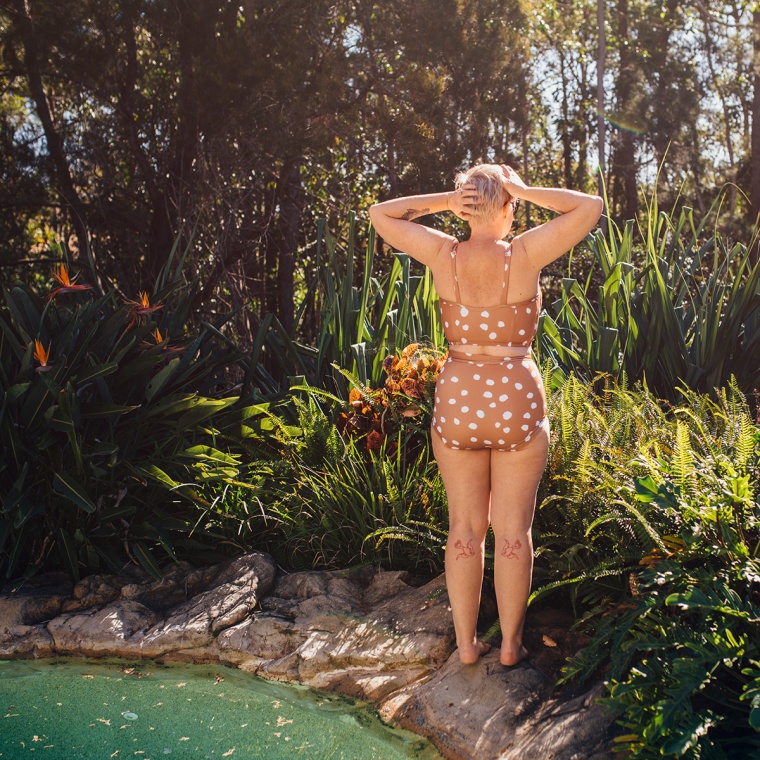
I forgot to mention the bottoms are my same old self drafted ones I wear constantly. I just sized down for these so they don’t fall off in the surf. I might have sized down a touch too much, but at least they aren’t going anywhere.
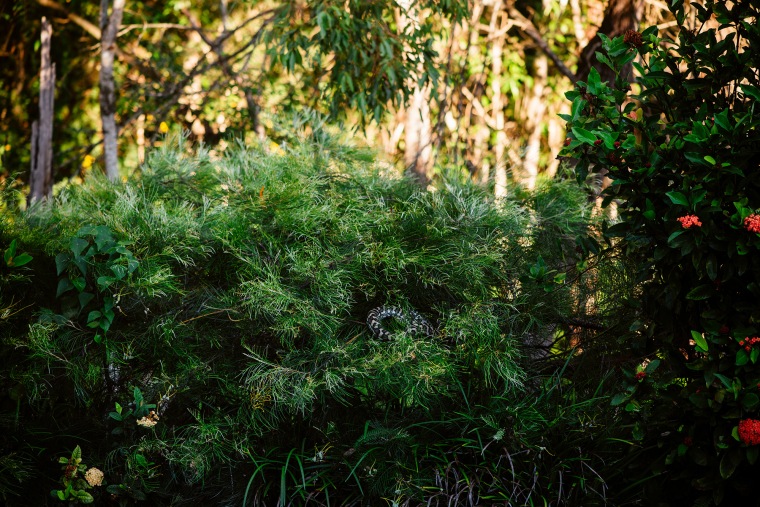
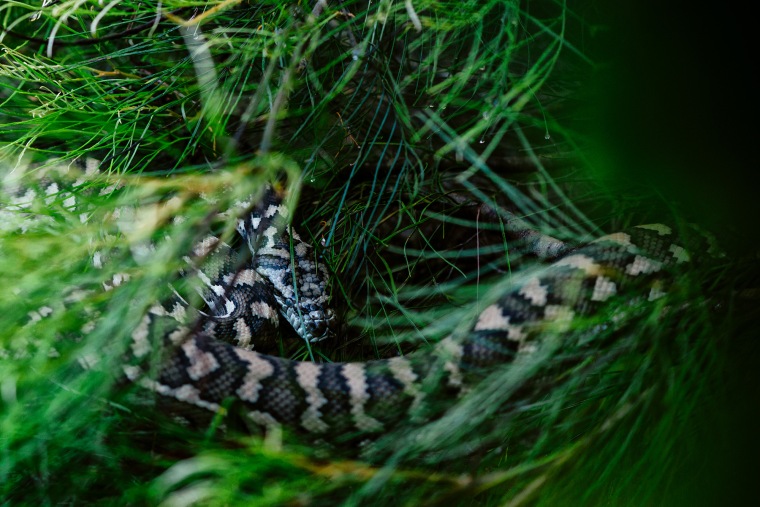
Gotta admit, the whole time I was taking these photos, I was slightly concerned about being joined by this not so little friend who has been hanging around recently. The shrub behind me is its hideout.
Lucky for me it remained tucked away wherever it is. I definitely would have ended up in the pool if it decided to make itself known. And that water is still really cold.
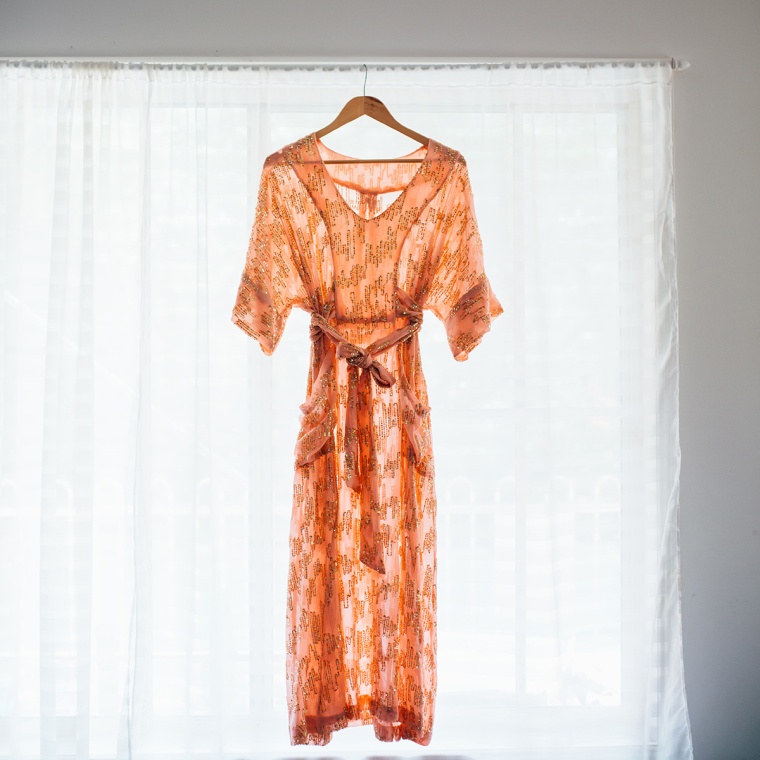
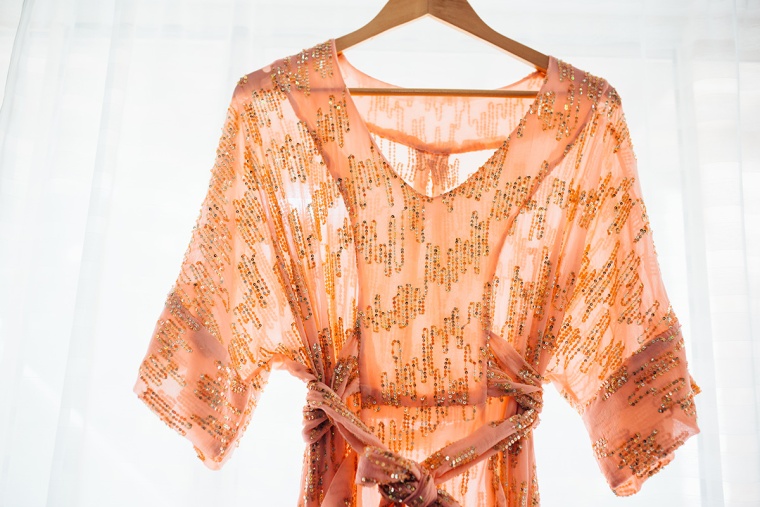
It occurred to me recently as I was lovingly admiring this dress in my cupboard, that I had actually never blogged it. It’s a really special dress for me and holds a little memory in every one of those sequins, I think.
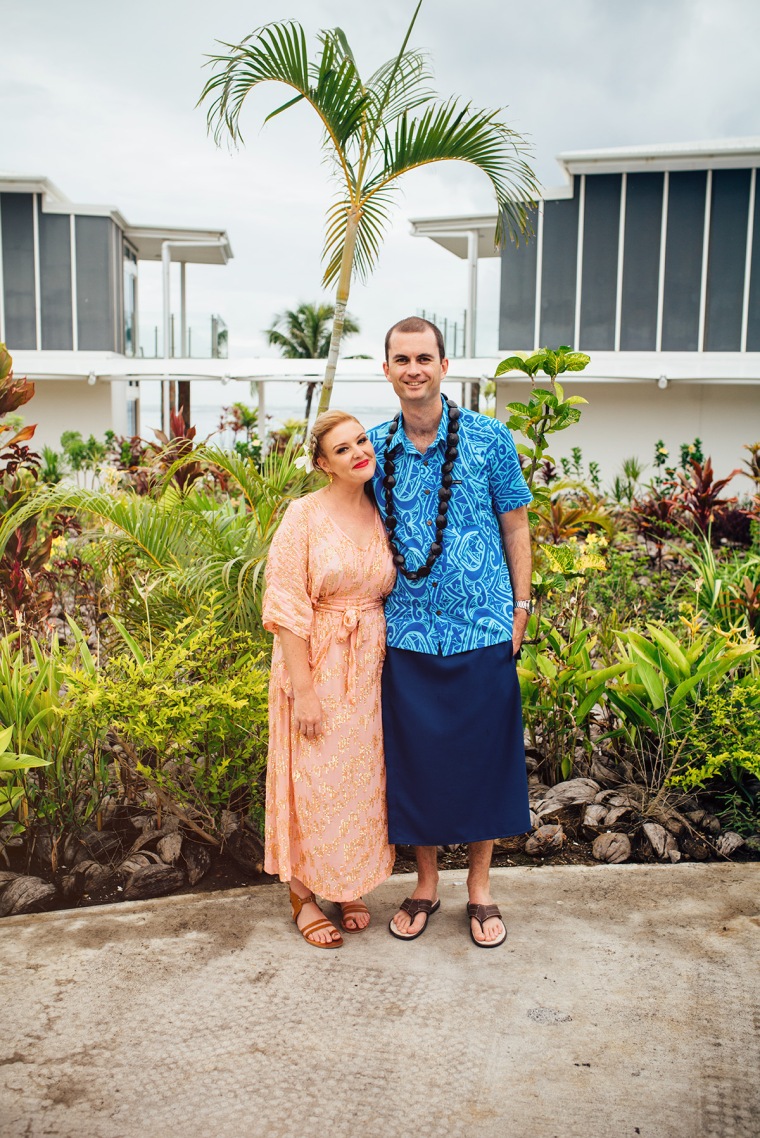
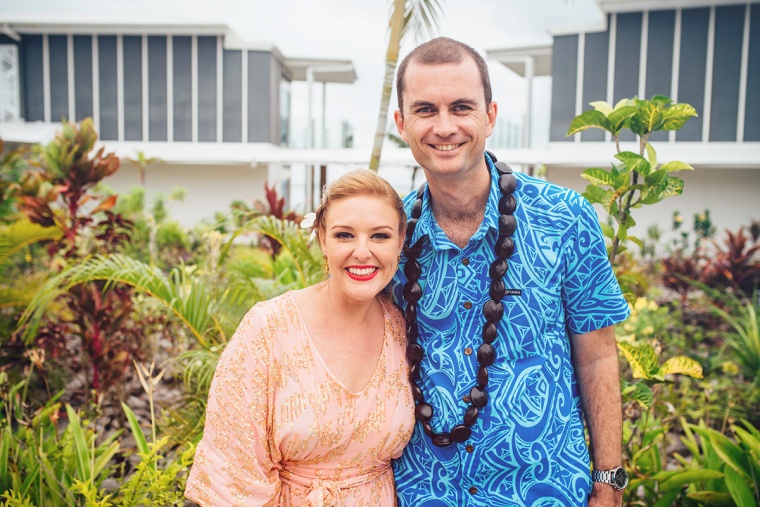
Created from one of my favourite patterns in the world, Sew House Seven’s Tea House Dress and sewn in a luxurious sequined silk chiffon from the Remnant Warehouse for my husband’s brother’s wedding in Samoa last November.
Samoa in November (and really most of the year) is hot and humid. As Queenslanders, we are used to a bit of heat and humidity, but this is next level stuff. I knew I wanted a dress from a natural fibre, with beautiful drape and fabric that just offered something a tiny bit extra. Enter The Remnant Warehouse. They stock a huge variety of designer remnants so it’s the place I stalk online when I want something extra special.
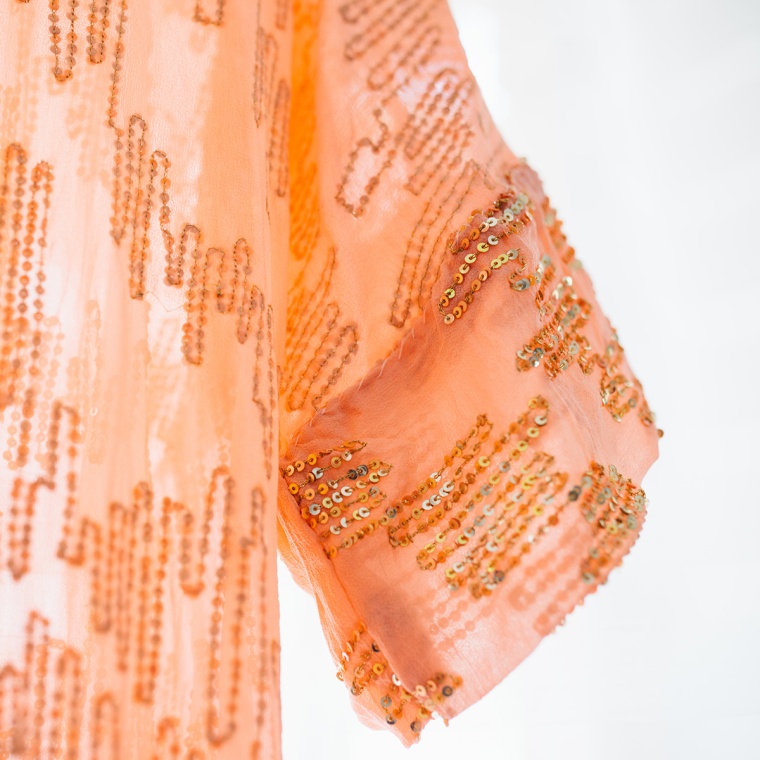
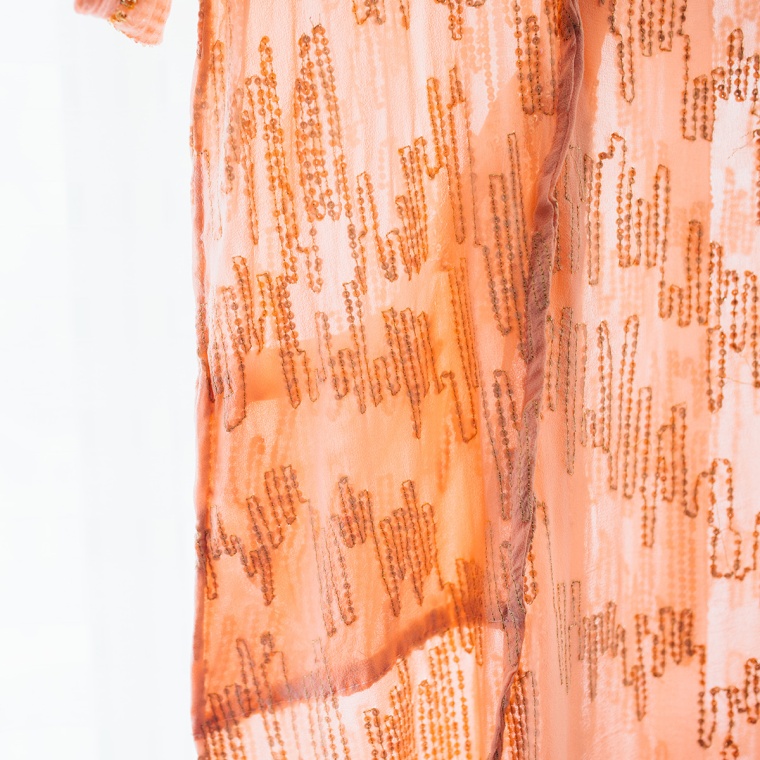
I cut my pieces very carefully and following some info I’d read online, started painstakingly removing sequins from the seam allowances. THIS. WAS. THE. WORST. It would have taken a year of unpicking in front of the tv each night. Further research online showed a few rebels that just sewed over the suckers. I held my breath and gave that a go and… nothing. Totally fine. No causalities (eyes or needles). These sequins were quite small and soft, as well as not too close together, so sewing over them was completely fine. Phew. Life saver. The cut ones are scratchy though, so I did french seams wherever possible and trimmed any rogue sequins out of the way.
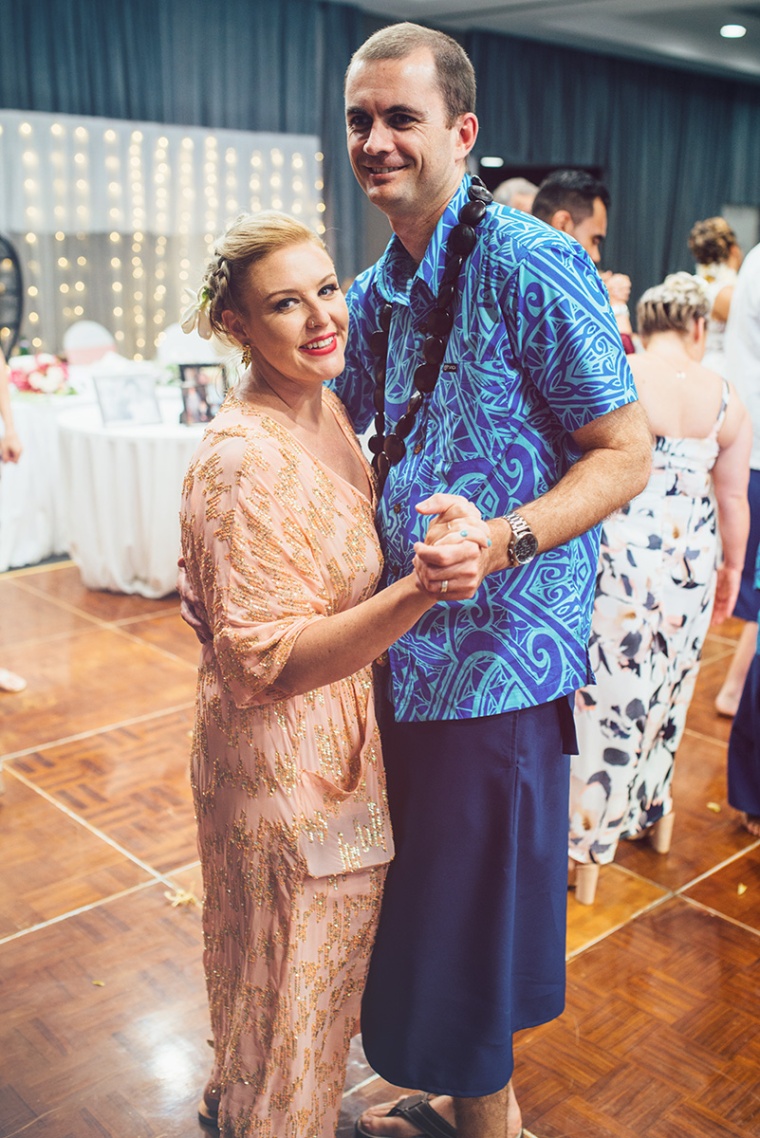
I stitched the hem of the dress and sleeves by hand because I didn’t want any stitching showing from the outside. It was totally worth taking the extra time and care. I did the same with the front and back facing pieces, after removing all the sequins from those so they weren’t rubbing against my skin. After initially thinking all those sequins were individually knotted, with trial and error I found the magic unraveling thread in each bunch. It was heaps of fun to pull it and watch gold sparkles fly around my lounge room (side note: what they say is true, 8 months on I’m still vacuuming those buggers up).
I didn’t want to line the dress so I made a slip out of cream silk voile which worked really well. The sequins make the dress heavy though and you can see it’s a fair bit longer than my others in the sleeves and the actual length. I don’t mind at all though.
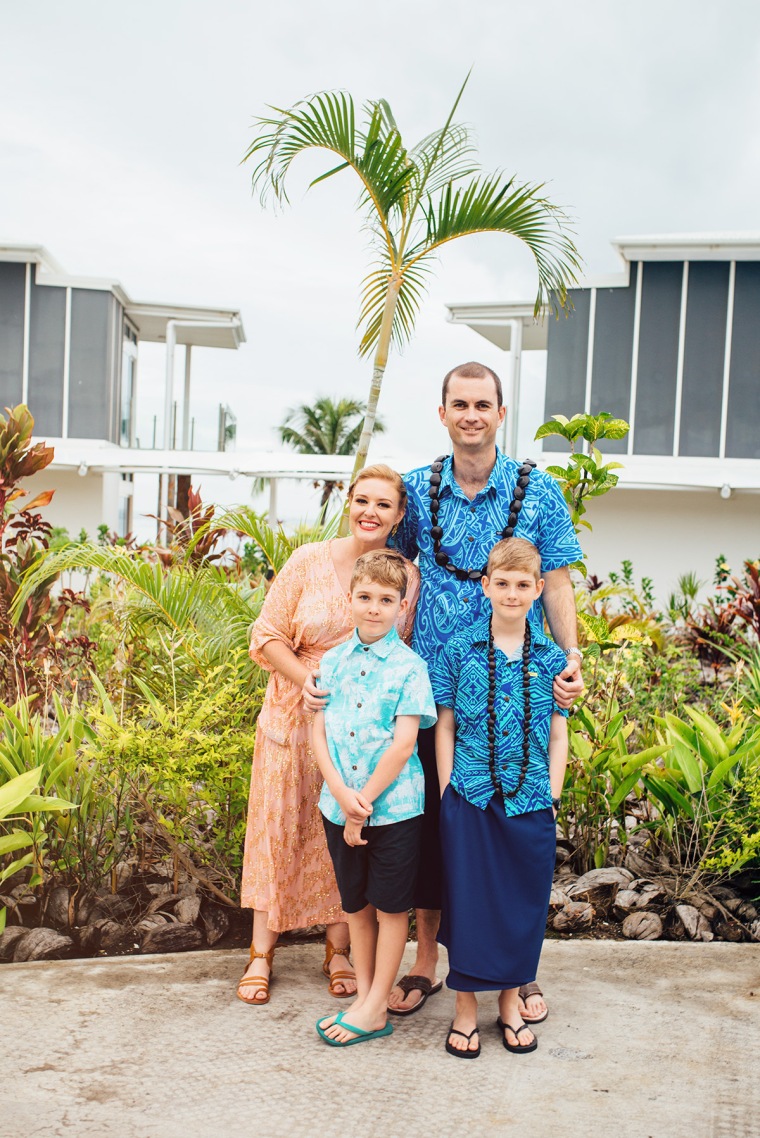
I photographed the wedding, so it was important I was comfortable and could move around easily – hence the sandals too. But let’s be clear – if you ever see me wearing heels, chase me down and tackle me because I can guarantee it’s an imposter. I never put myself through that kind of torture.
One of my husband’s lovely cousins grabbed the camera off me a few times through the day to make sure I was photographed too. It was very sweet and I’m so grateful to have these images. Note to self: phone does not belong in the pocket of this dress!
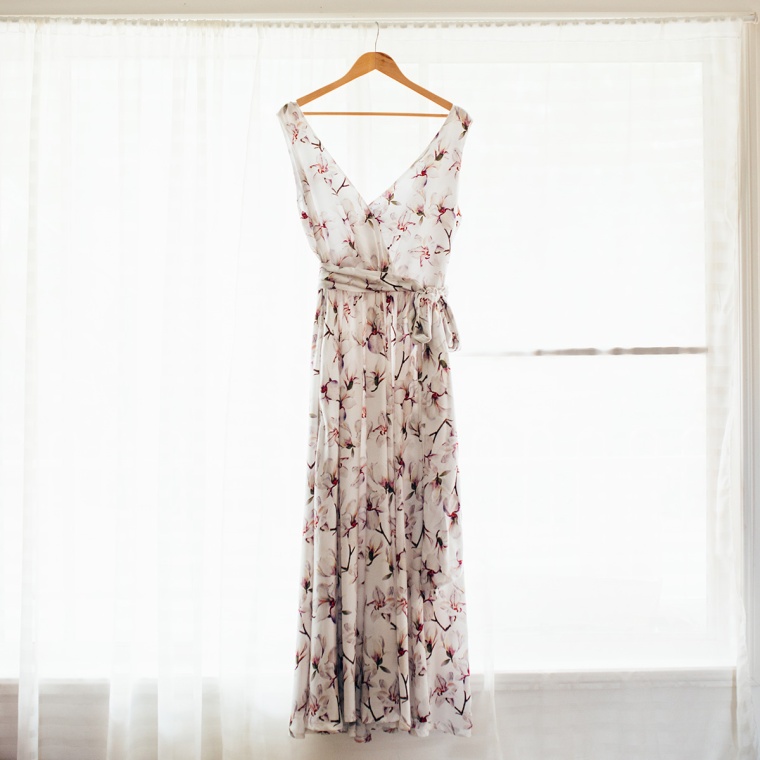
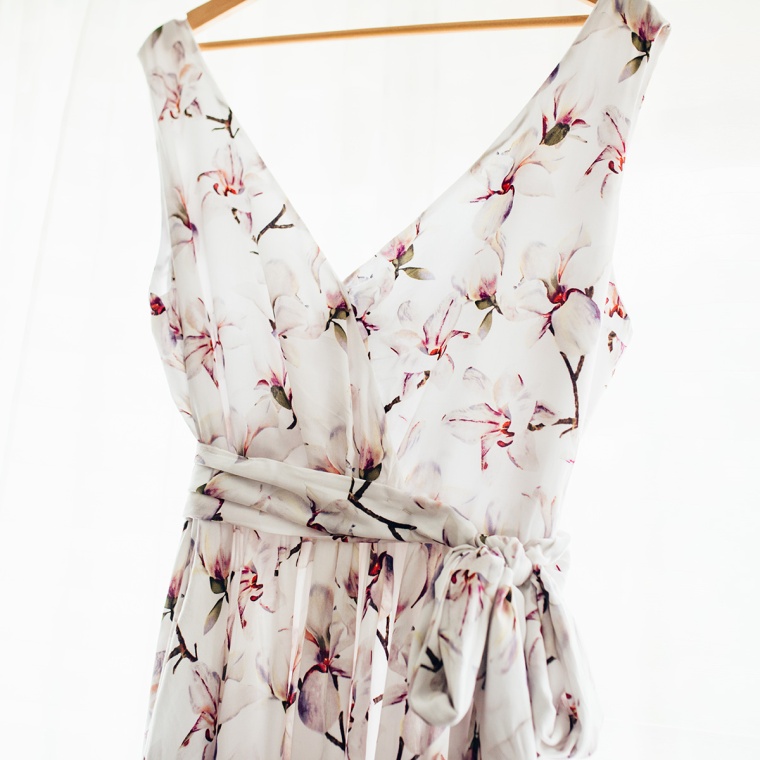
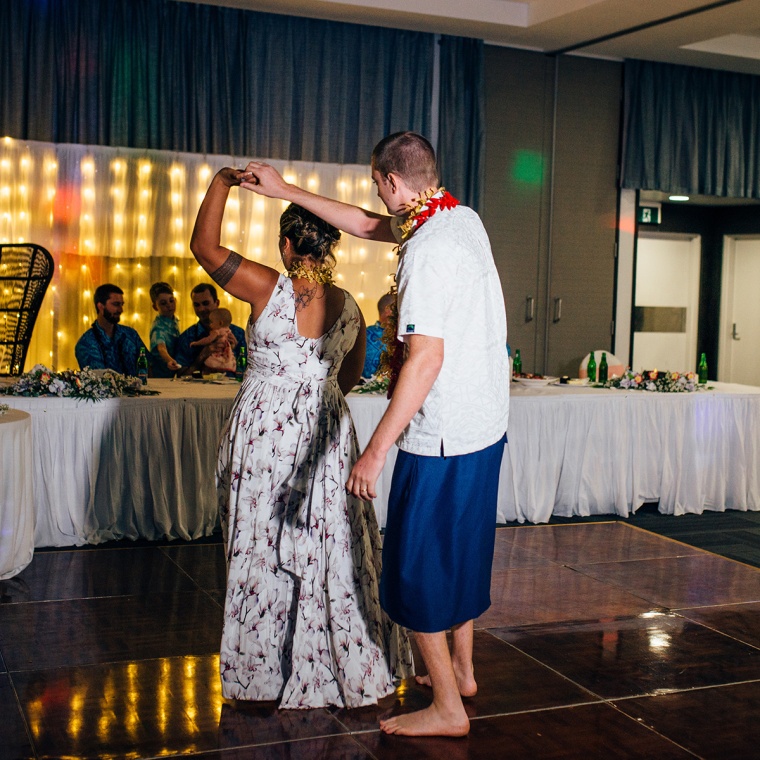
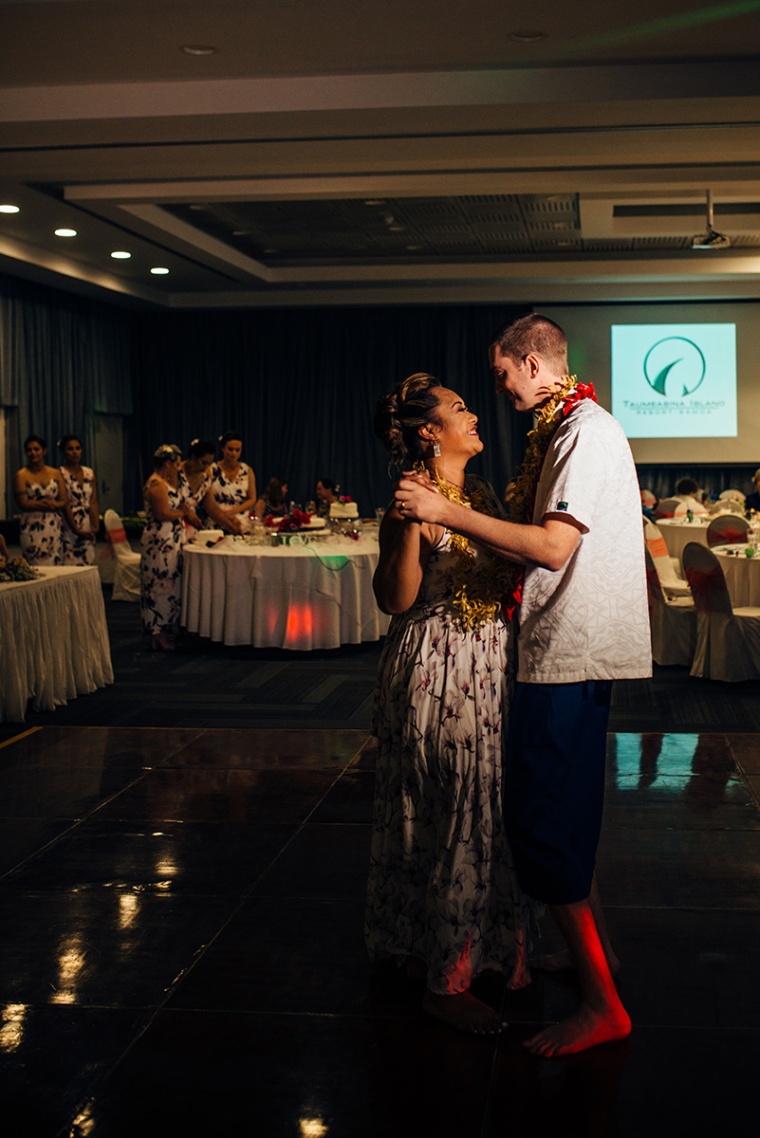
In other news, my sister in law (to be, at that stage) asked if I’d make her a dress to wear to her reception. She pretty much had the same pre requisites as me, but wanted a sleeveless dress and something with a lot of skirt.
She came over and we sat together in my sewing room, digging through my patterns. We settled on Simplicity 8013, which is a reissue of a 70s faux wrap dress. There is a massive 8 metres of rayon in this dress, it’s a huge fabric hog. The skirt is made up of big panels all gathered together and it’s so delightfully swishy and full. I fully lined the bodice to eliminate the facings and provide a bit more coverage because the fabric is so light.
It was very nerve wracking sewing for someone else, especially someone with a body shape so different to mine, but it all worked out ok in the end. She looked so beautiful moving around the reception.
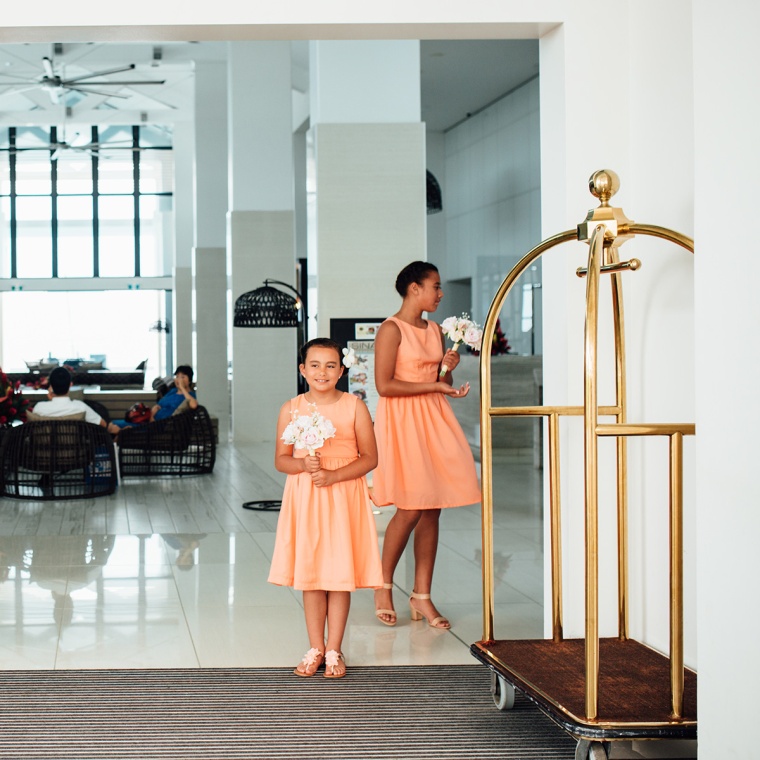
PS I made the flower girl dresses too.
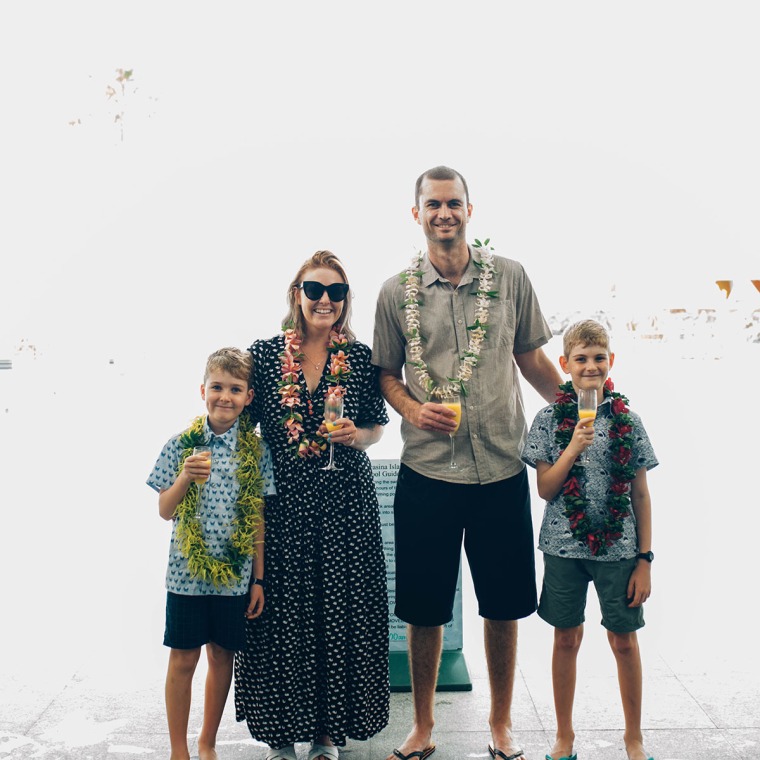
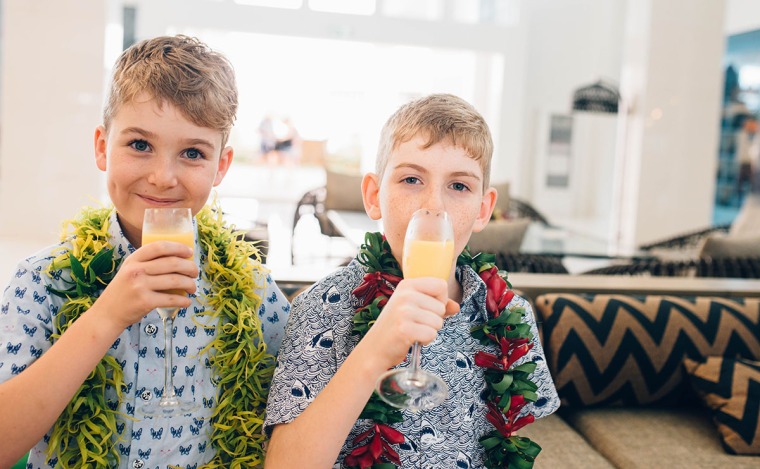
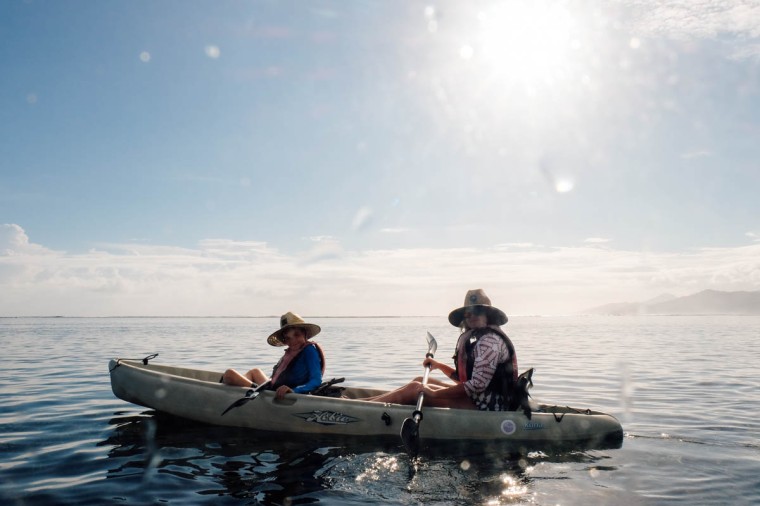
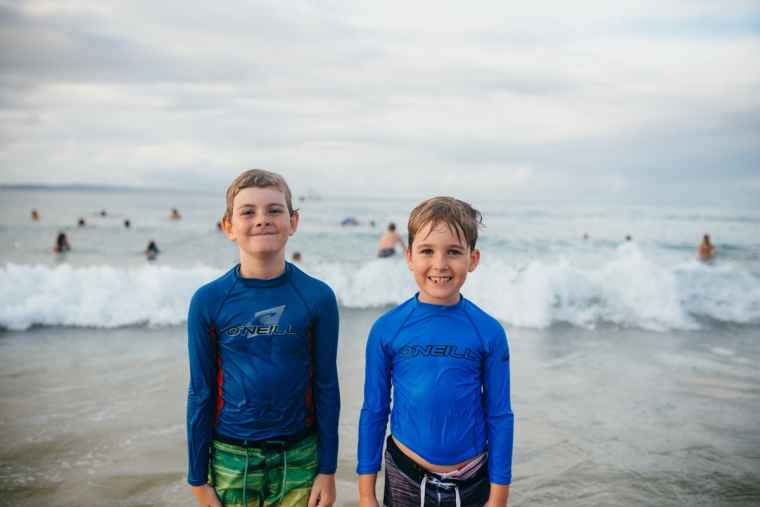
And if you’ve made it this far, well done. Here’s a gratuitous selection of images from our stay. Yes, I made the boys’ shirts too. Ok, enough words.
You know what’s cool? Being able to print your own designs onto the fabric of your choice. Now, I’m not clever enough to be able to design my own fabric, but I know what I like. Sometimes you’ll find the right fabric in a print that blows your mind, sometimes you won’t. Especially when it comes to fabric that is suitable for swimwear. It needs to be a magical combination of either polyester or nylon and spandex (or lycra, which is just the brand name for spandex).
I mean, where else could you find Iced Vovo fabric but Spoonflower?
The more I sew swimwear, the more I crave those unique prints that tickle my fancy.
That’s right, Australians. Next State Print (based in Melbourne and possibly the most helpful company around) now offer their own version of activewear and swimwear fabric. So of course I had to order a metre and test it out as I really wanted to see how it compared to the Spoonflower Sport Lycra. Because: (a) I’m nerdy like that and (b) I really like to support Australian businesses when I can. Also, I reallllly like the Spoonflower lycra, so could another product compare? Let’s see.
Here are the stats (I told you I was a nerd):
Content:
SF: Polyester (88%) and lycra (12%)
NS: Polyester (80%) and spandex (20%)
Width:
SF: 142cm
NS: 140cm
Price:
SF: $32USD/yard (approx $41AUD per 91cm, if we’re getting picky)
NS: $37/metre
Stretch:
Now, if you’ve seen my last post, you’ll know this is a tricky number to nail down.
SF: Claim 75% in one direction and 50% in the other. I honestly find this hard to believe. It’s much firmer than that.
NS: No stretch listed but it’s stretchier than the Spoonflower version.
Sorry it’s not a more exact science than that.
General feel? They both feel good. Both are a decent thickness and nice quality. If you haven’t used digitally printed fabric before, know that they have their limitations and are different to their screen printed cousins – it’s the nature of the beast. But what I have found is the colour and quality is much more vibrant on synthetic fibres (like spandex) than natural fibres (like cotton).
The Next State Print Active is definitely lighter and stretchier than the Spoonflower Sport Lycra. But it’s also silkier and softer. It does work out a bit cheaper but of course, they don’t have as much variety in their prints as Spoonflower. My Spoonflower swimmers have been washed and worn many times now and are holding up well, I will update what happens with the Next State version as I’ve only just made them and worn them in the pool today.
Oh and if you’re wondering about this swimsuit, it’s a hacked version of Megan Nielsen’s Rowan pattern, which I’ve also made here and here. It’s a good one and I love it.
A chunky plastic open ended zipper (51cm) from Spotlight.
A couple of strips of light to medium weight iron-on interfacing.
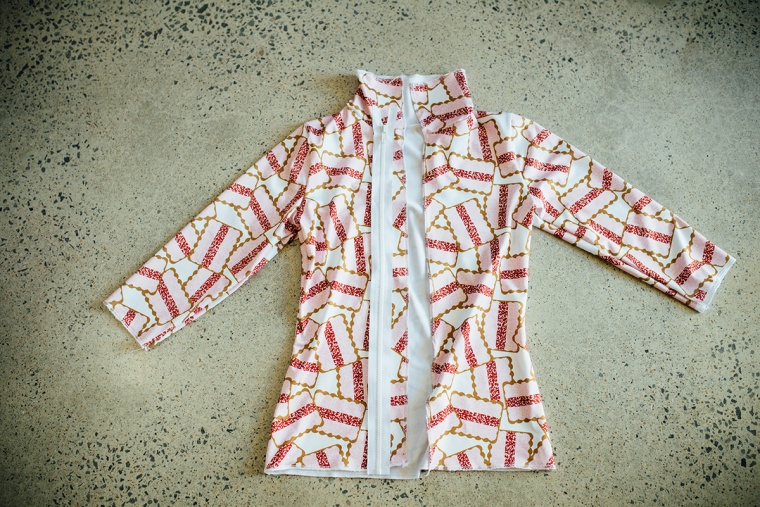
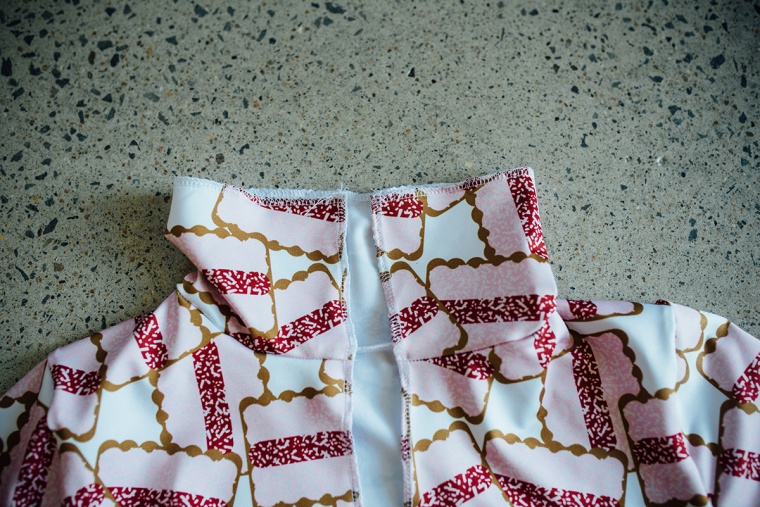
I’ve used the turtle neck t shirt pattern pieces from Rowan, but instead of cutting the front pieces on the fold, they’ve been cut into two pieces with a bit of seam allowance added for the zipper. I’ve added the same allowance to the neckband piece. The first video covers the basic construction of the rashie – sewing the front pieces to the back and sewing in the sleeves.
The second video shows how I add sleeve bands instead of hemming the sleeves and also adding the neck band.
The third and final video shows how to interface the front edges to stabilise them before adding the zip. Then I finish off the neck band and hem.
Super awesome bonus round:
Making matching, fully lined bikini bottoms from the free Acacia pattern!
I make swimmers from underwear patterns quite often and this is something I get asked about all the time. What takes something from knickers to swimwear? Let me show you. Spoilers: Fabric choice, lack of gusset, including a lining and leg and waistbands instead of picot.
I also added some height to these are they are quite low.
I did it you guys. I made a stack (seven, to be exact) little video tutorials on how to sew swimmers. I’m pretty tired. Please excuse the way I bumbled through it. Hot damn, I learned a lot of new stuff. I do hope this helps if you’ve been looking for a few hints on sewing your own swimwear.
Recently, the legends at Spoonflower got in contact and asked if I’d like to take part in a little blog hop they’re organising to show how makers around the world are celebrating the holiday season. They suggested that perhaps I’d like to make an Australian themed swimsuit or similar from their sport lycra (which is the tits and I’ve used many times). WOULD I? Of course! This time of year is alllllll about the water based activities for us. While half the world is freezing their butts off and singing about letting it snow, we are sweating and eating mangoes in the pool.
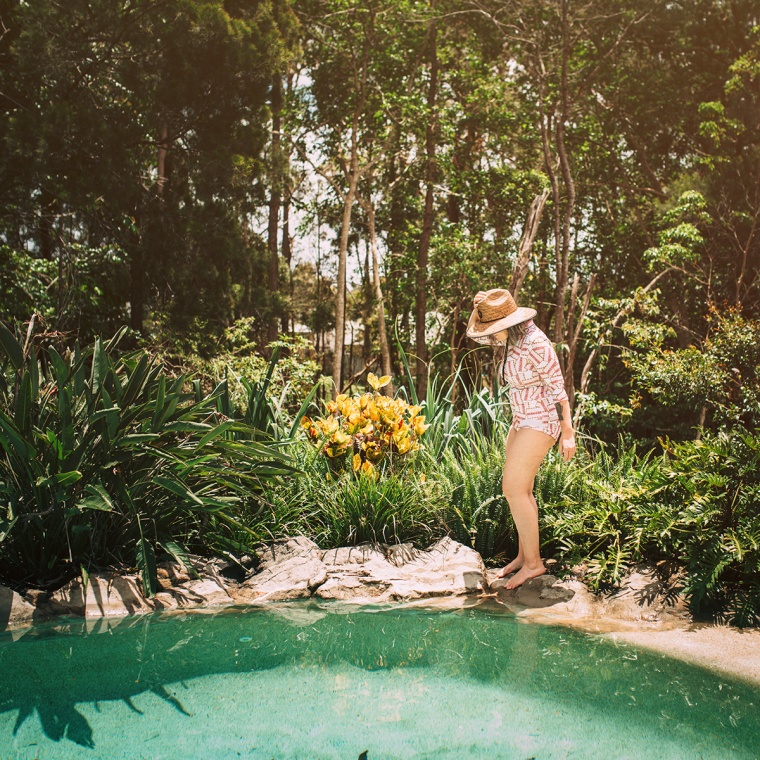
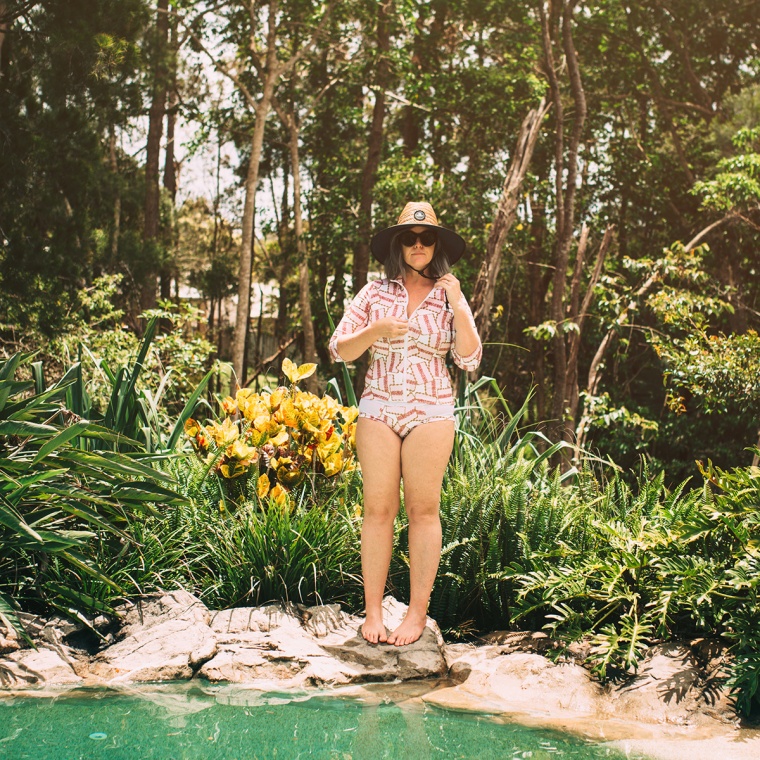
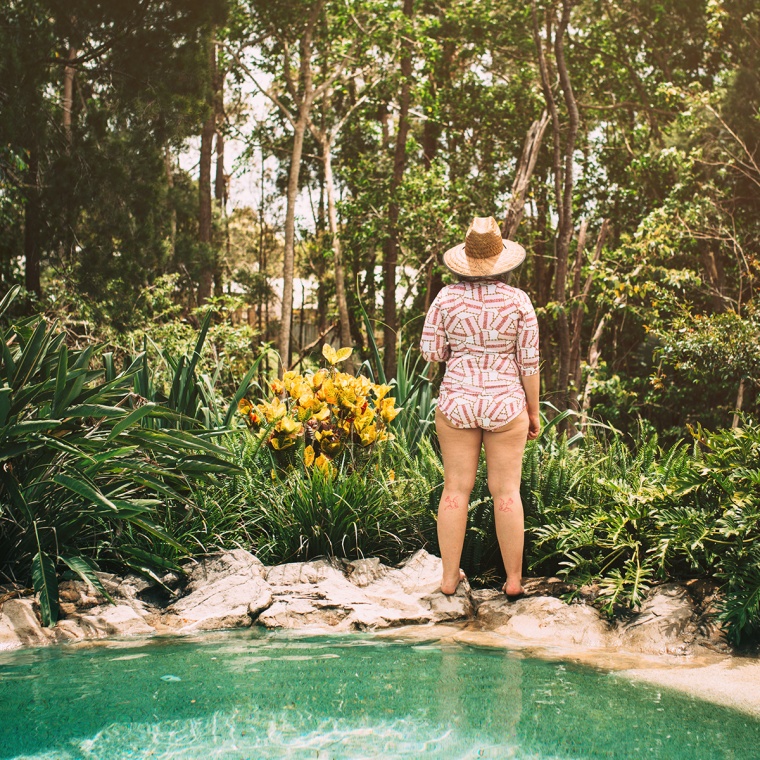
Now, if you are Australian you’ll totally get the references in the title. If you’re not, let me explain the Australian summer to you (at least in my neck of the woods, we’re a big country, it varies a lot), our sun will burn you in minutes. The whole ‘slip, slop, slap’ thing was a campaign launched by the Cancer Council in 1981 (the year I was born!) and refers to slipping on a shirt, slopping on some sunscreen and slapping on a hat. Apparently it’s one of the most successful health campaigns in Australian history. There you go. No wonder the jingle has been stuck in my head for 36 years.
And iced vovos are a pretty iconic biscuit made by Arnott’s (which is no longer an Australian company, but lets ignore that). I have very fond childhood memories of iced vovos with tea.
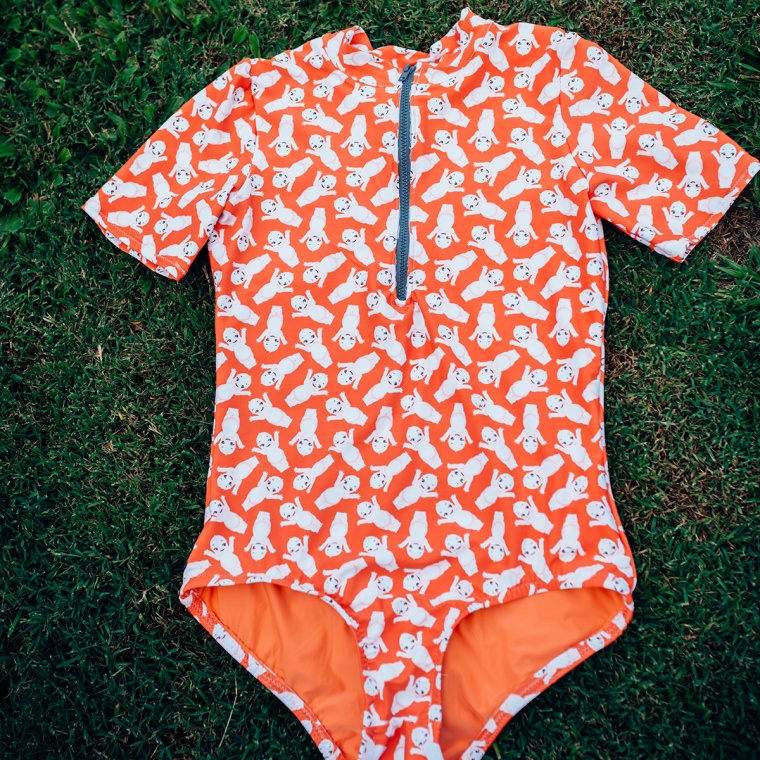
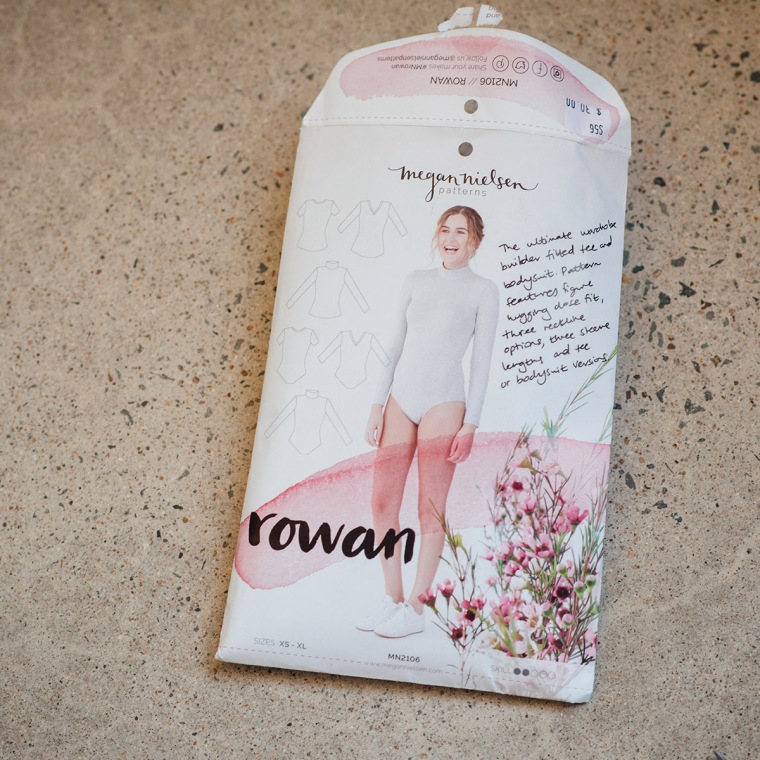
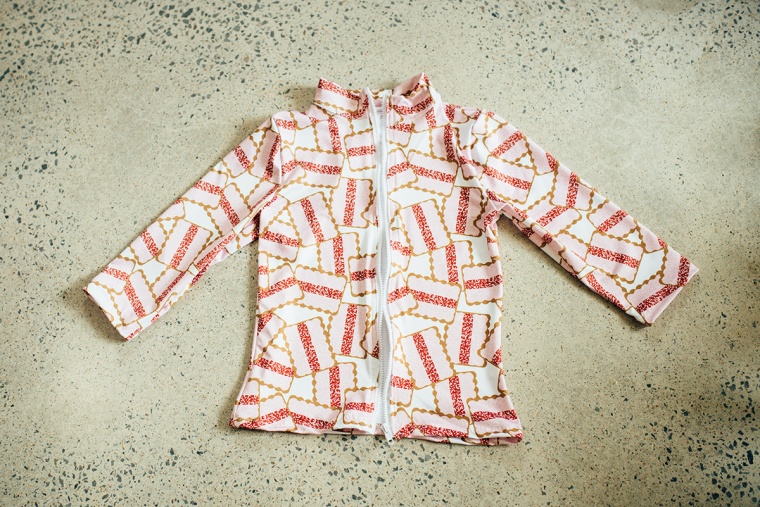
I was browsing through Australian designer’s stores on Spoonflower, looking for a print that would fit the brief, when I stumbled across Natalie’s amazing iced vovo design. YAS. This was it. I knew what it had to be – a rashie that I could easily create from Megan Nielsen’s (another Aussie, can you see how loyal I’m being here?) Rowan pattern.
So while Rowan isn’t technically a rashie pattern, I have made swimmers from it quite successfully before. This time was even more simple – I used the t shirt version of the pattern, added a seam allowance to the front pieces for the zip and cut it in two pieces instead of cutting it on the fold. Easy.
I sewed most of it up in about 15 minutes on my overlocker, finishing the centre front edges, hem and sleeves – which isn’t even necessary because the lycra won’t fray, it just looks nice.
While you can sew the band on folded, I decided not to. I wanted to encase the scratchy edges of the top of the zip in the neck band – even though when I checked my RTW rashie I found out it wasn’t done this way.
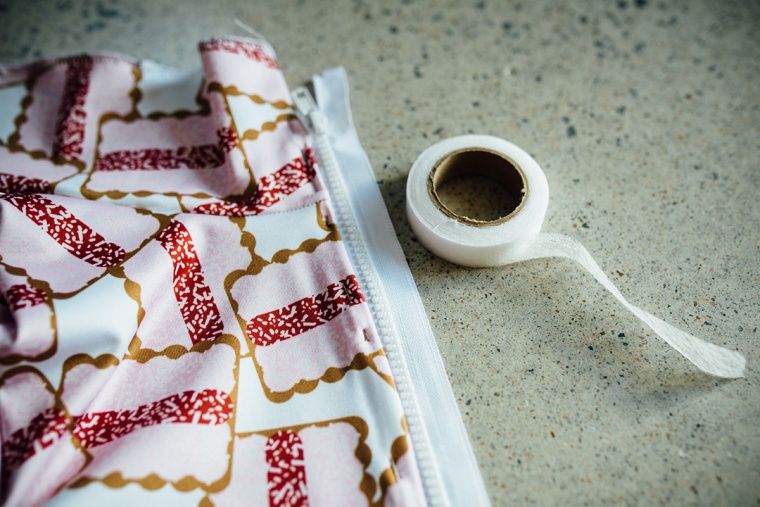
Just a warning, attaching the zip might make you cry a little bit. To make it less painful, you can add some fusible tape to the edge of the fabric, but if you find that’s not enough (like I did), heavier interfacing is better. Basting helps too but I found that it’s not enough on its own to stop the fabric stretching.
After that I just pinned the rest of the neck band in place and zig zagged it above the neckline seam. I finished the hem and and sleeve hems with a zig zag too, you need lots of stretch for this baby.
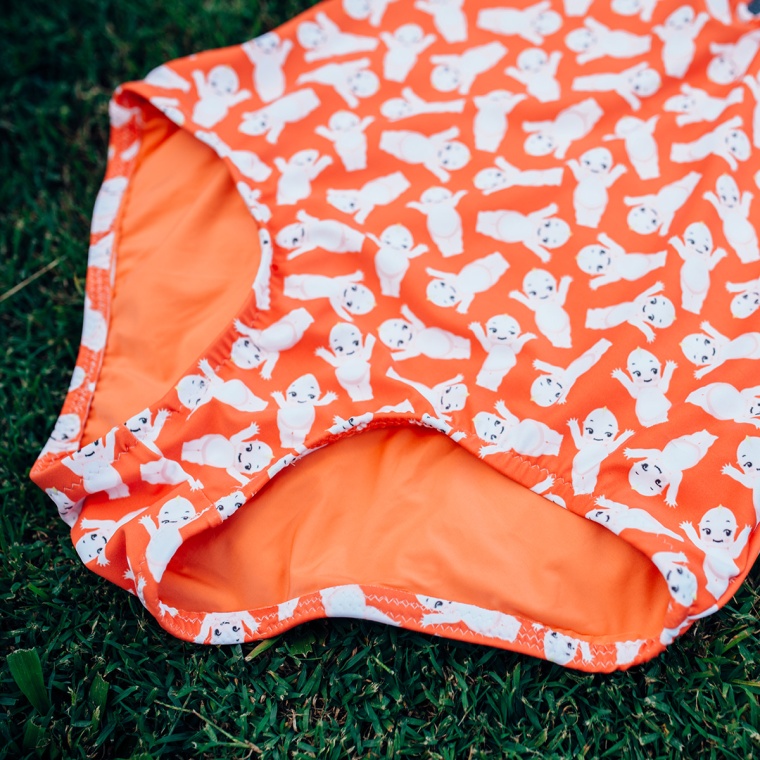
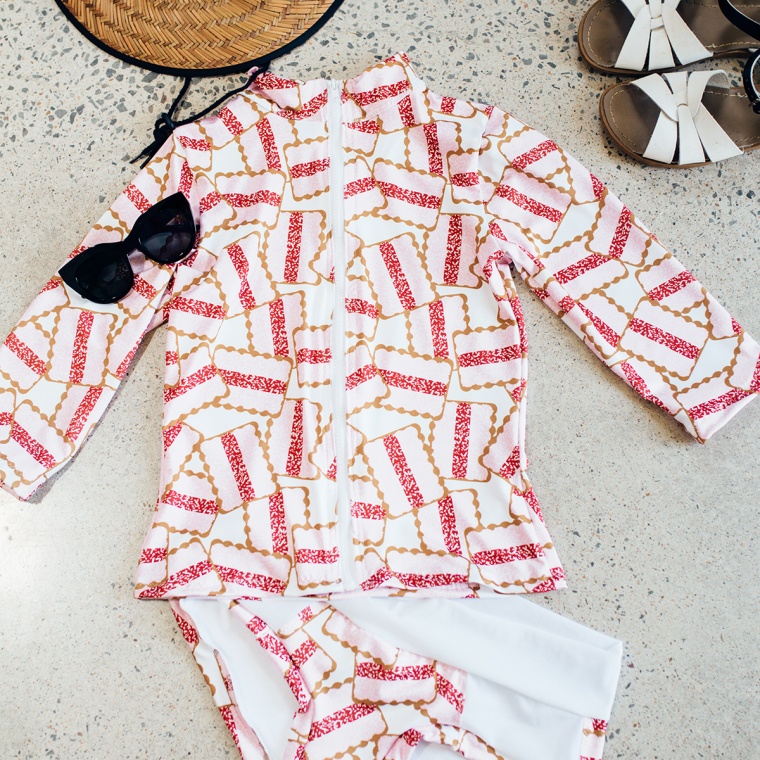
I managed to piece together my scraps to get a matching pair of bikini bottoms. I didn’t have enough fabric for my usual high waisted pair (pattern cloned from my favourite pair of RTW knickers), so they are lower than usual and I didn’t have enough for the top band either. Still, they aren’t bad and I do like making the most of my fabric scraps. Ooh and the bottoms are lined for obvious reasons. The rashie isn’t because I’ll always wear a bikini top under it for support. Or it will go over something else in a fantastic clash of prints.
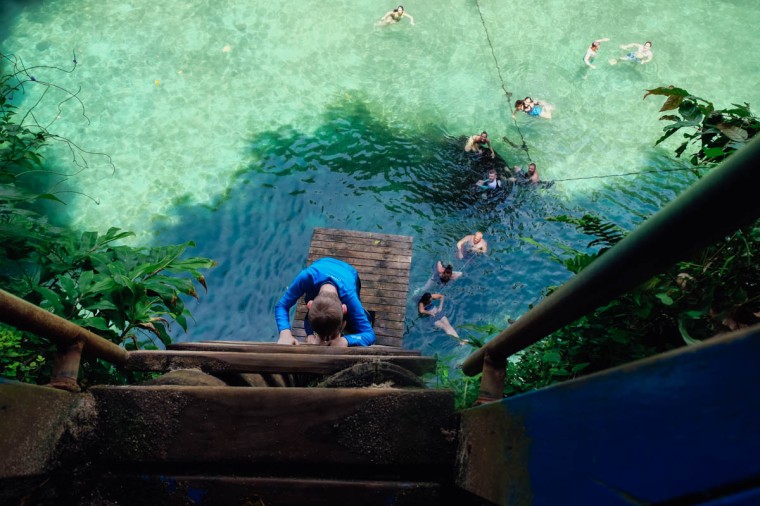
Spying on my neighbours.
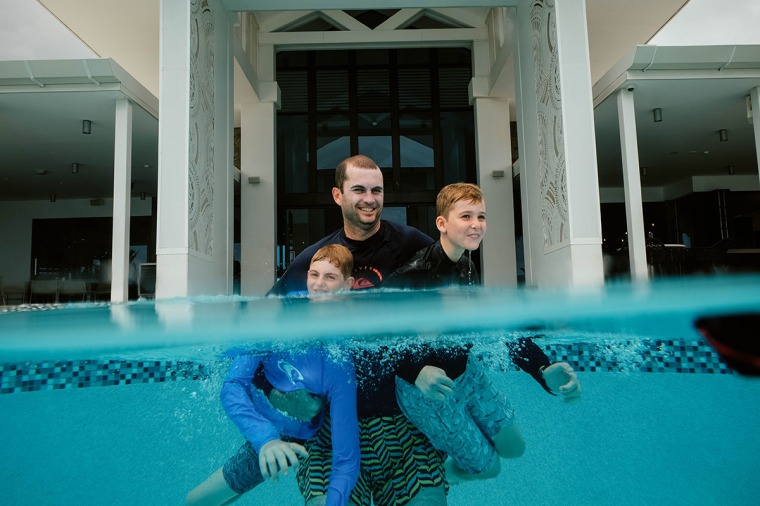
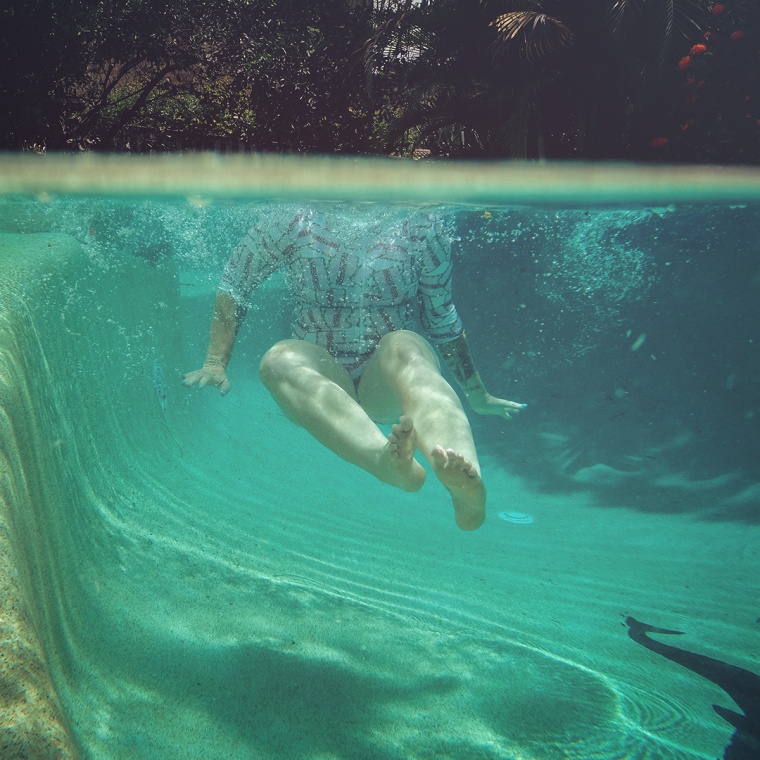
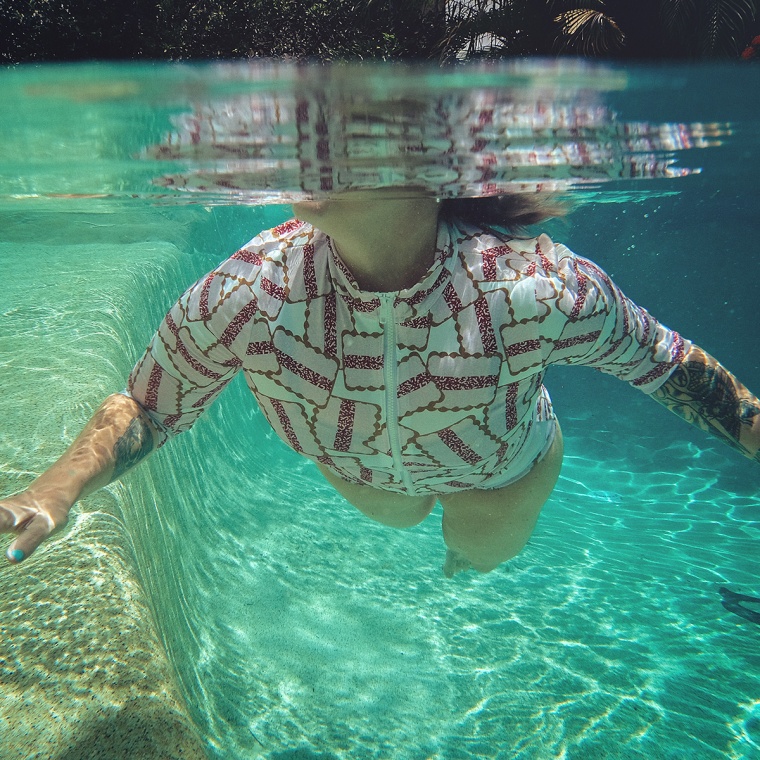
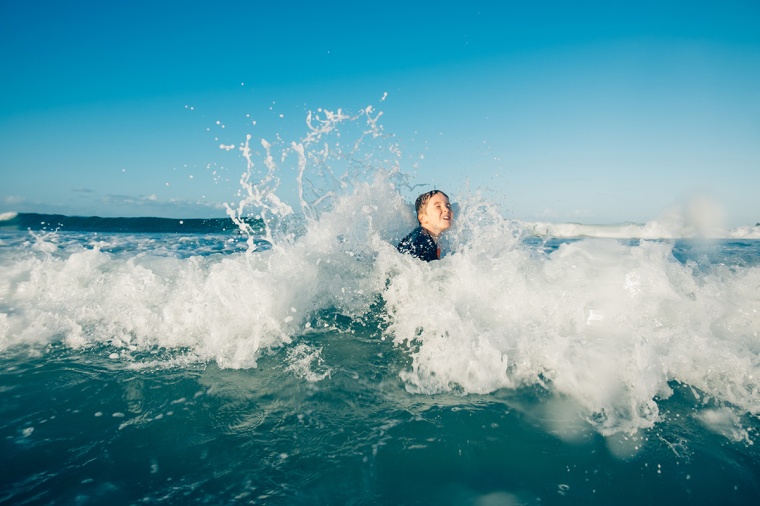
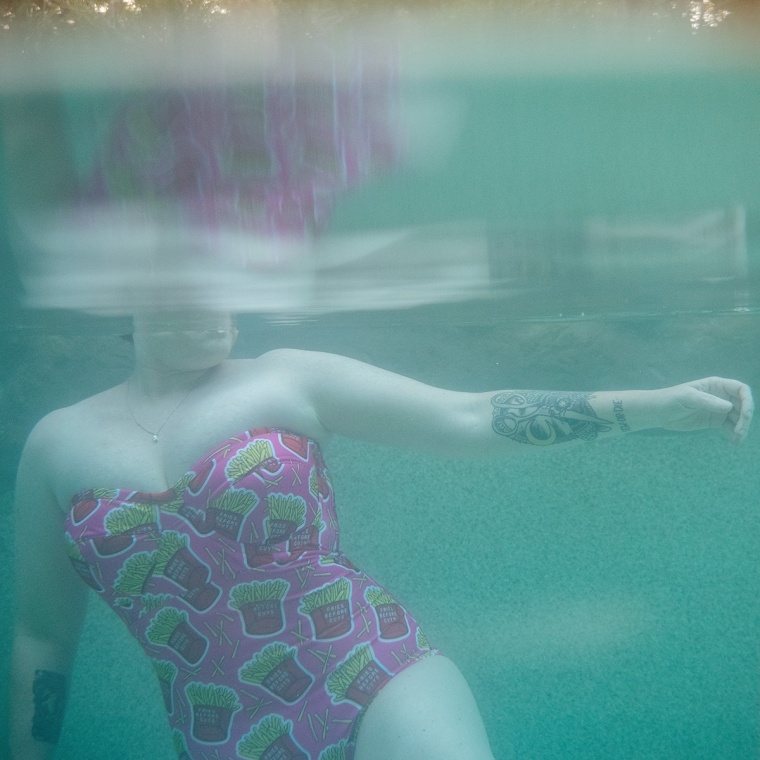
Submerged.
Yes there’s a dolphin in our pool, his name is Dave. He was there when we bought the house although we didn’t know it at the time because the whole thing was pond green.
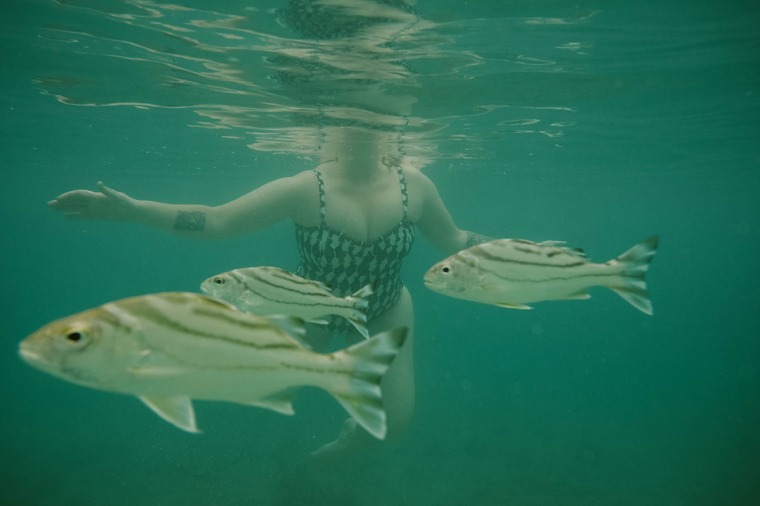
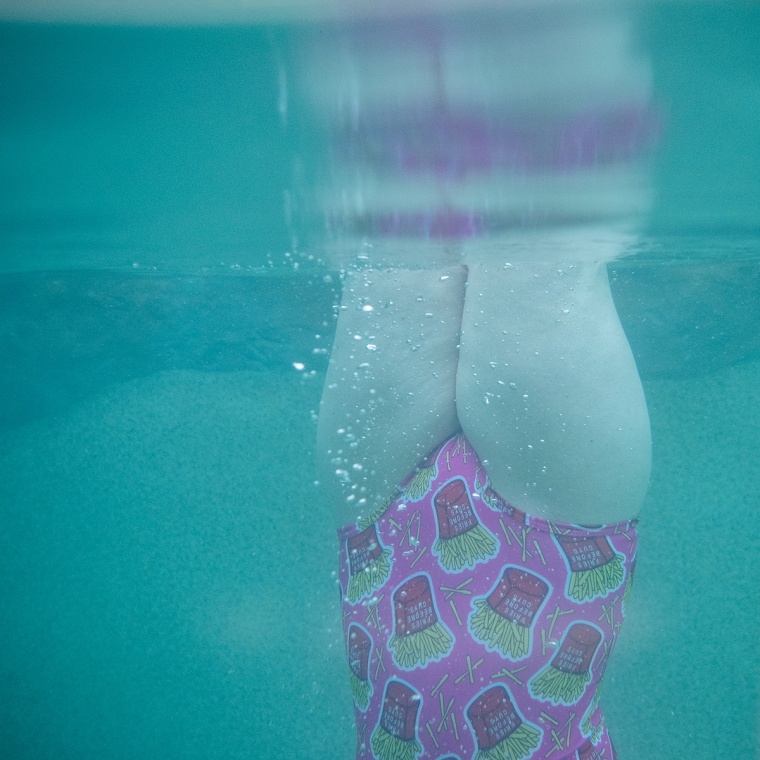
If you ever need a reminder that you are not a graceful mermaid, just get some photos of yourself underwater. YOU’RE WELCOME.
If you made it this far through my incessant chatter, I have a reward for you – use the code katie17 to get 10% off your Spoonflower purchases until the 31st of December. Happy Dance!
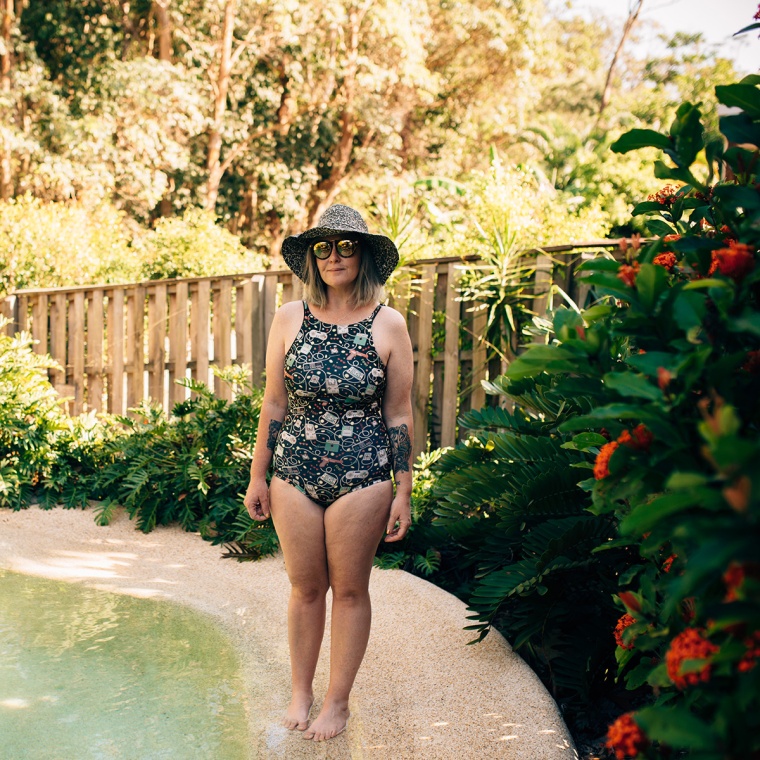
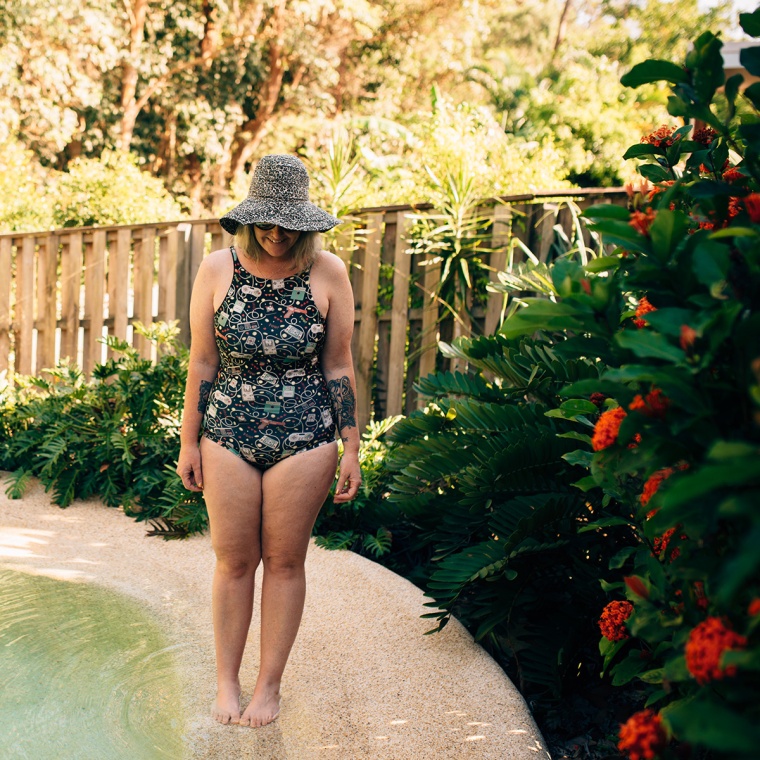
I know it seems like I’ve been sewing a lot of swimmers lately and that’s because I have. Ha. There is a real gap in the market for one piece swimsuits for women that aren’t keen on the whole backless, flimsy, high and cheeky cut or the full bottomed, ruched and paneled offerings. Like a huge gap. I’m 36 and struggle. My mum is 60 and struggles. Bikinis seem to offer a little more variety, but one pieces? Nup. Your choices decrease even further if you can’t deal with halternecks. I can’t and incidentally neither can my mum. Instant headaches for both of us. Plus there’s the whole ‘go into the shop and try on at least 10 pairs under ugly lights and try not to cry’. NO.
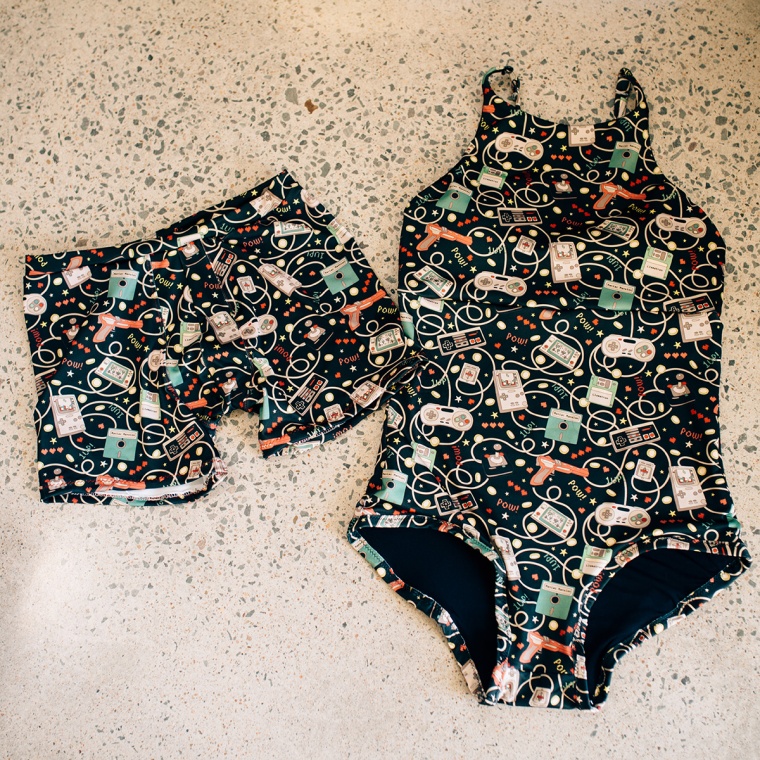
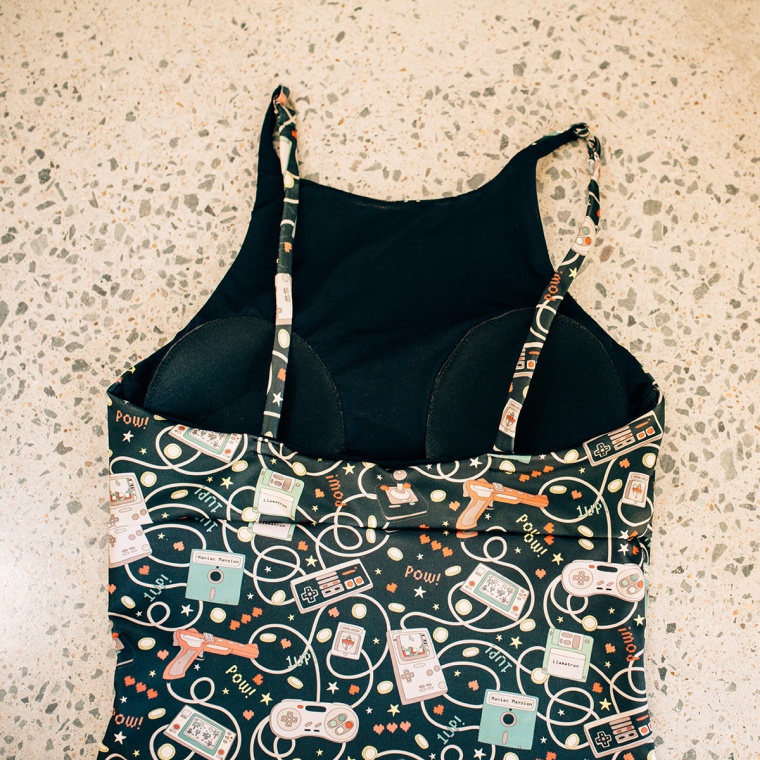
So what’s a girl to do? Well, you know the answer to that. You sew your own. Minimal melt downs and swimmers that fit just how you want them to. For me, that means lower legs, thicker straps that run over the shoulder and nice bust support. But no ruching – no matter how ‘flattering’ everyone likes to tell me it is. Plus, this way you get to have nerdy Nintendo swimmers. And match your husband if you want to. Even though he might not be so keen.
Fabric is Spoonflower’s sport lycra and it’s a ripper for swimmers, it’s a polyester lycra blend with 75% stretch across and 50% stretch up and down. It’s colourfast in saltwater and chlorine and therefore ideal for swimwear. I’ve lined mine with swim lining from The Remnant Warehouse.
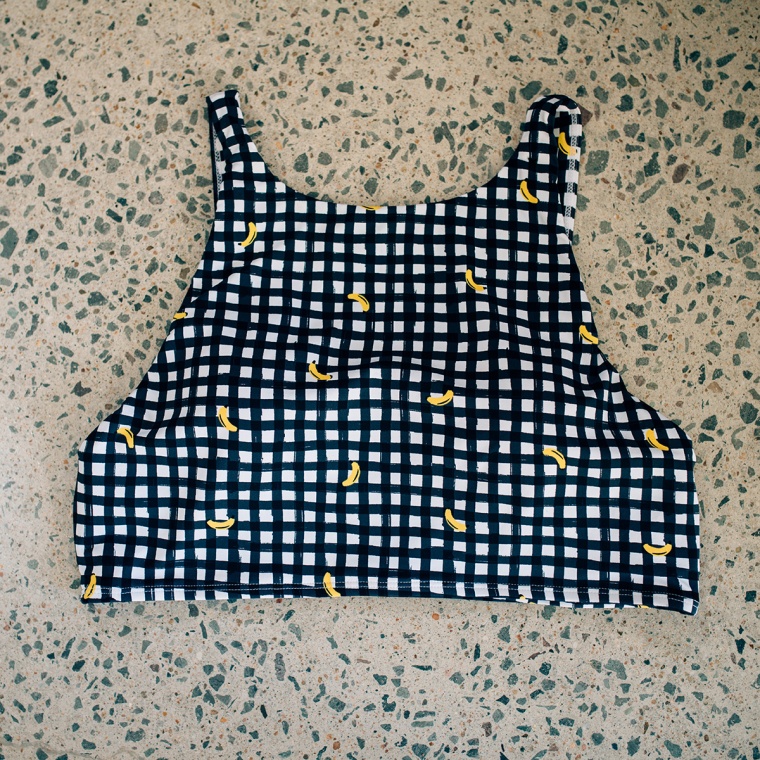
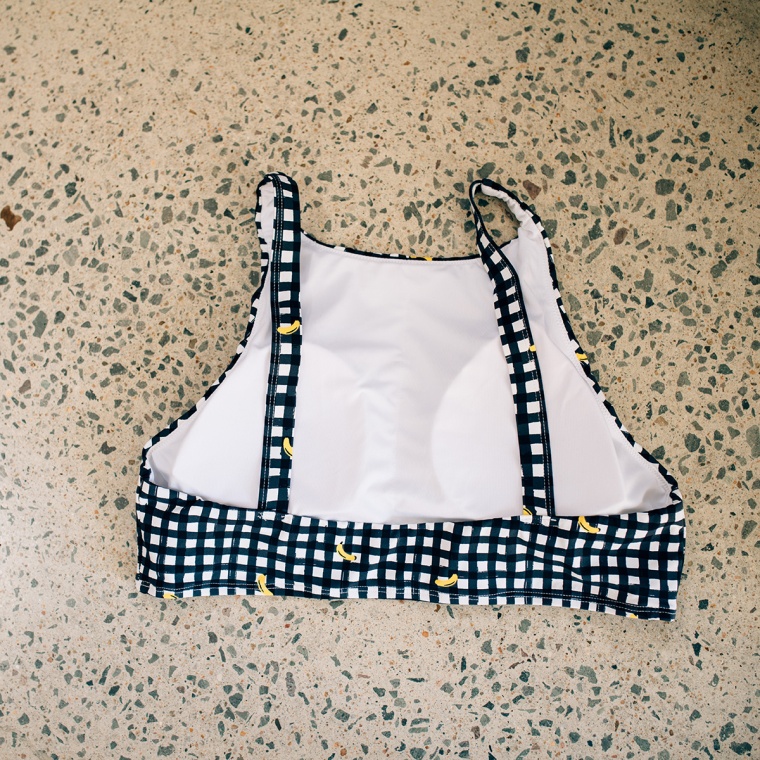
See this top? I bought it. GASP. I love this high neck style, the wide back band without a clasp and this is one of the first I’ve found with thicker straps that run over the back instead of around the neck. It’s a bit low for me around the armholes, which is a common problem for me with this style (hello side boob) and I hate how those bra cups float free and move around. Incidentally, the one on the right looks like it’s turned sideways. Annoying. I bought it specifically to make a pattern from.
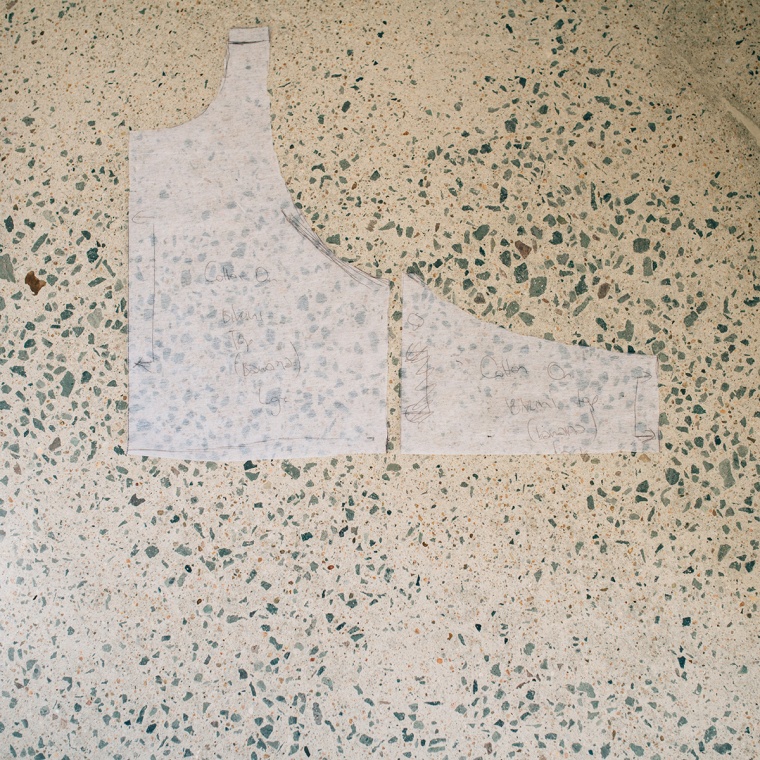
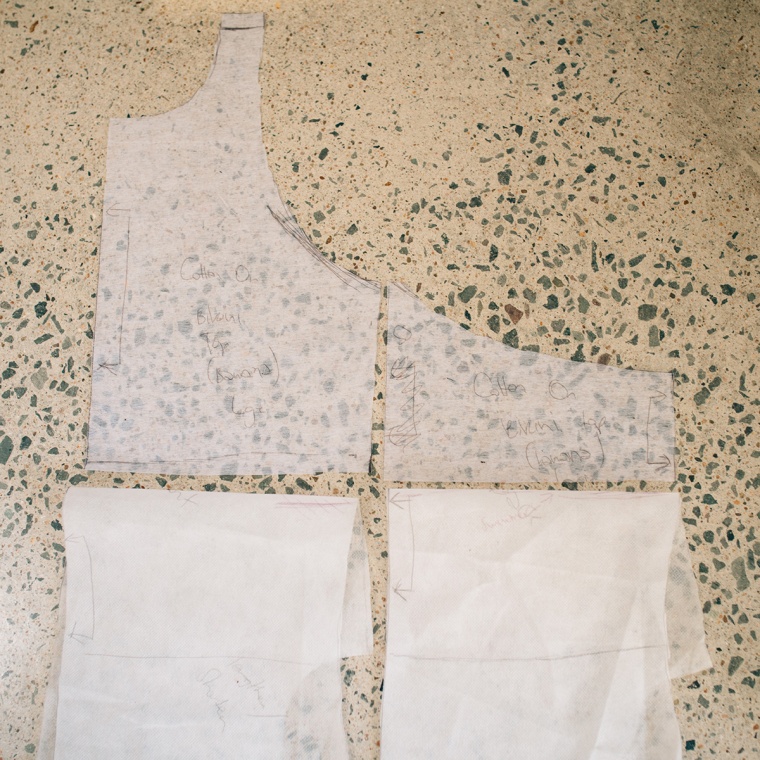
So I clipped that sucker down flat with wonderclips and I cloned it – adding seam allowance and also raising those arm holes.
I compared my new pattern pieces to the Megan Nielsen Rowan pieces and look at that, they matched up really well. The Rowan pieces are folded down because I’ve been too lazy to trace and cut new ones for my swimmers.
I added swim cups for support again, these ones came out of an old pair of swimmers and really, they are too small for me. But they work well enough with the tension in the fabric when they’re on. I recently watched Beverly Johnson’s class on sewing swimsuits and used her starburst method for adding the cups, which basically entails zig zagging them onto the lining and then cutting into the lining over the cups which then makes the lining and fabric sit better over the bust. As long as those cups don’t move around, I’m happy.
I decided that I’d attempt to finish the neck and armholes the same way as the RTW top – sew the lining and outer together right sides together so no raw edges show and then add elastic to that seam for support. At least, I assumed that was how I did it but I’ve made a mistake somewhere there because my lining wants to roll over at the edges a bit. I have to think about it a bit more for next time. It’s not such a big deal because it’s black and tends up blend in pretty well. It’s worth noting that RTW uses pretty specialised machines for their construction, so it’s not always something that’s easy to replicate on the home sewing machine.
Other than that though, I’m pretty pleased. Once again I finished the legs with this method of binding and used this method for my straps. Learning both of these methods has been a game changer for me, I think it makes handmade swimmers look pretty damn professional.
I’ve been swimming laps at my local pool almost every day recently, so a good solid one piece really is a wardrobe staple for me at the moment.
It gets hot here. We spend a lot of time in the water from about September through to May. And even though we wear sunscreen and hats, as well as staying out of the sun between 10am and 3pm, sometimes that’s just not enough.
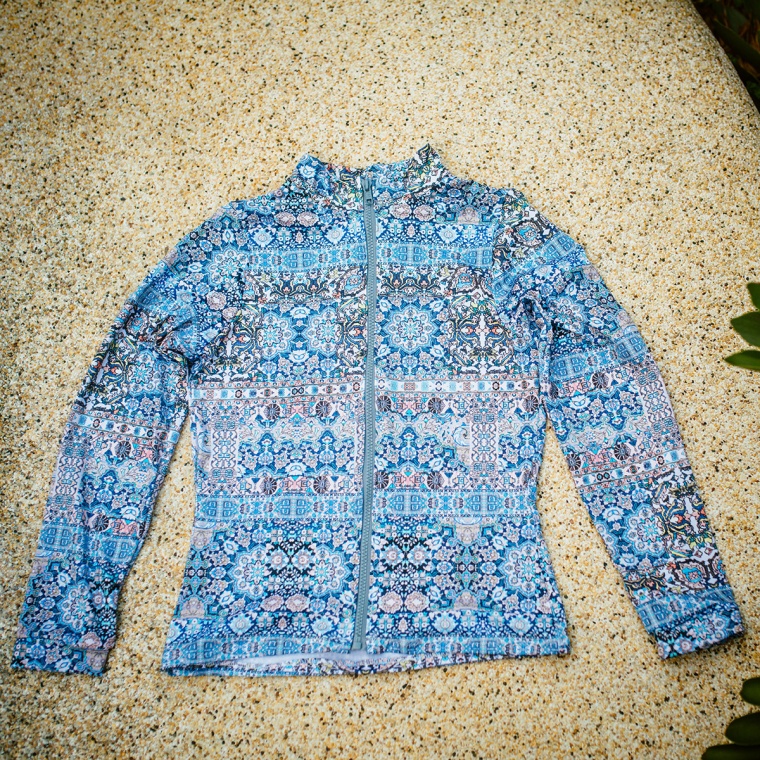
So we wear rashies (I think they’re called rash guards in the US). They’re easy enough to buy for the kids but generally they are falling apart after one season. Not a big deal really because they’ve grown out of them anyway. But there’s not a lot of variety available for women. Maybe there’s not a huge market for them. They’re not exactly the height of beach fashion. But still, skin cancer is worse.
So mine is a couple of seasons old and is looking worse for wear. All stretched out and baggy. They don’t seem to be made out of quality fabric anymore. Time for an upgrade. I quite like the all in one situations, like a one piece with sleeves, but I’m yet to find one that’s the right shape for me. They all seem to have what I like to call ‘Baywatch Butt’, you know – that really high cut skimpy back? Which is fine, but not all that practical when I’m in the water photographing clients, because I do that occasionally. I want to make sure I can tackle the surf without getting distracted by a wedgie.
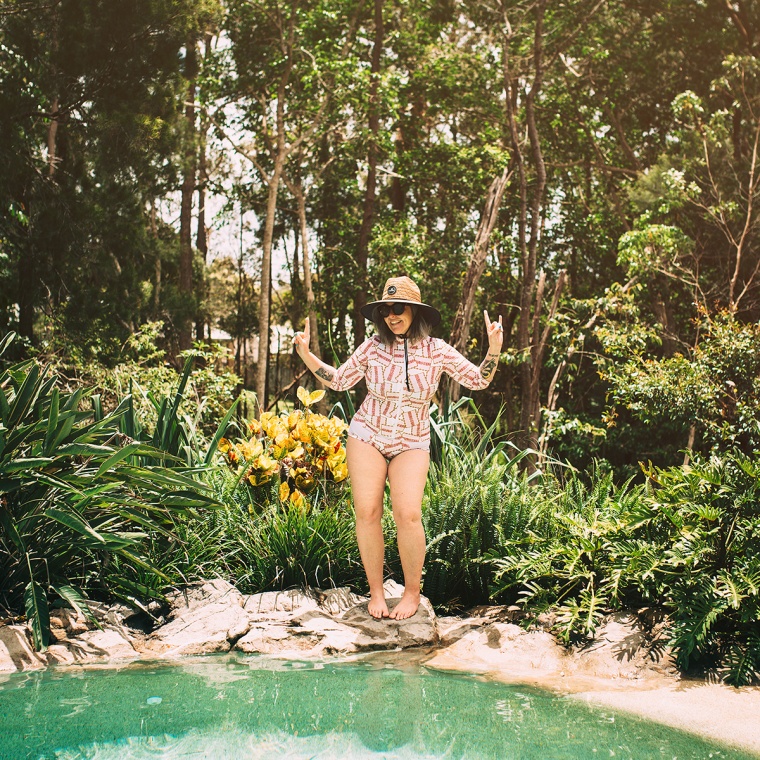
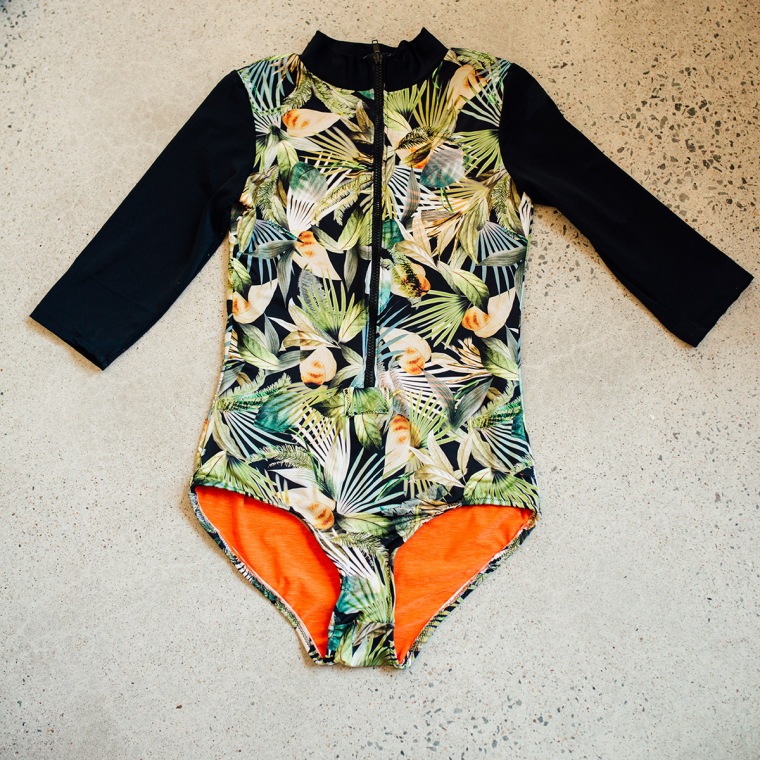
Enter Megan Nielsen’s Rowan. Oh yes. Yeah, I know it’s not a swimsuit pattern, but since when have I followed the rules? My tropical print spandex and swim elastic is from Pitt Trading and the spandex I used for the lining (which isn’t really lining) as well as the plain black is from The Remnant Warehouse. Both these stores are superb sources of swimmy stuff in Australia.
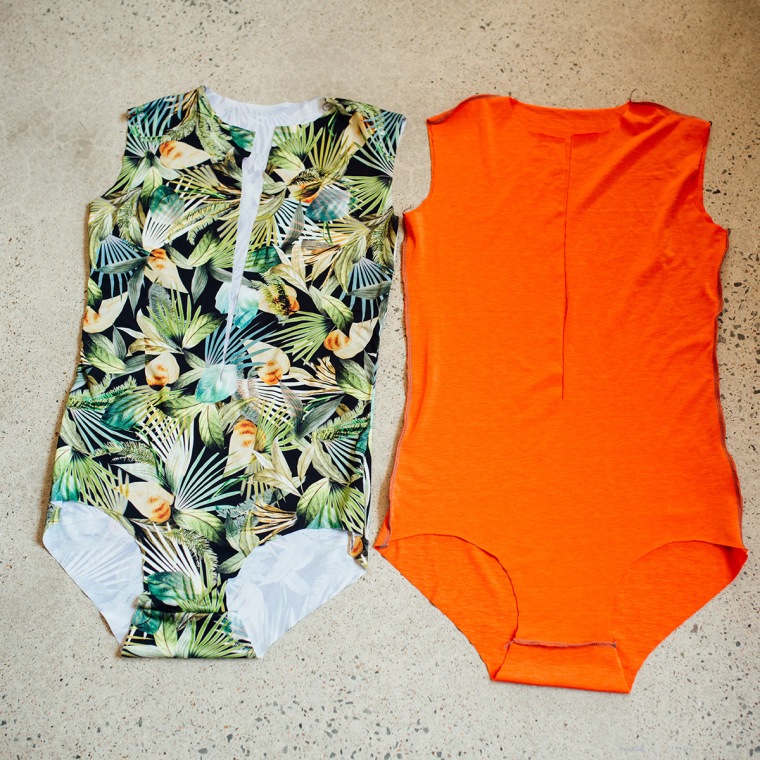
My original plan was to make a top from the Rowan pattern first, but that all went out the window when today decided to reach 31 degrees. DEFINITELY TIME TO START ON THE SWIMMERS. Risky really, but it all turned out pretty ok in the end. I’ve taken some work in progress shots this time, because the construction is a bit different to the normal bodysuit as it has to be fully lined, a zipper added and no crotch snaps. As mentioned above, my lining isn’t really lining, but spandex because I didn’t have enough black swim lining left. Both have a really similar amount of stretch so it works quite well and feels more supportive.
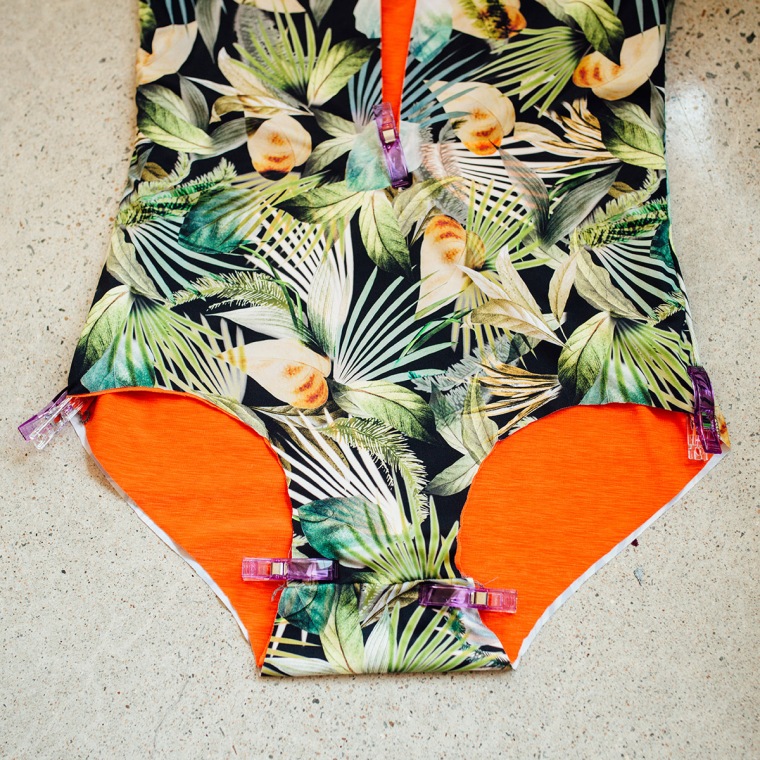
I pretty much made two of the bodysuits and then basted everything wrong sides together, which gives a pretty clean finish on the inside. The front is cut for the zipper (otherwise you wouldn’t be able to get into it, obviously). I attached the neckband while it was still open rather than stitching it into a loop first, so the zipper had somewhere to go. I overlocked the raw edges. Not that they need it – the spandex won’t fray. I just find it easier to work with.
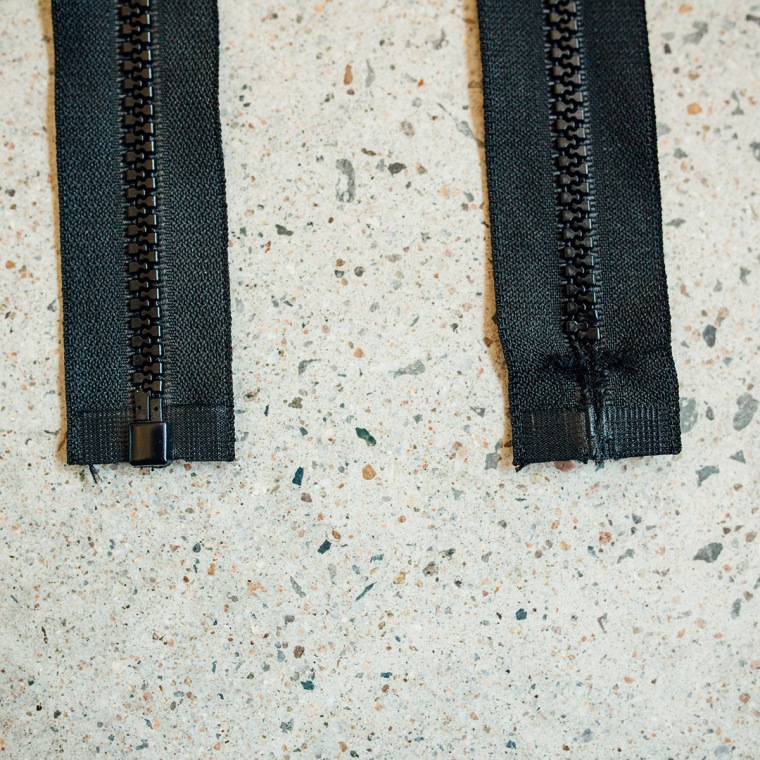
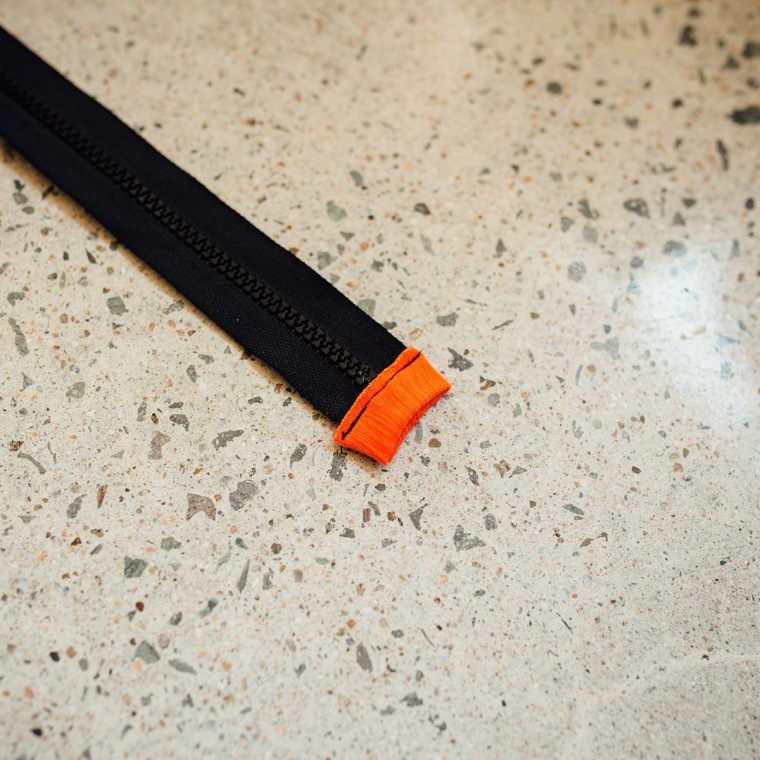
I could only get open end plastic zips, so I put a tack across it by hand and literally smashed off the end teeth with a hammer. Satisfying and effective. Then I added a bit of spandex across the end for comfort. Not my prettiest effort but no biggy.
And you know, I knew inserting this zip would be the biggest challenge of the entire thing. I went in all zen, even used interfacing on the edge of the swimmers because I totally knew that spandex would want to pucker and go wavy and be a bastard. It still did anyway. Probably not as much as it would have without stabilising the edges. But it was still a bugger and took longer than the rest of the construction put together. The end of it looked so horrendous that I ended up covering it with a little tab of fabric. Which in the end wasn’t the worst idea because I think it adds a bit of strength to a weak point.
The sleeves couldn’t go in flat (as per the instructions) because the side seams were already done, so they just went in the normal way. In the round? Set in? You know what I mean. Easy enough. Although make sure your overlocker doesn’t want to inhale everything around the sleeves. Mine does. I won this time though, I was bloody careful. Then elastic for the legs and you’re golden. I don’t love elastic in swimmers done this way. I prefer the look of bands. But that’s just nitpicking and also because I have delightfully thunderous thighs that elastic tends to cut into.
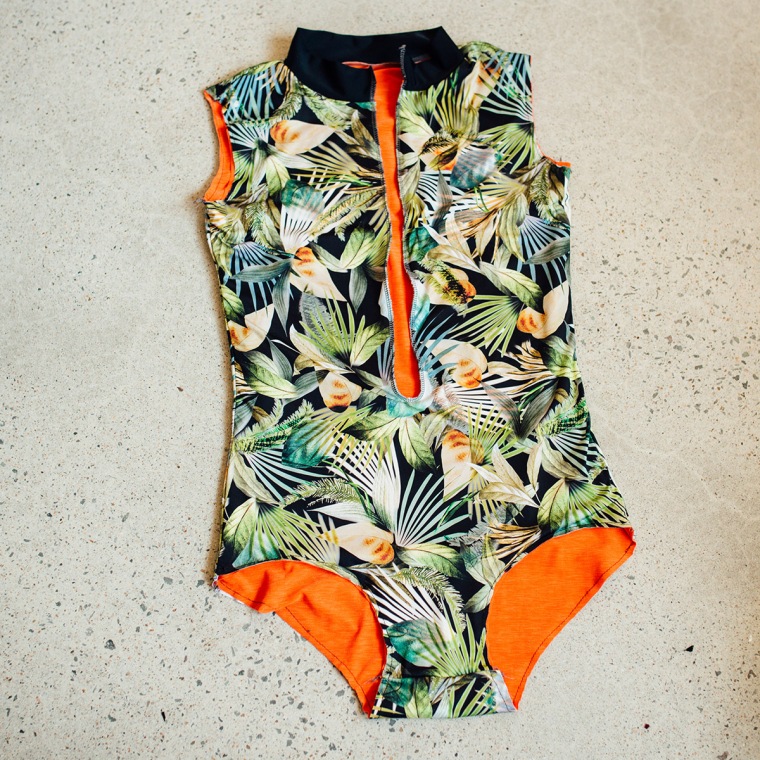
And she is done! It just occurred to me that I should have framed these better and actually got some water in the shot. So you’ll just have to believe that I am standing on the edge of the pool.
My absolute favoutire part of this pattern is the butt coverage. It’s perfect for my shape (which is mostly pancake butt). I find that most underwear patterns bag out between the back of my hip and leg and I usually have to take a dart out of the pattern piece. But not these babies! Nice and secure. I love the fit so much I think I might use it to draft some more knickers.
Fit wise, they are a smidge too small. I’m getting a bit of pulling at the zipper. My measurements put me between the M and the L. I made the M because I didn’t want to risk them being too big. I have converted underwear patterns into swimmers before and while the fit is ok when they’re dry, they get baggy and want to wash away once they hit the surf. This one is snugggggg and not going anywhere. If I wasn’t being lazy, I would have added a bit extra to allow for the zip because it’s seam allowance that the original pattern doesn’t have built in. I’ll definitely do that next time.
So the thing about using orange lining is that when you actually get wet, it will show through. But you know what? Nothing else shows through, so that’s a win. And there is my first official dip of the season. There will be more – Rowans and swims.


 Look, I’m a bit of a fraud because my body tends to reject chips (fries, chips to us here in Australia), even though I love their crispy, carby, salty goodness. Most of the time my skin is like ‘nah, we aren’t about those anymore. Have some acne for your attempt, though’. Who could resist this print though? It’s a bloody winner.
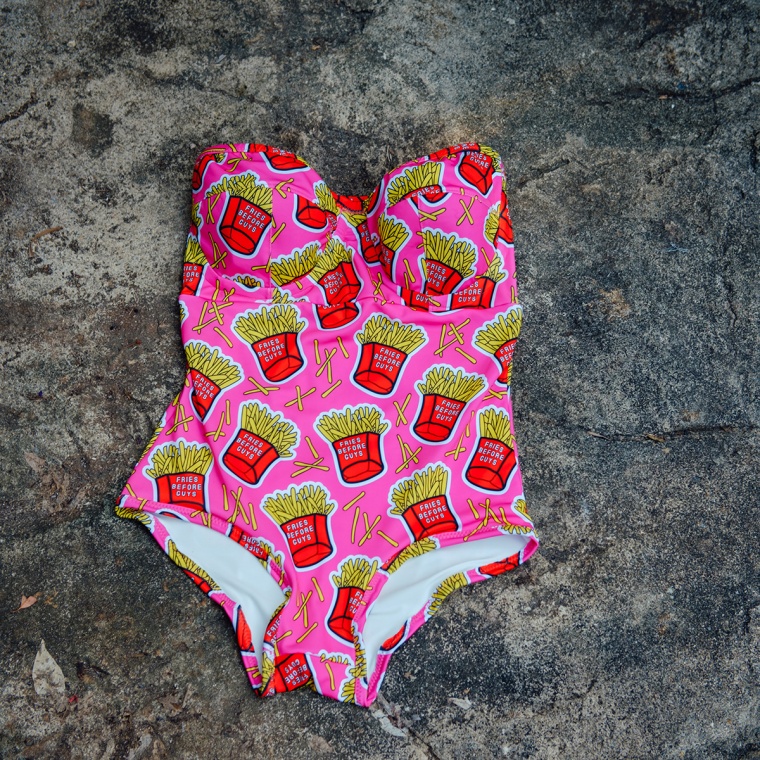

 It occurred to me recently as I was lovingly admiring this dress in my cupboard, that I had actually never blogged it. It’s a really special dress for me and holds a little memory in every one of those sequins, I think.